This is a modified version of the original tutorial credited here:
HOW TO MAKE FACE MASK WITH FILTER POCKET AND ADJUSTABLE WIRE | SEWING TUTORIAL
I chose this pattern because I wanted:
- Easy straight cuts (instead of curved) for mass production with my workflow
- Masks with pockets for filters

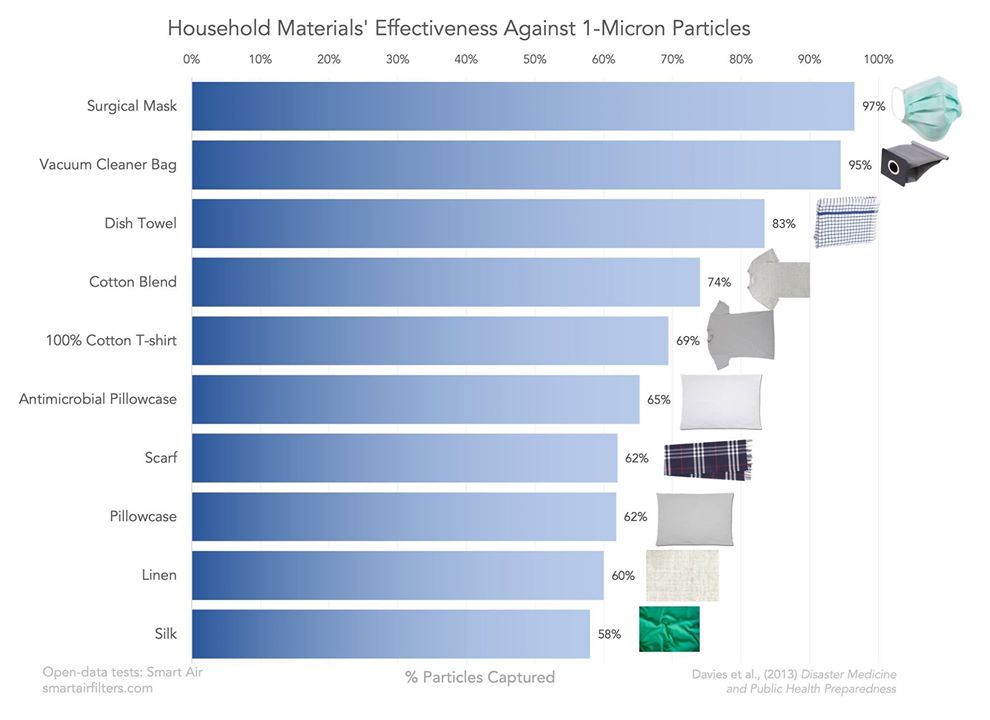
What filters to use for the inside of the pockets?
These should be removed prior to washing the cloth masks.
I am hearing mixed information about the use of HEPA filter vacuum cleaner bags, so I advise to research this further.
Image Source: https://smartairfilters.com/en/blog/best-materials-make-diy-face-mask-virus/
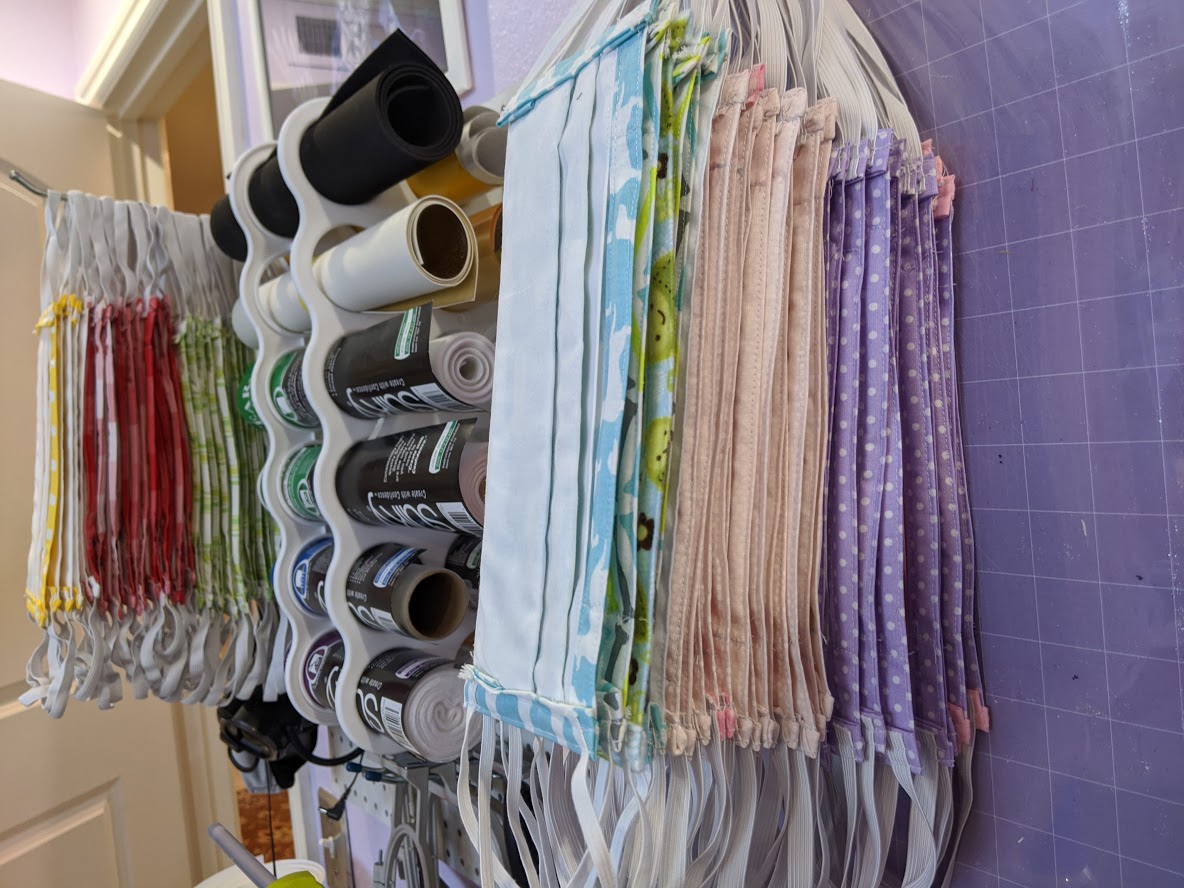
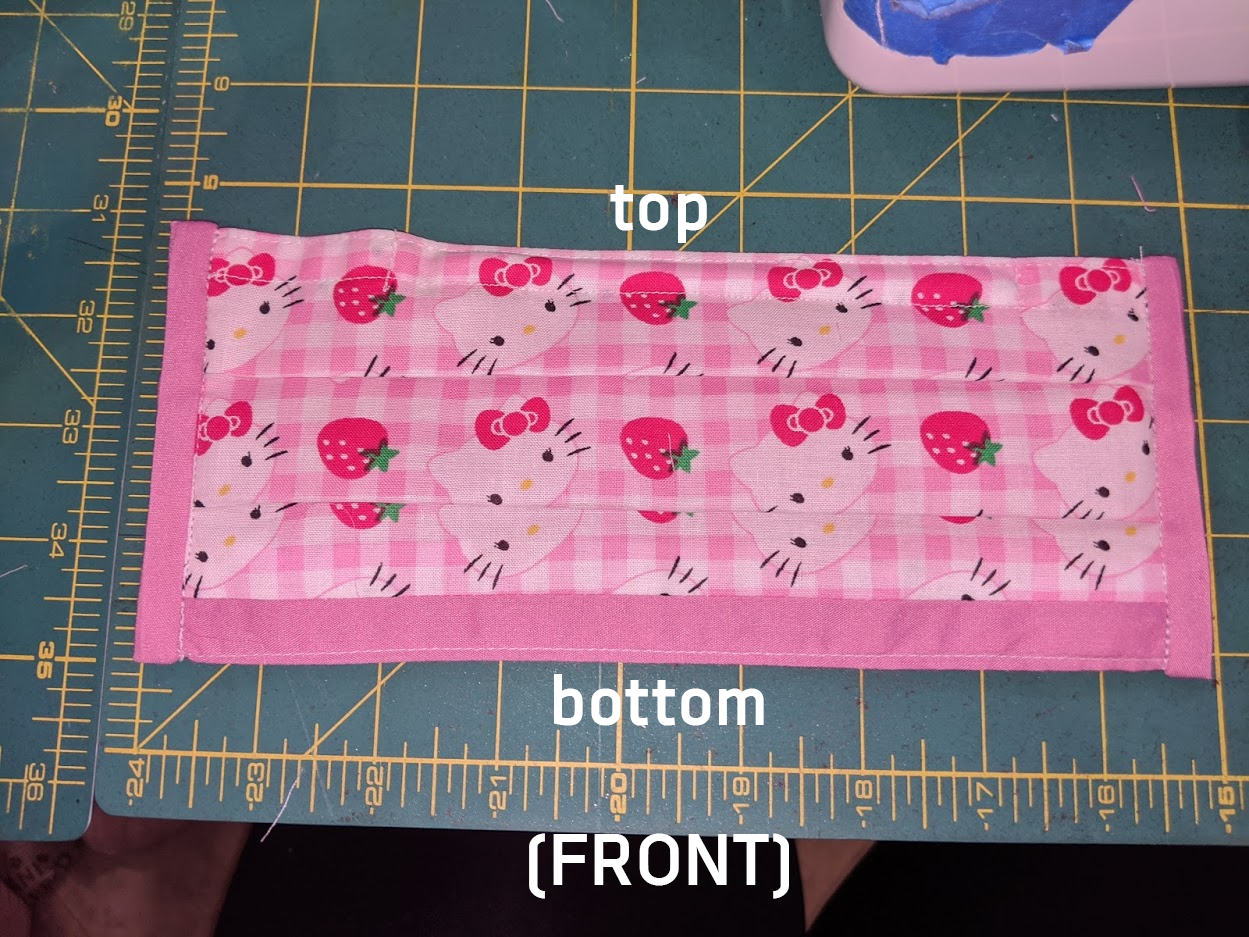
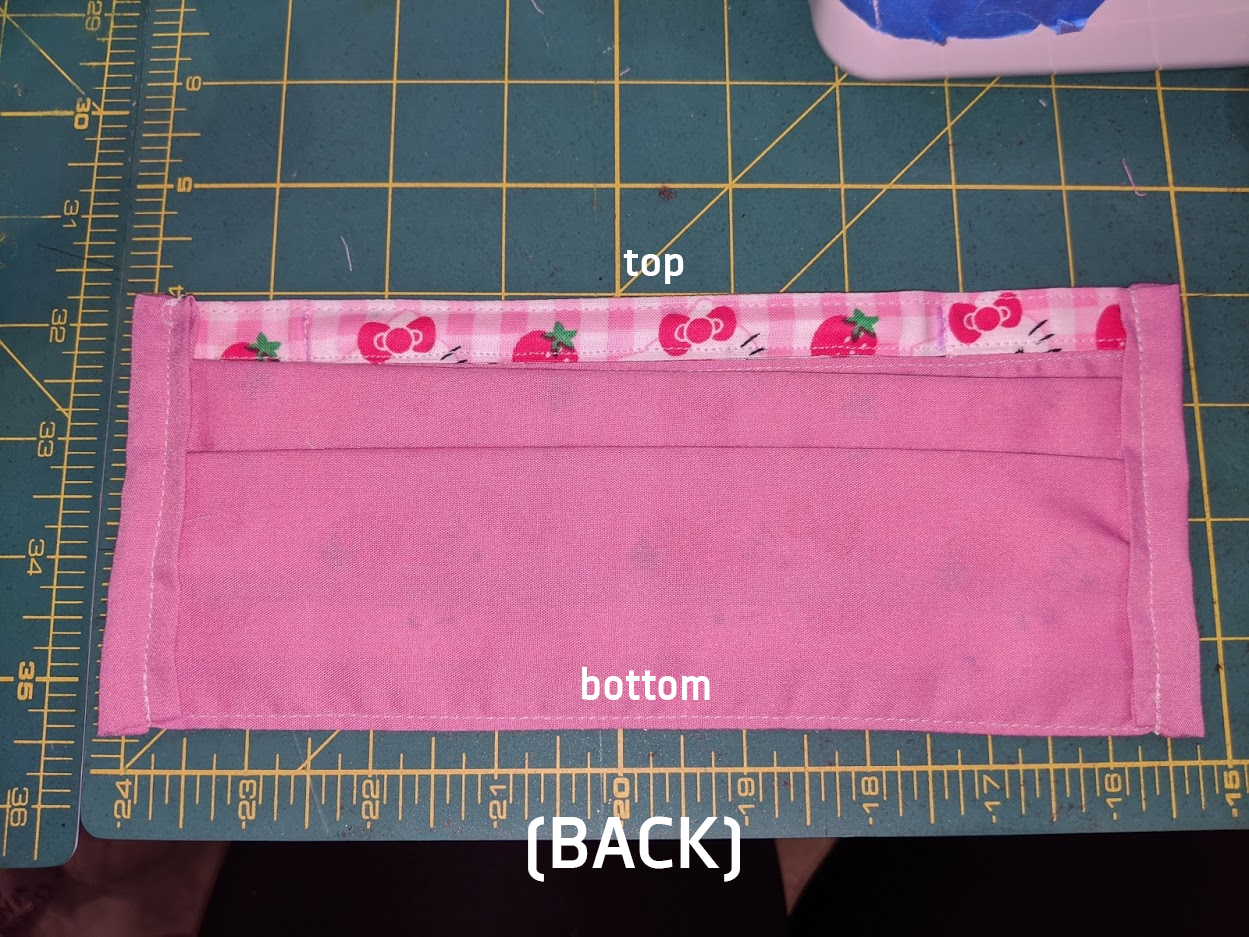
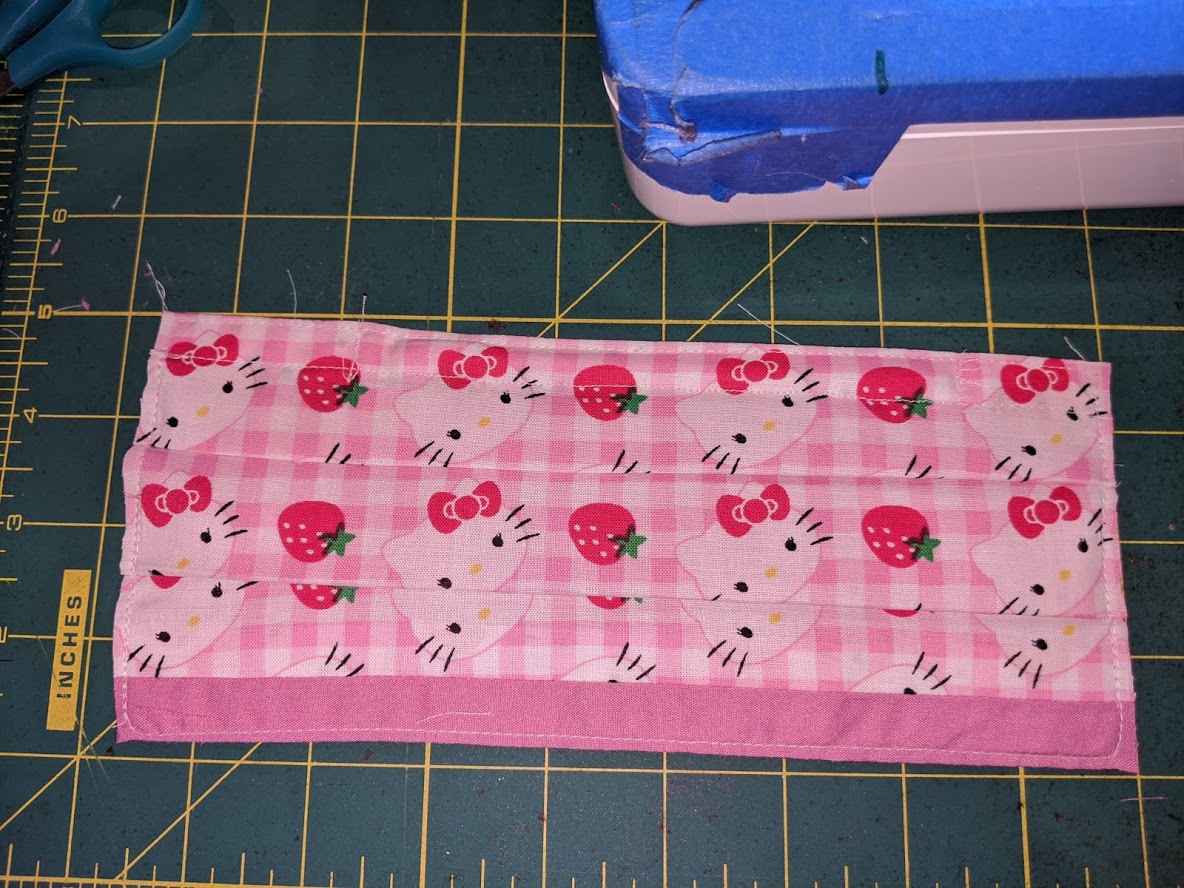
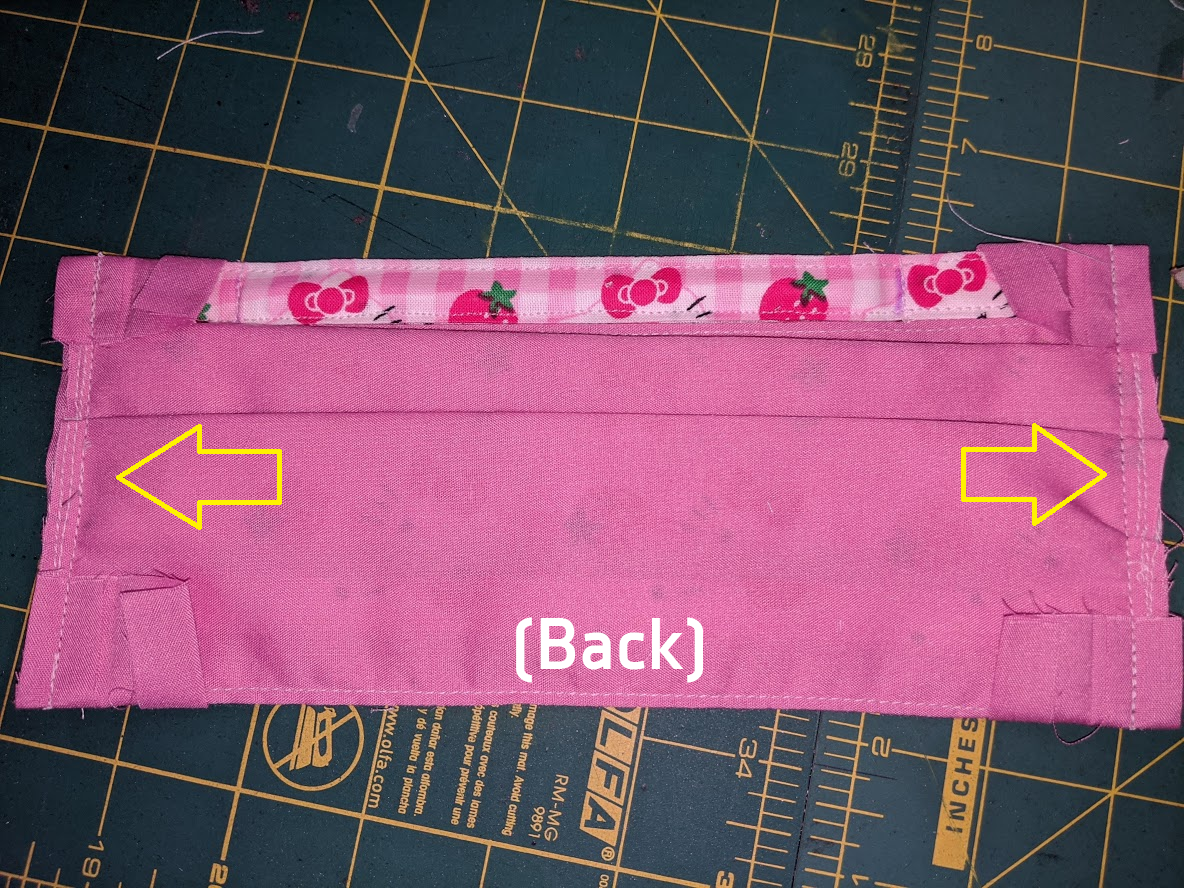
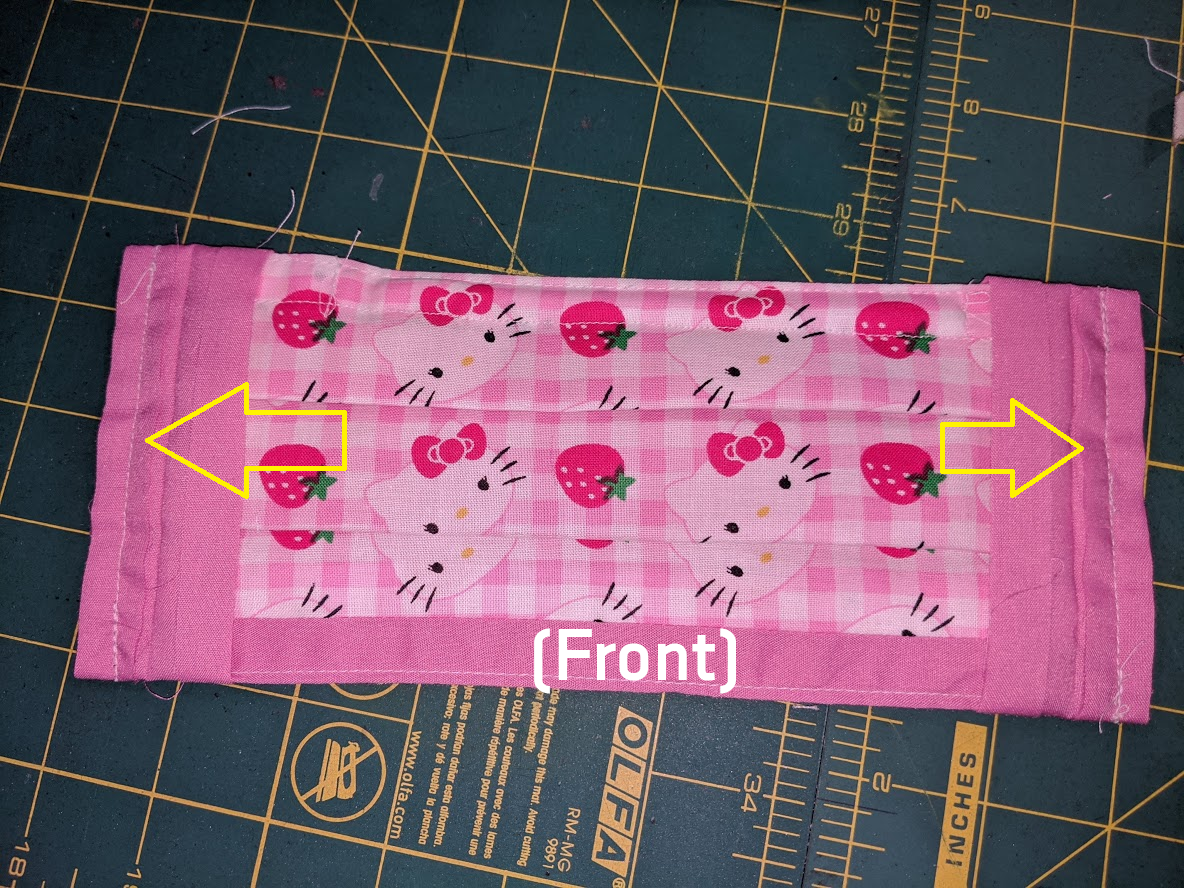
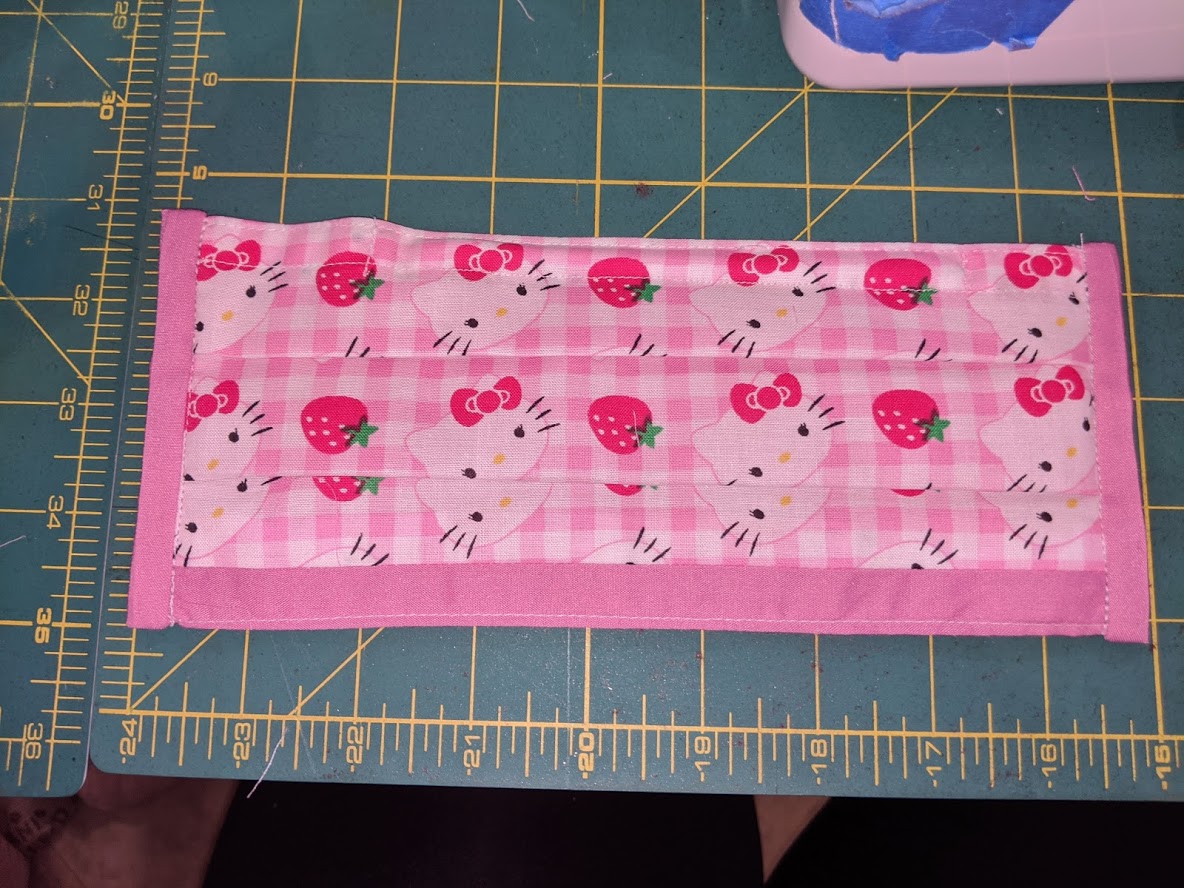
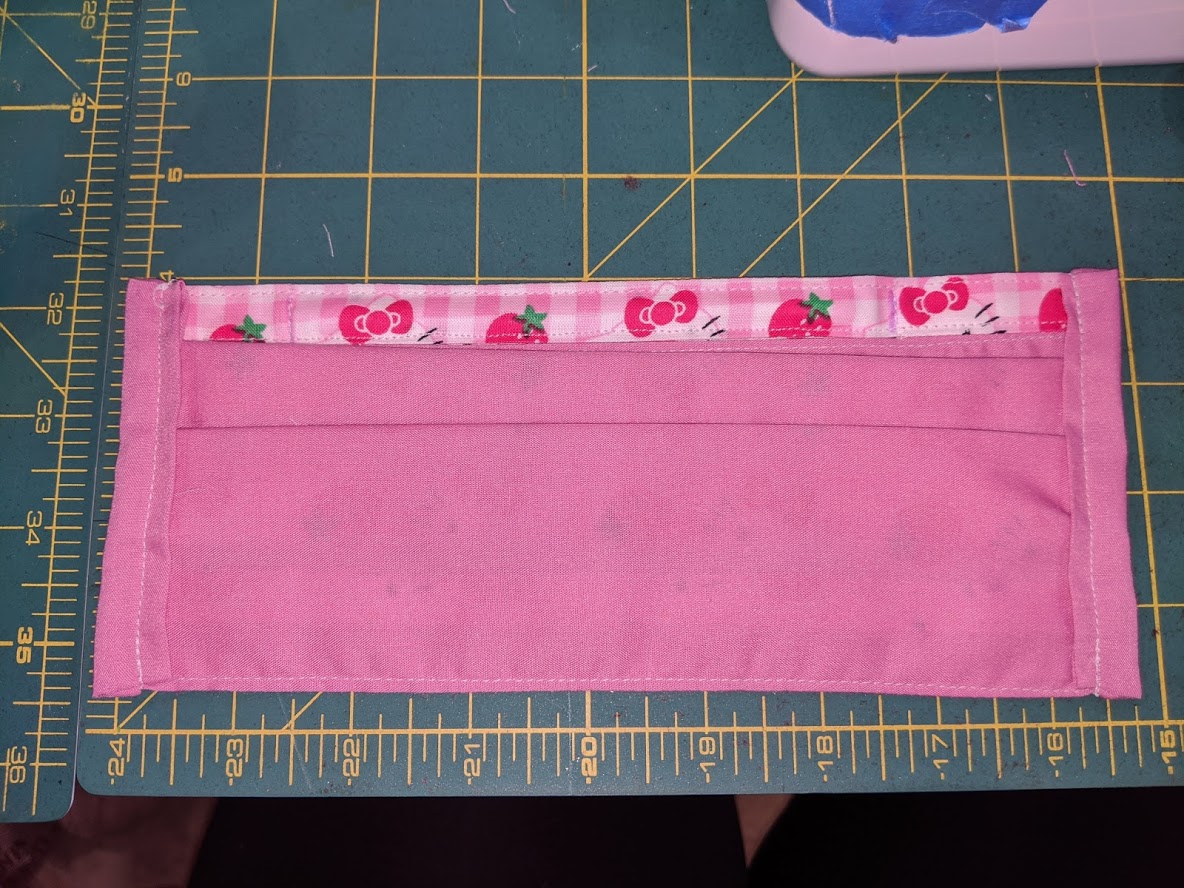
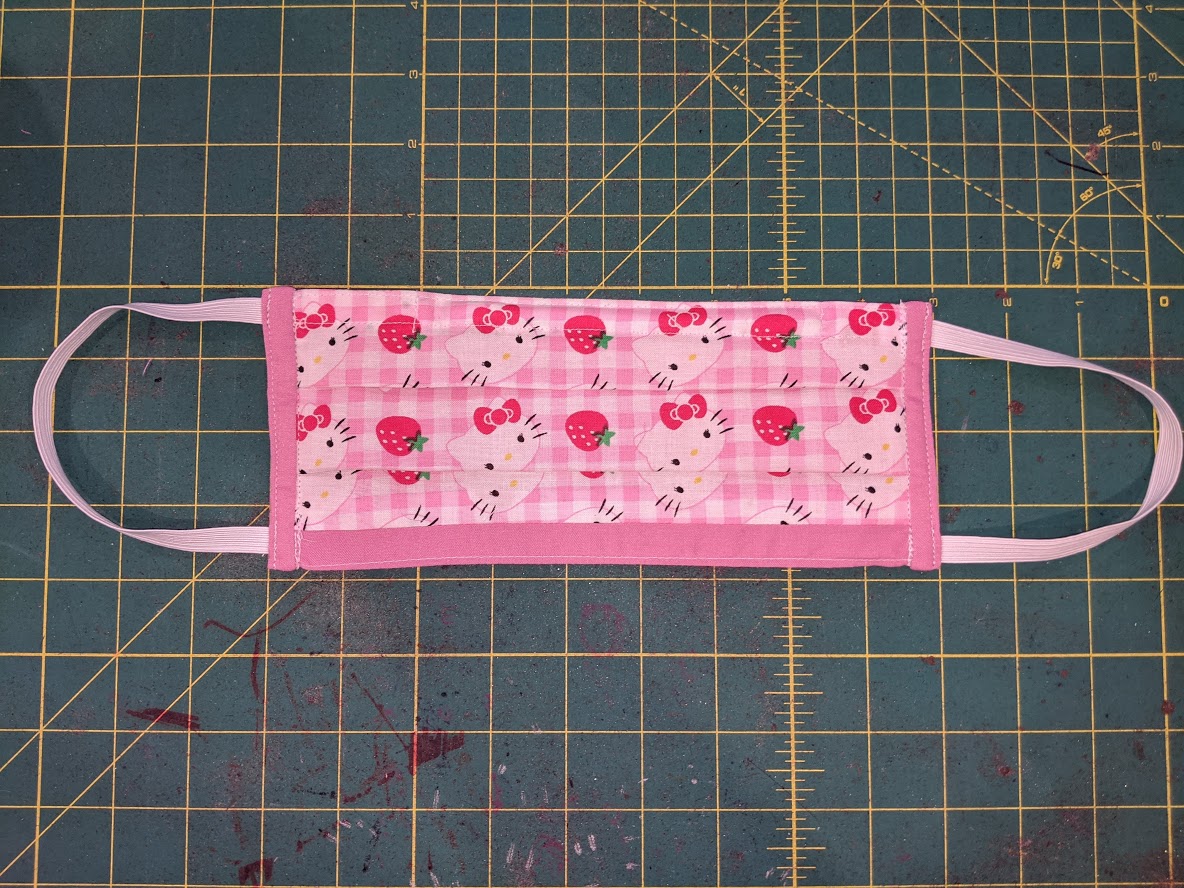
The final look before elastic straps!
Note how there’s a solid color of fabric on the bottom. This is normal and a piece of the back layer of fabric. I would say the “solid color” bottom distinguishes the top from the bottom of the mask when wearing it. The top includes the wire that should conform to the shape of your nose.

The mask has a pocket for a filter.

Estimated Time to Completion (ETA)
This varies on skill level and how “neat” you want to make your stitches. For me personally, assuming all pieces are cut, I have gotten down to about 10-15 minutes per mask after making about 70 of these, and I have memorized the steps.
Mass Production at Home Tips
- You can choose to do an “assembly line” style of these, but I warn ahead that this can be more mentally taxing.
- To start off with, you can ideally finish about 3-5 per day and work your way up from there.
- Take breaks in between.
- 1 yard of fabric (adult size) will generate about 8 masks if you use the same fabric for both sides. If you choose to use 2 different fabrics, 1 yard will generate 16 masks. See more details in the cutting layout below.
- A fat quarter (18″ x 22″ rectangle) of fabric will generate 2 masks or 4 if you use another piece of fabric to cut.
- The easiest parts for someone else to help with (if you have someone to help) ironing, followed by cutting. This requires no sewing skills.
- For fabrics that do not shrink, you can leave the iron on folded pieces while you fold additional pieces of cut fabric for max efficiency.
- You will run out of thread FAST! I advise buying a couple of large spools. I went through a 1000m spool sewing over 140 masks in one week.


If you have access to a 3d printer:
This is the file for the mask elastic extensions. you can print this in PLA or PETG. For best results, if you have access to removable flexible steel print beds with PEI as the surface, it is very easy to remove the prints once completed. Clean your 3d printer’s bed surface with IPA Alcohol and a paper towel while preheating, and use a spatula if you find it difficult to remove your prints. Be very careful using spatulas with sharp corners… I have stabbed myself a few times removing thin 3d prints off the bed multiple times because of the sharp spatula.
- (Adult size) https://www.thingiverse.com/thing:4249113
- (Smaller or child size) https://www.thingiverse.com/thing:4273837
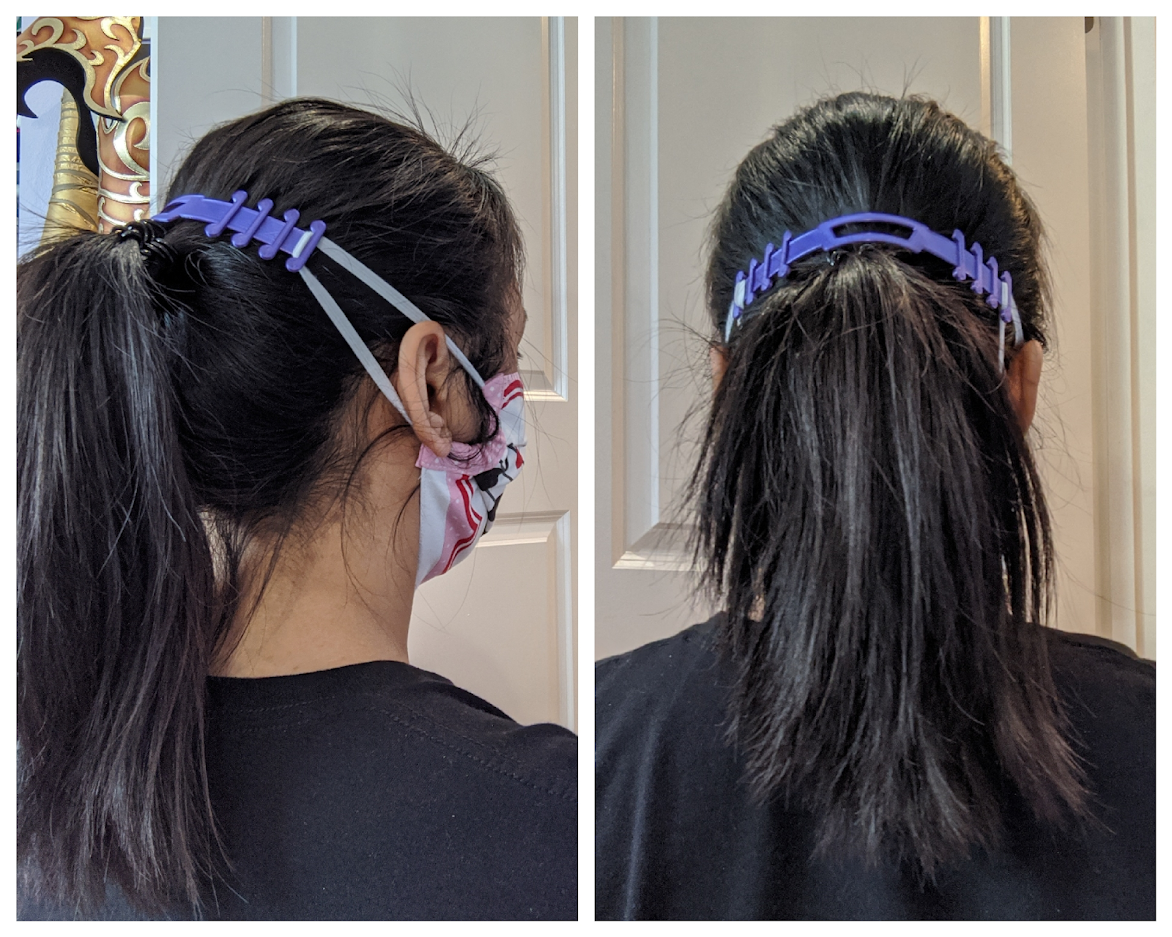
My masks with the 3D printed “ear saver” elastic extension piece.
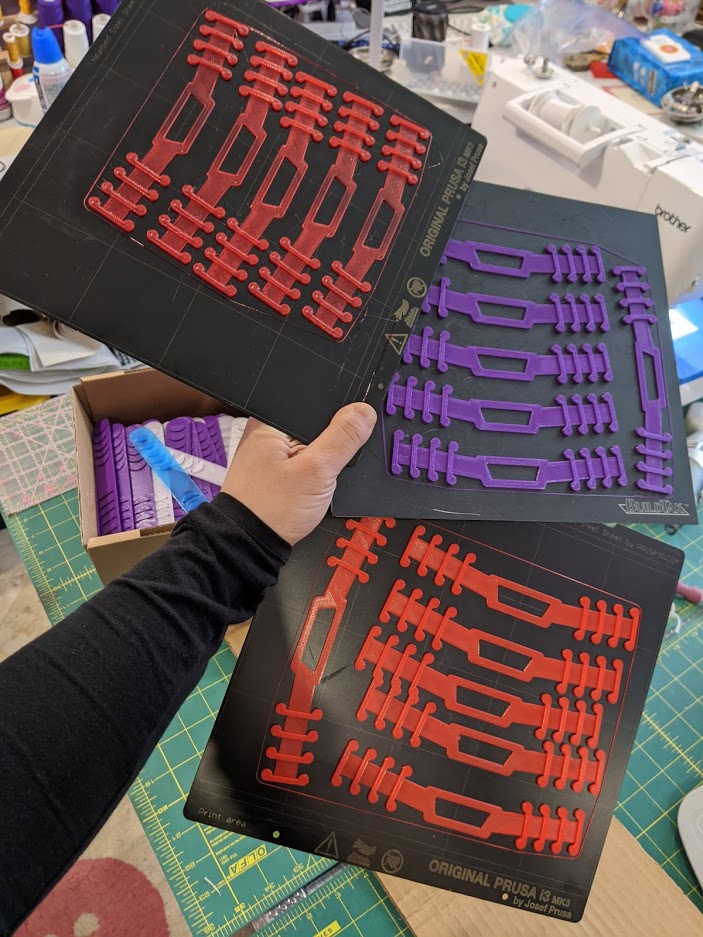
3D printing on removable flex steel beds!
Materials
- Adult size fabric: I cut 2 of 9” x 8” rectangles for each side, instead of 15” x 7.5” single cut used in the video for a fold in the middle.
- Child size fabric: I would cut 2 of 7” x 6” rectangles for each side, or a single 11” x 7” cut for folding in the middle.
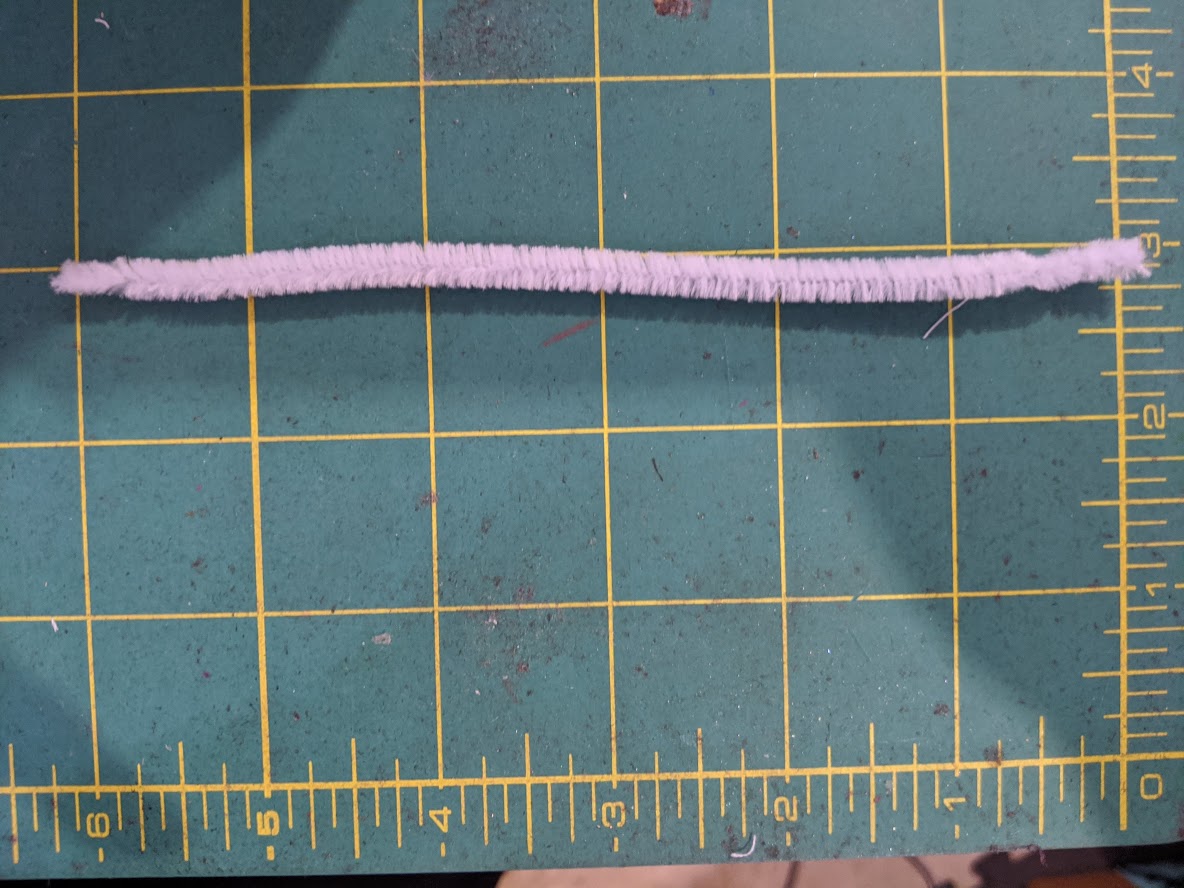
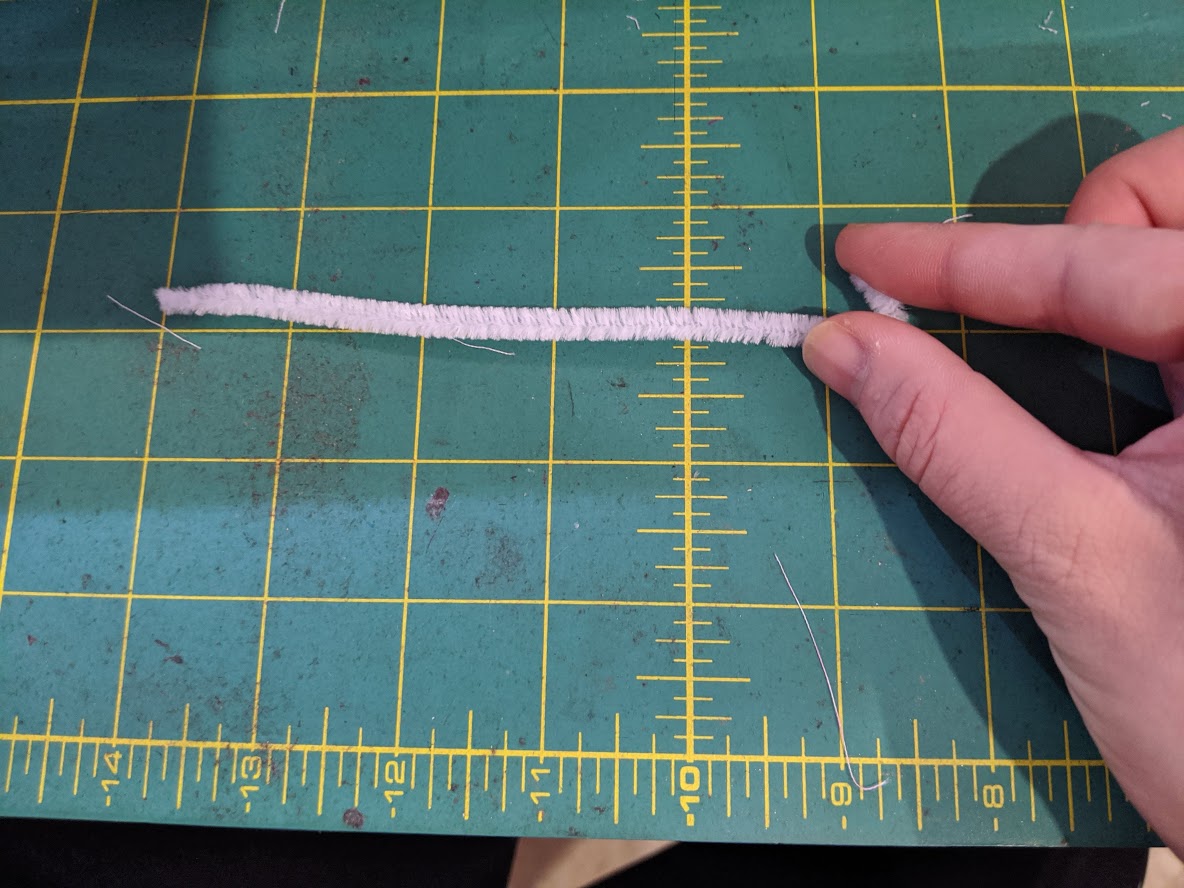
- Wire – I used craft pipe cleaners. They often come in packs of 12”, so I would cut them in halves (6”). Alternatives – 16 gauge wire, but ensure that the ends are curved or bent to prevent from poking.
- Elastics – 3mm width elastics are ideal, cut into 2x 9″ pieces. (I know this is hard to come by right now, but keep the width no thicker than 6mm)
- Thread – Polyester or cotton (“sew all” / “all purpose”)
Tools
- Sewing machine of any kind
- Iron
- Universal needles
- Walking or regular zigzag stitch foot (usually the defaults for sewing machines)
- Rotary cutter
- Cutting mat
- Ruler
- Sewing clips
- Air or water soluble marker, or tailor’s chalk
- Fabric scissors
- Seam Ripper (for any mistakes)
- Awl or something (toothpick, skewer) that is sharp but not sharp enough to poke a hole on fabric with reasonable force
- (Optional) Sleeve ironing board
Sewing Tutorial
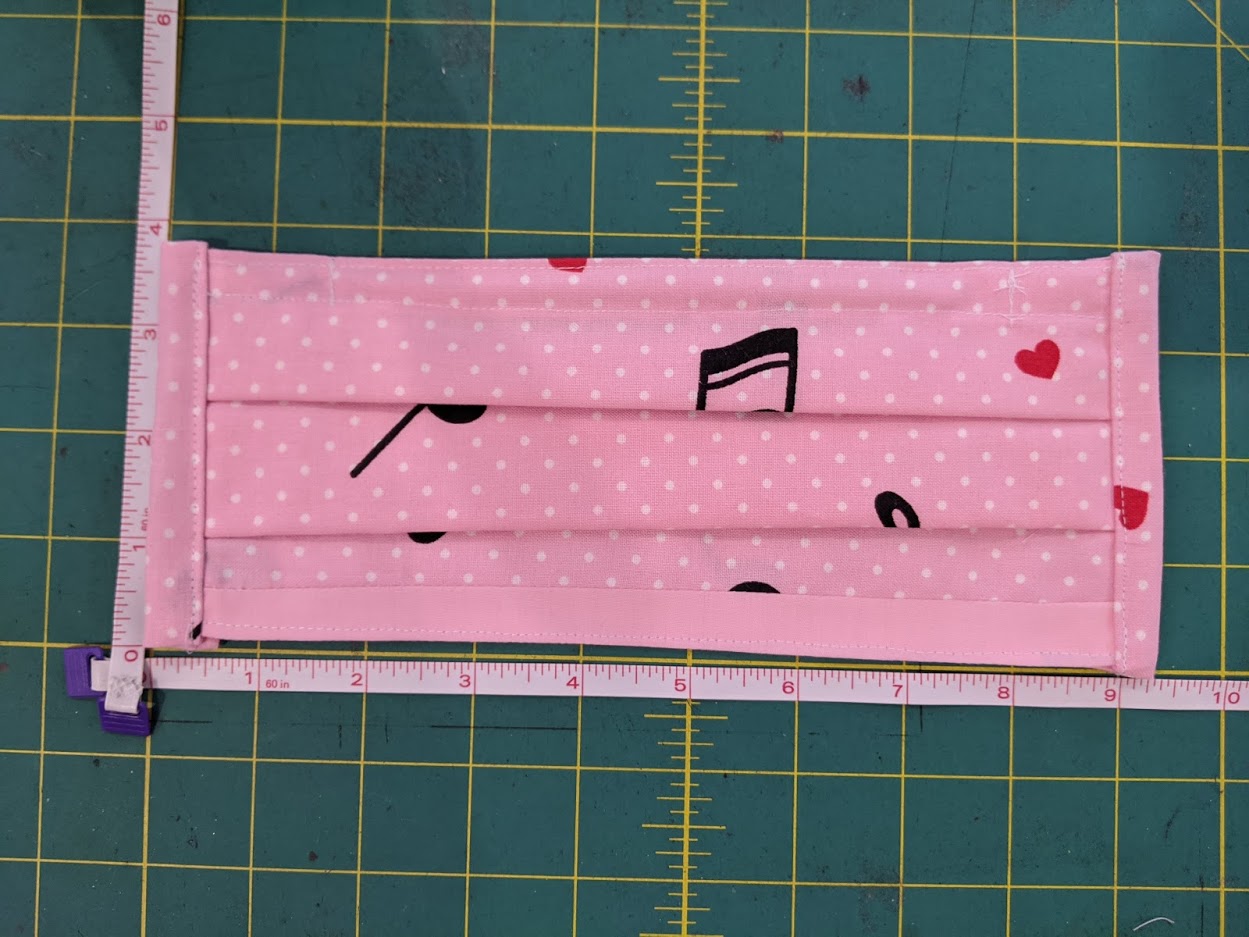
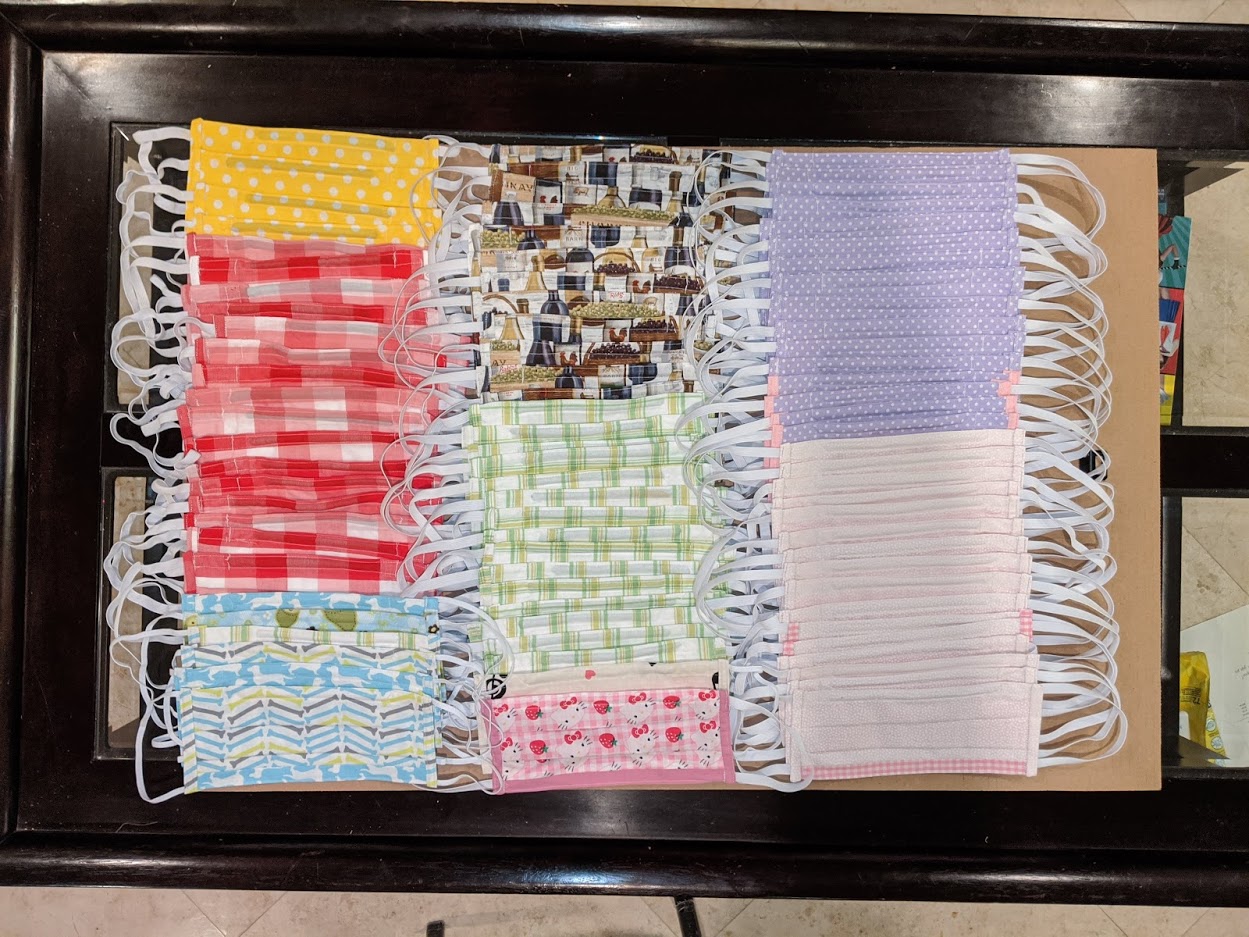
This is how the finished layout will look like before elastics are sewn on.
Cutting Layout
First – What kind of fabrics do you have on hand? Do you want to make the front and back with the same fabric? This tutorial will be for sewing masks with 2 different kinds of fabrics – one with a print, and the other with a solid.
With 1 Yard of Fabric
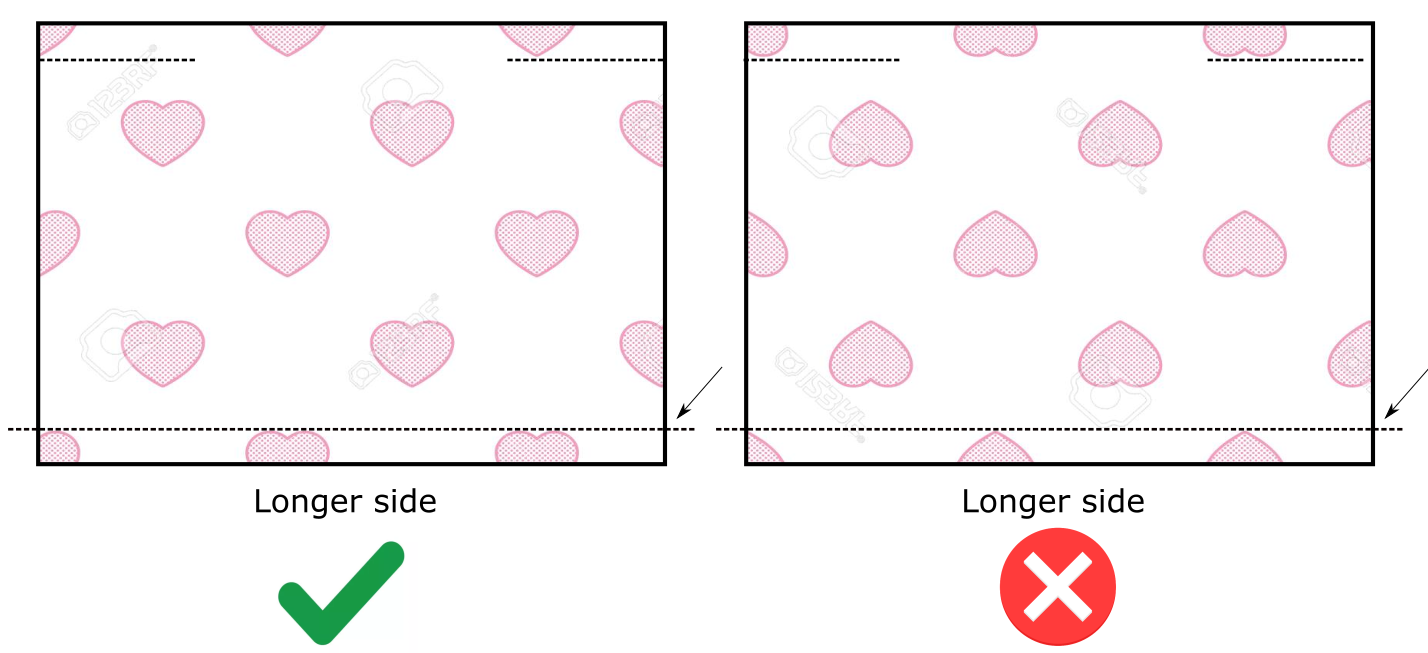
If you have fabrics with a print, check your print’s orientation! Check the cutting layout below.
Download the printable PDF: [Click HERE for PDF]
Click the images below or download the PDF to see a larger version.


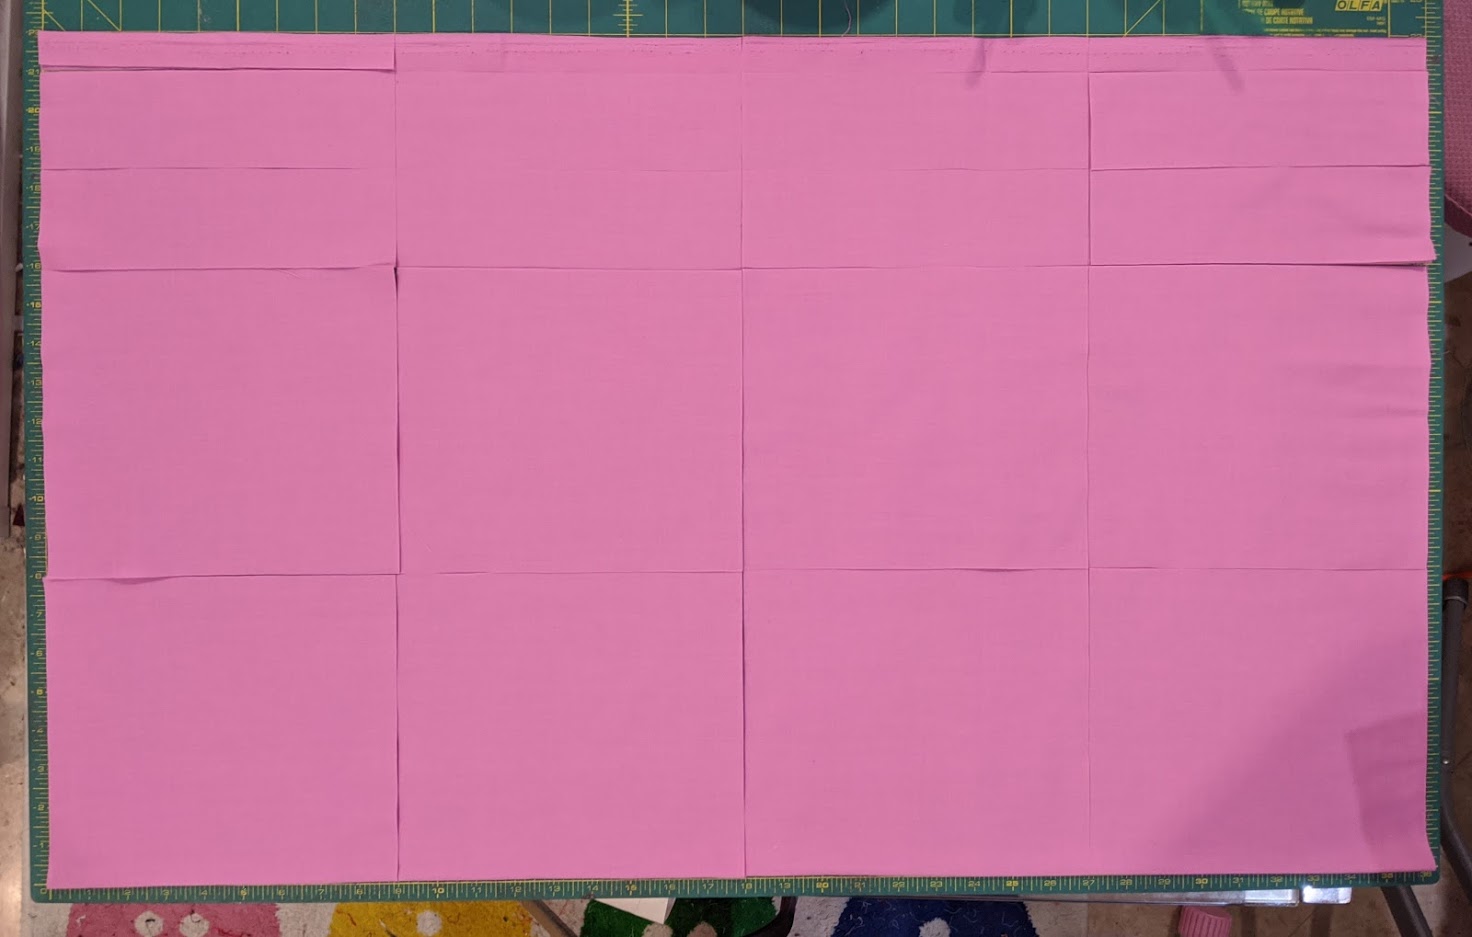
Here’s how I cut a single (1) yard of solid fabric. There is no pattern orientation on this fabric, so I maxed out the use of the fabric by splitting a 36″ (1yd) cut across 9″ rectangles, similar to the first template diagram above.
These will be the fabrics I use. This particular print can go in either vertical direction.

Place the “wrong” side of fabrics facing each other, or towards in the inside.
Sew the mask as pictured. Seam allowance is about 1 cm or 1/2 inch. Mark where to stop with your air or water soluble pen.
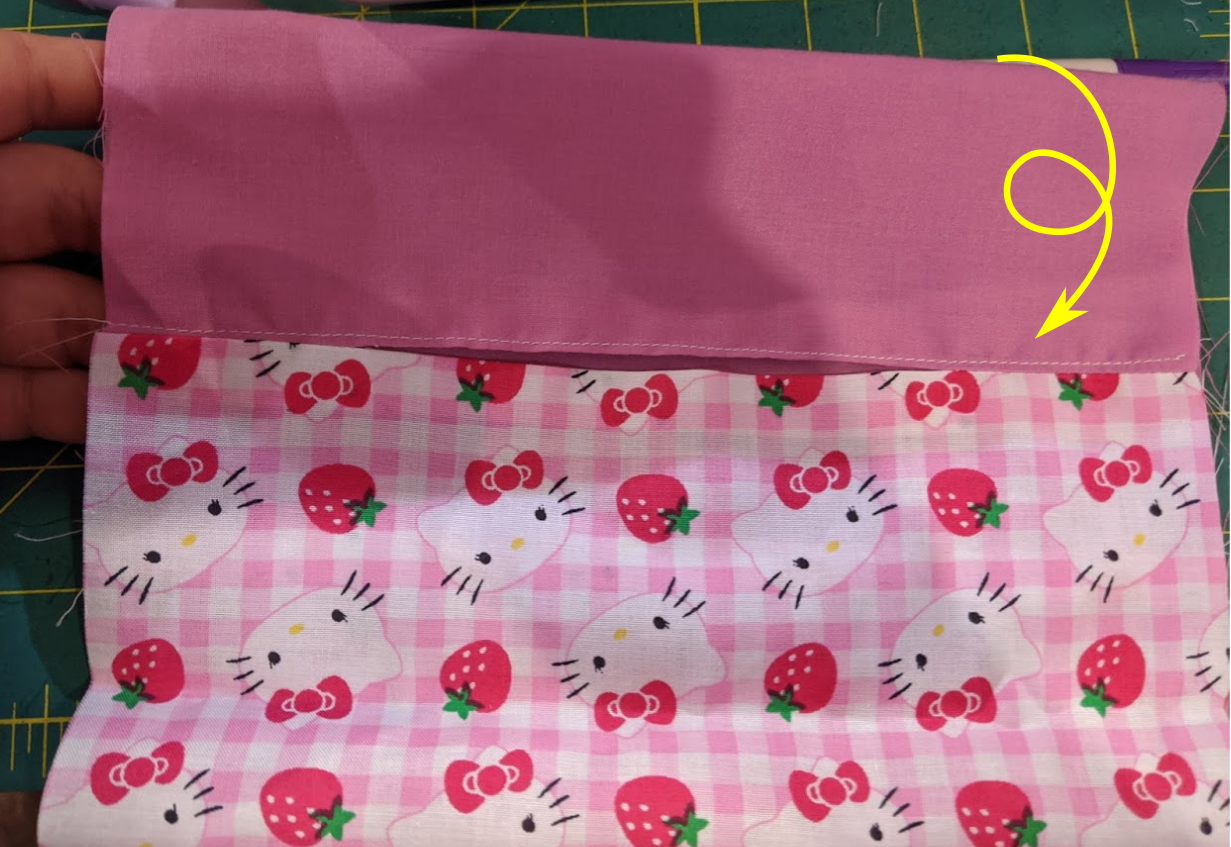
Please note the bottom when sewing fabrics with prints:
(Optional step at this part, though highly recommended – Serge or finish off the edges of the cut fabric with zig stitch or pinking shears. I did not do those in this tutorial or on my masks for the sake of mass production)
With an iron, press open the seams. If available, use a sleeve ironing board as pictured.

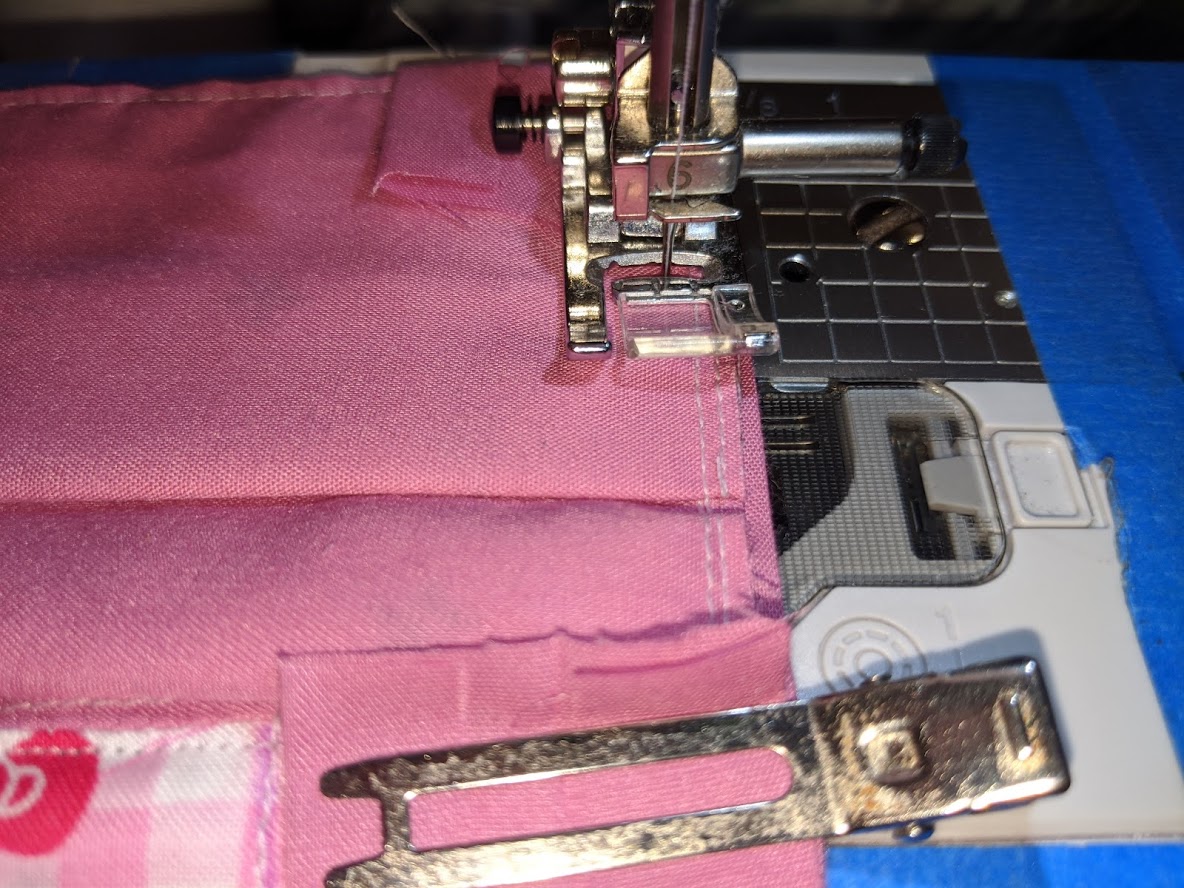
Keep the fabric inside out, but take the opening section of the sewn fabric, and top stitch the edge of the fabric that will be facing the inside of the mask. This part can be a little challenging to manage depending on the stiffness of the fabric.
Place the fabric on the needle as pictured. The needle position may vary depending on your comfort level with top stitching in relation to the needle position. The fabric is still inside out, with the “correct outer side” on the sewing machine. Topstitch the inside facing fabric.
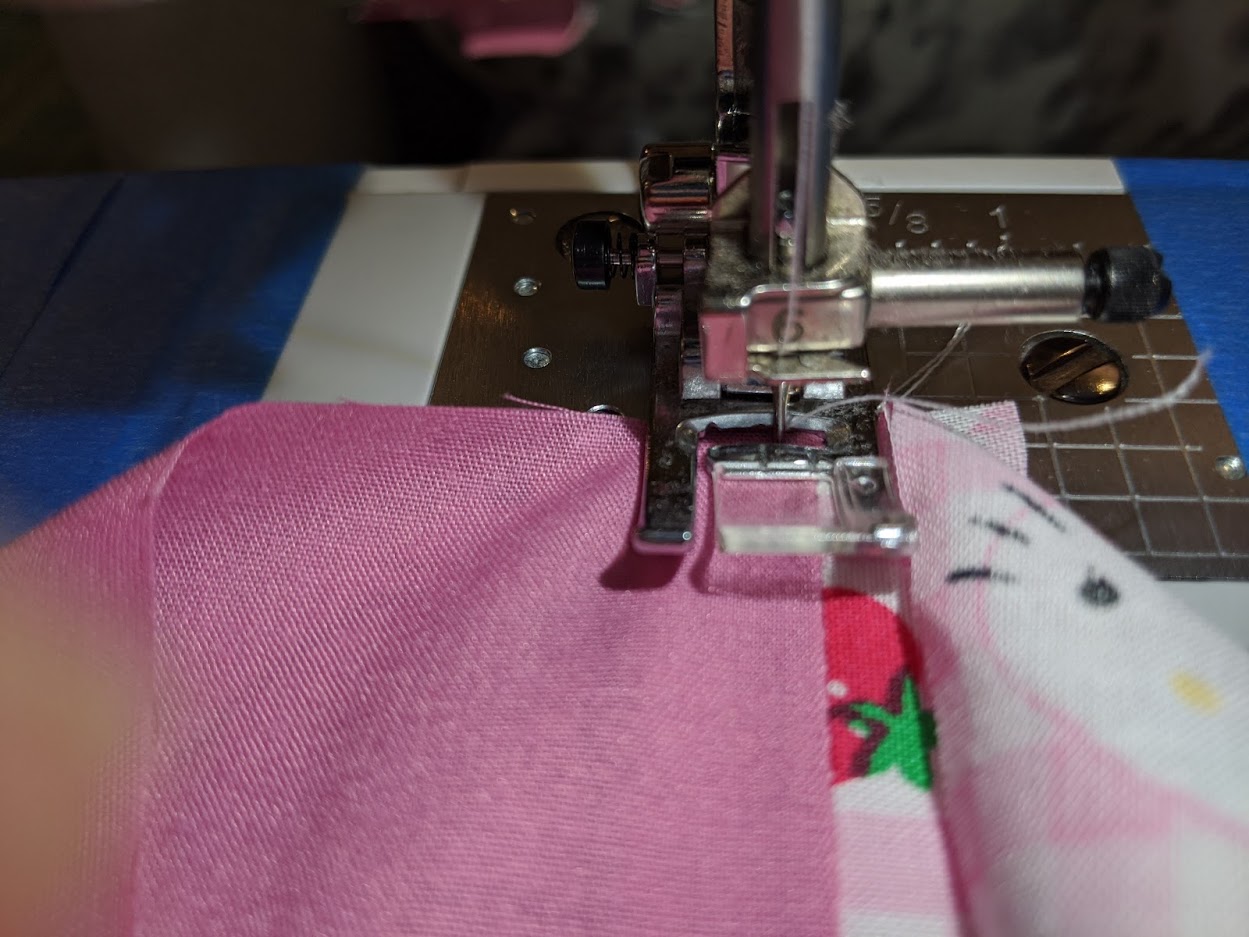
Hold the fabric taut while top stitching.
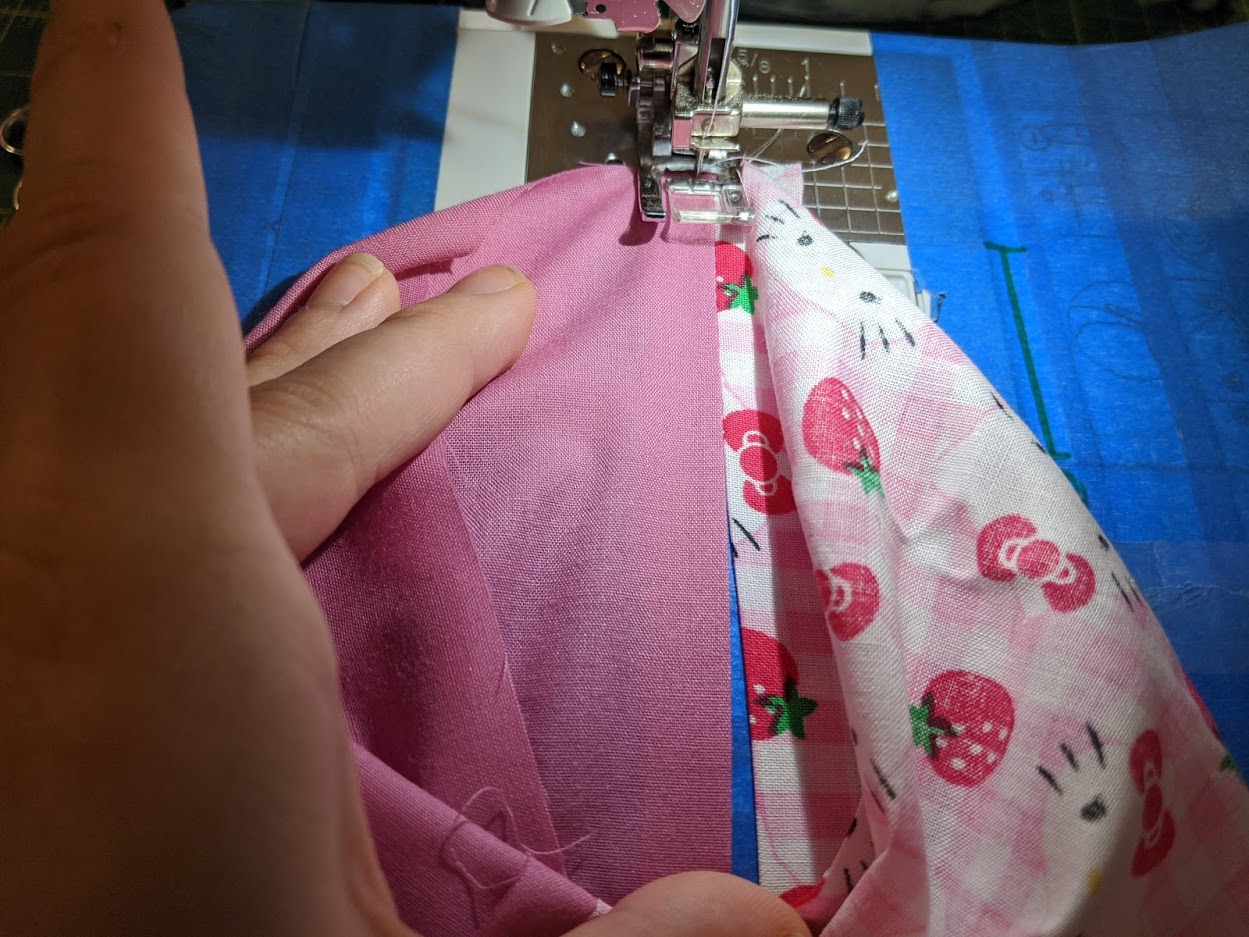
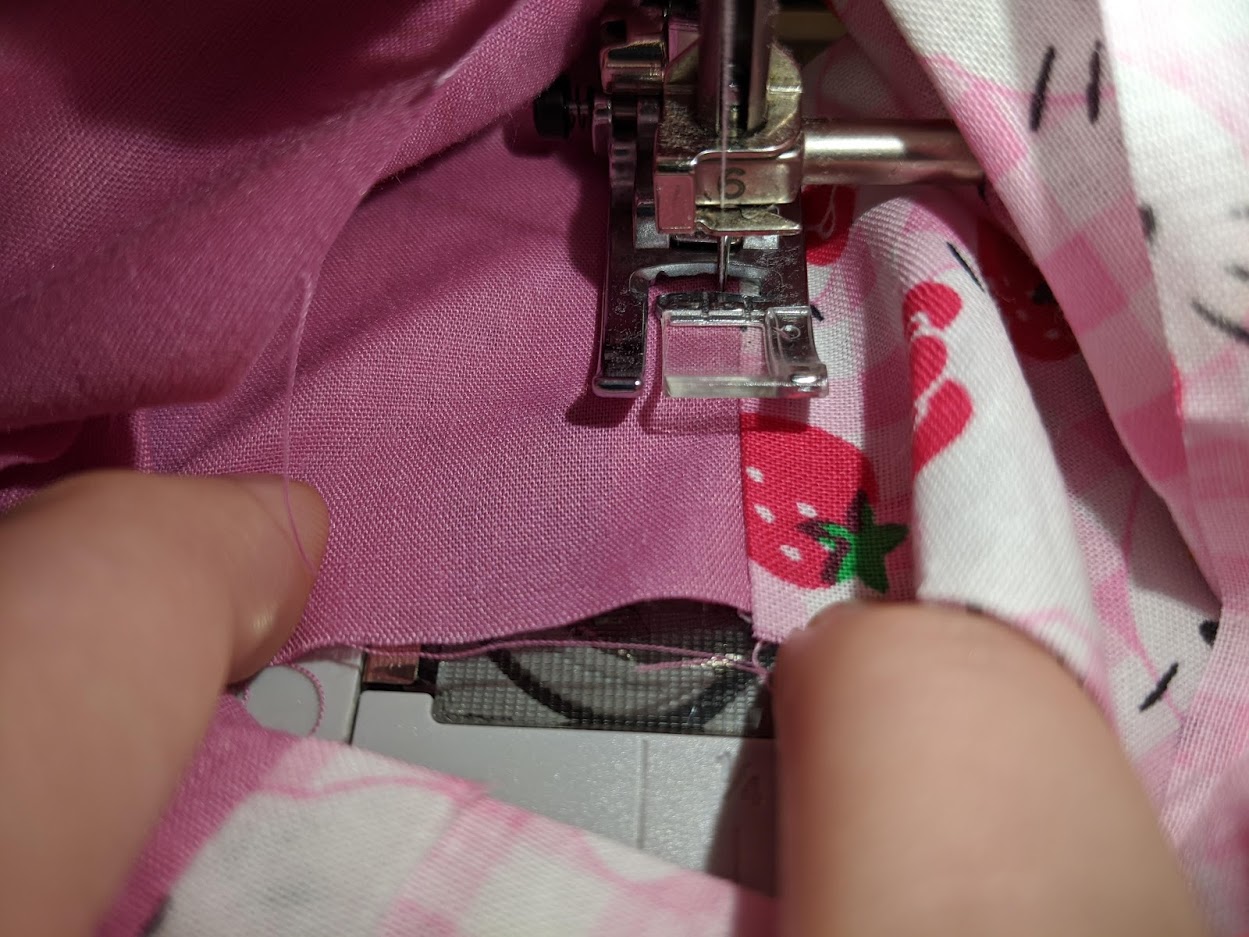
As you sew down the inner fabric, it is natural for the “outer fabric” to separate a little bit while feeding into the sewing machine needle.

Finish off this top stitching.
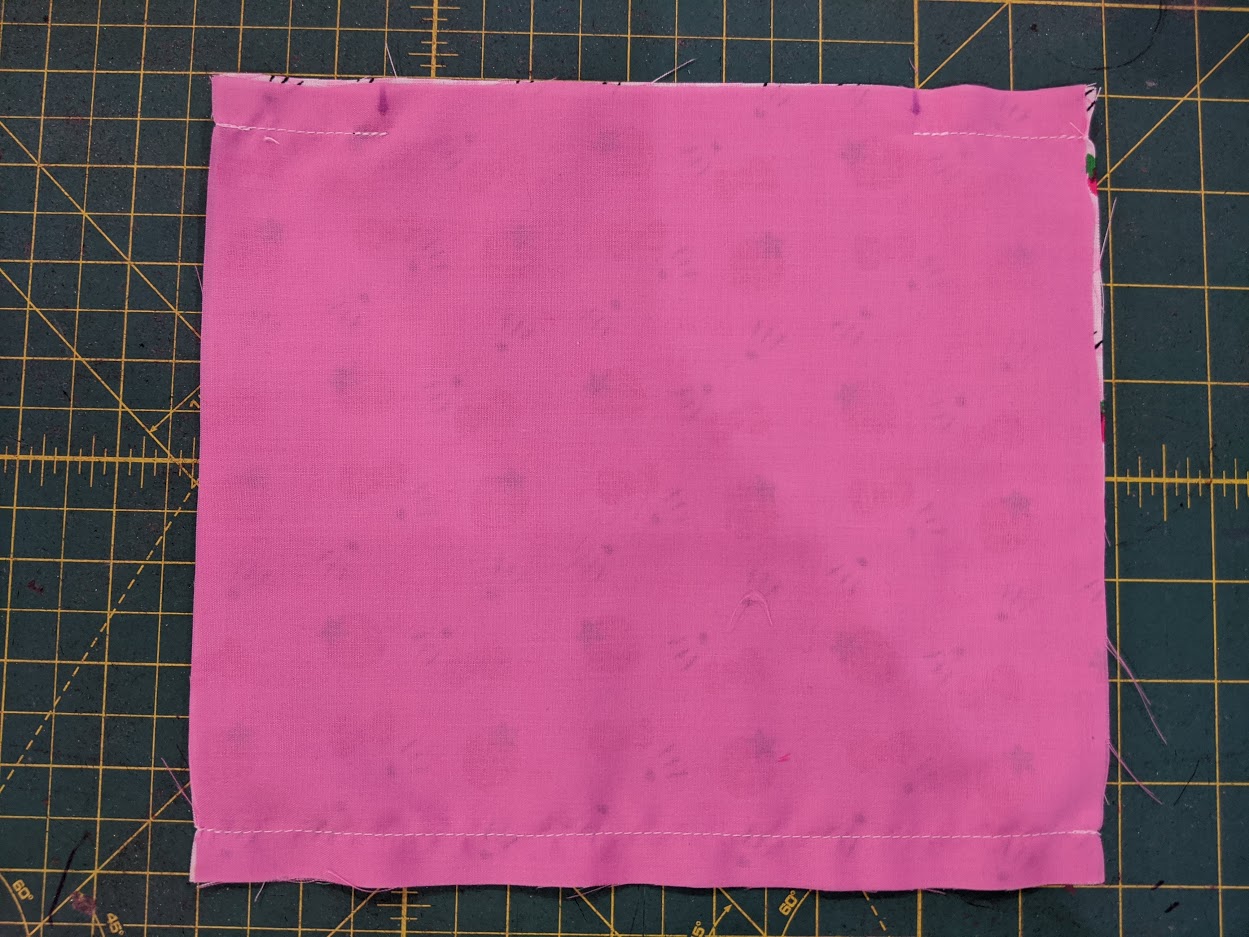
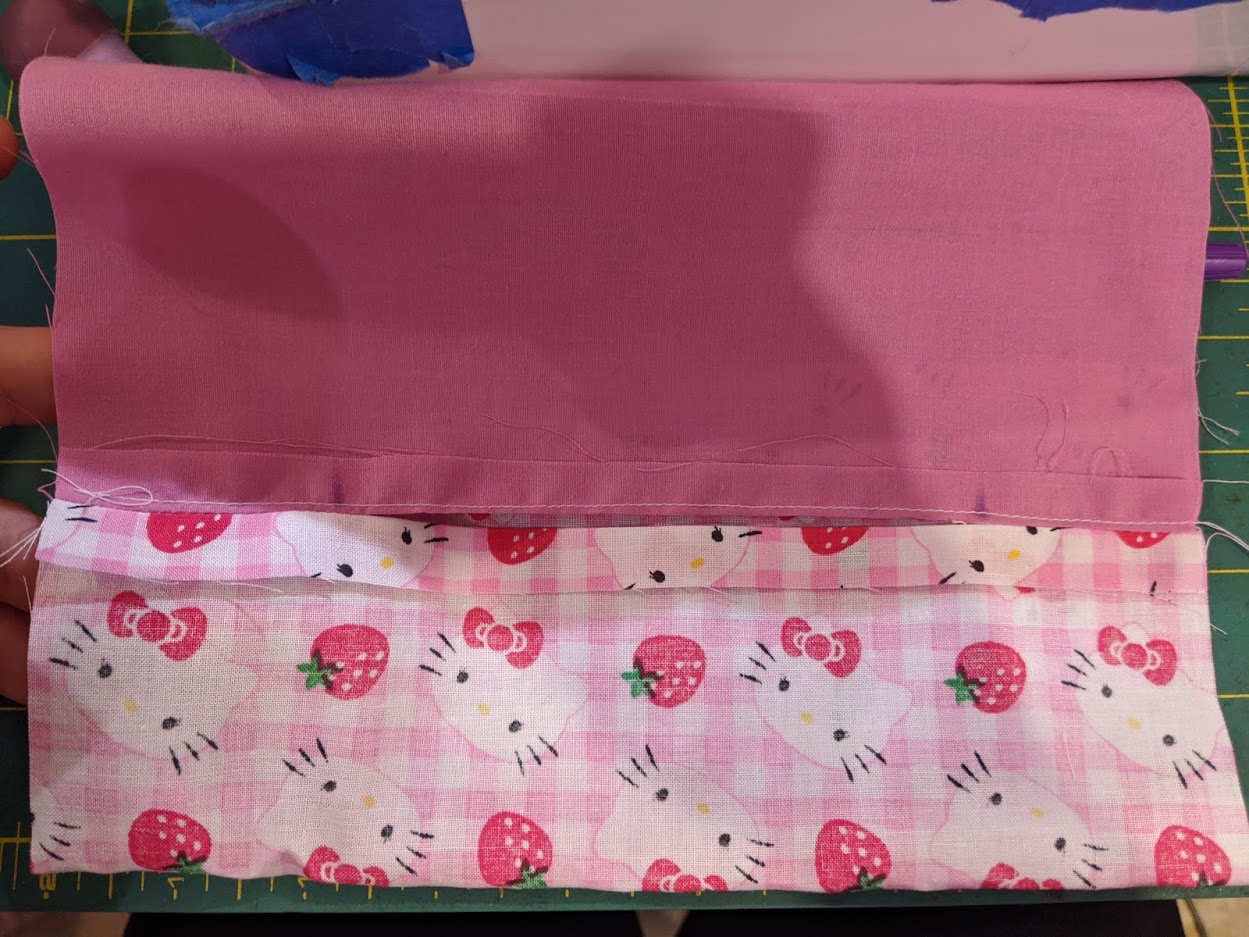
It should look like this with the fabric pieces inside-out (wrong side is facing outwards).
Only top stitch the “inner” (solid fabric as pictured) fabric at this time.
Now, turn the fabric inside out, with the correct side of fabric facing outwards.
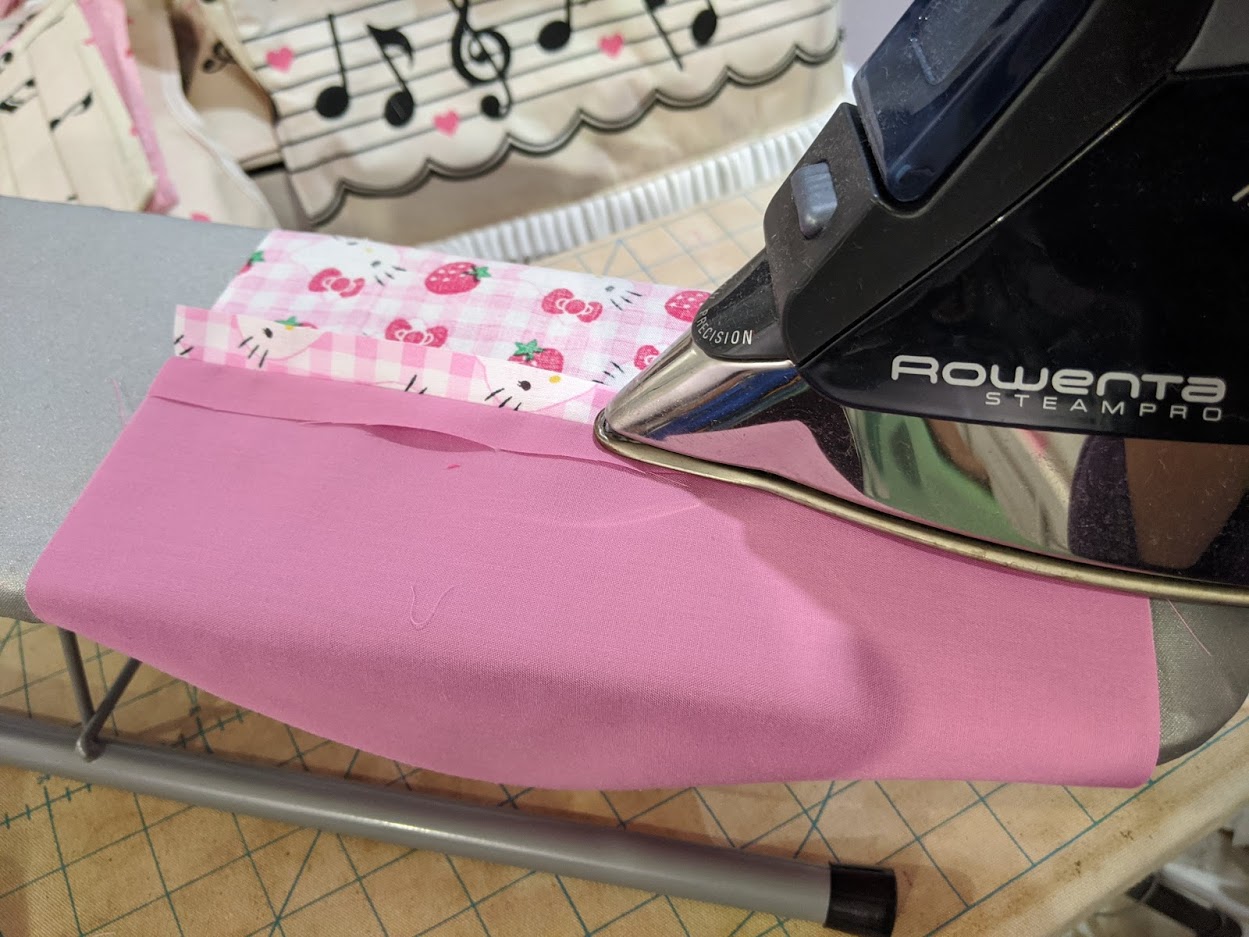
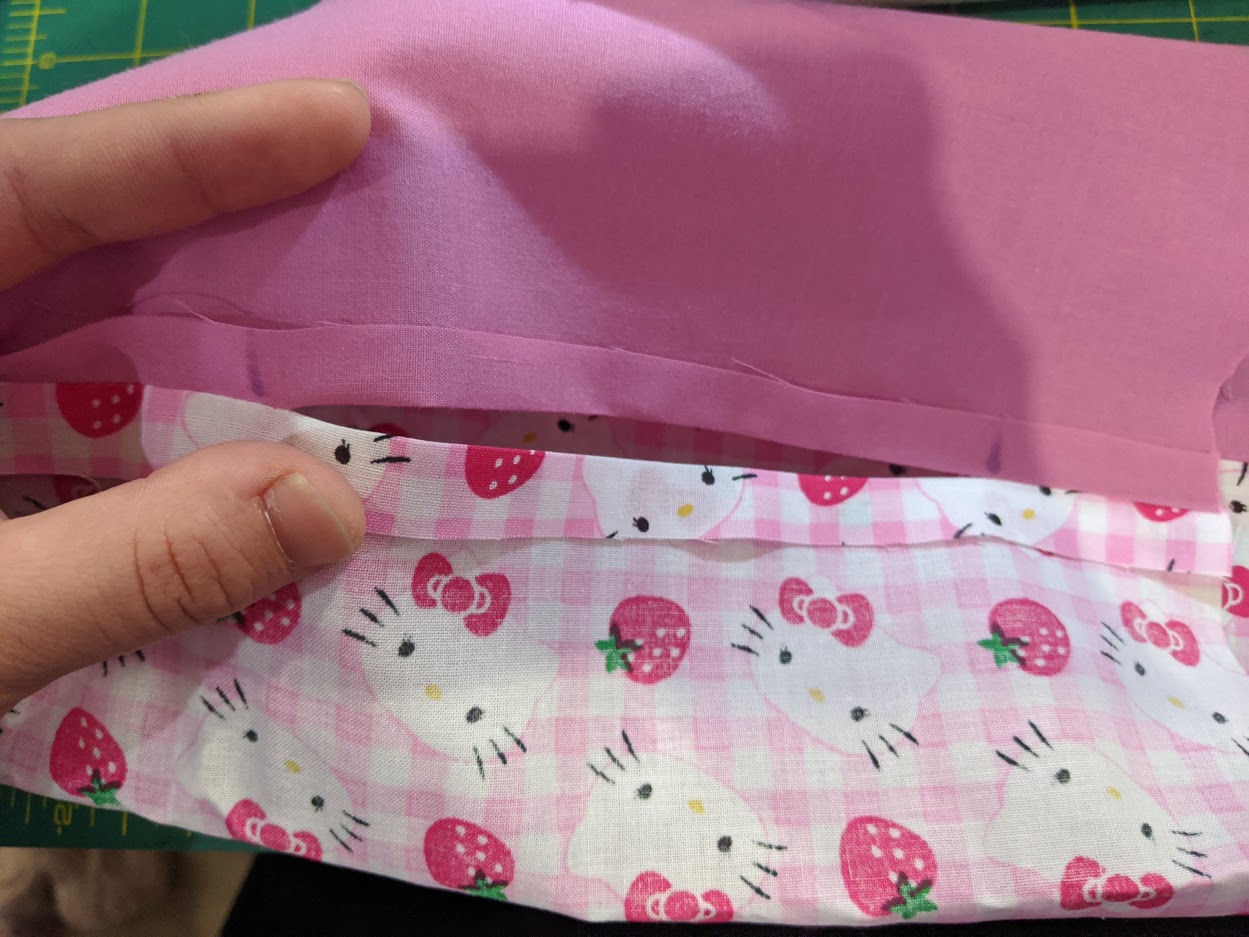
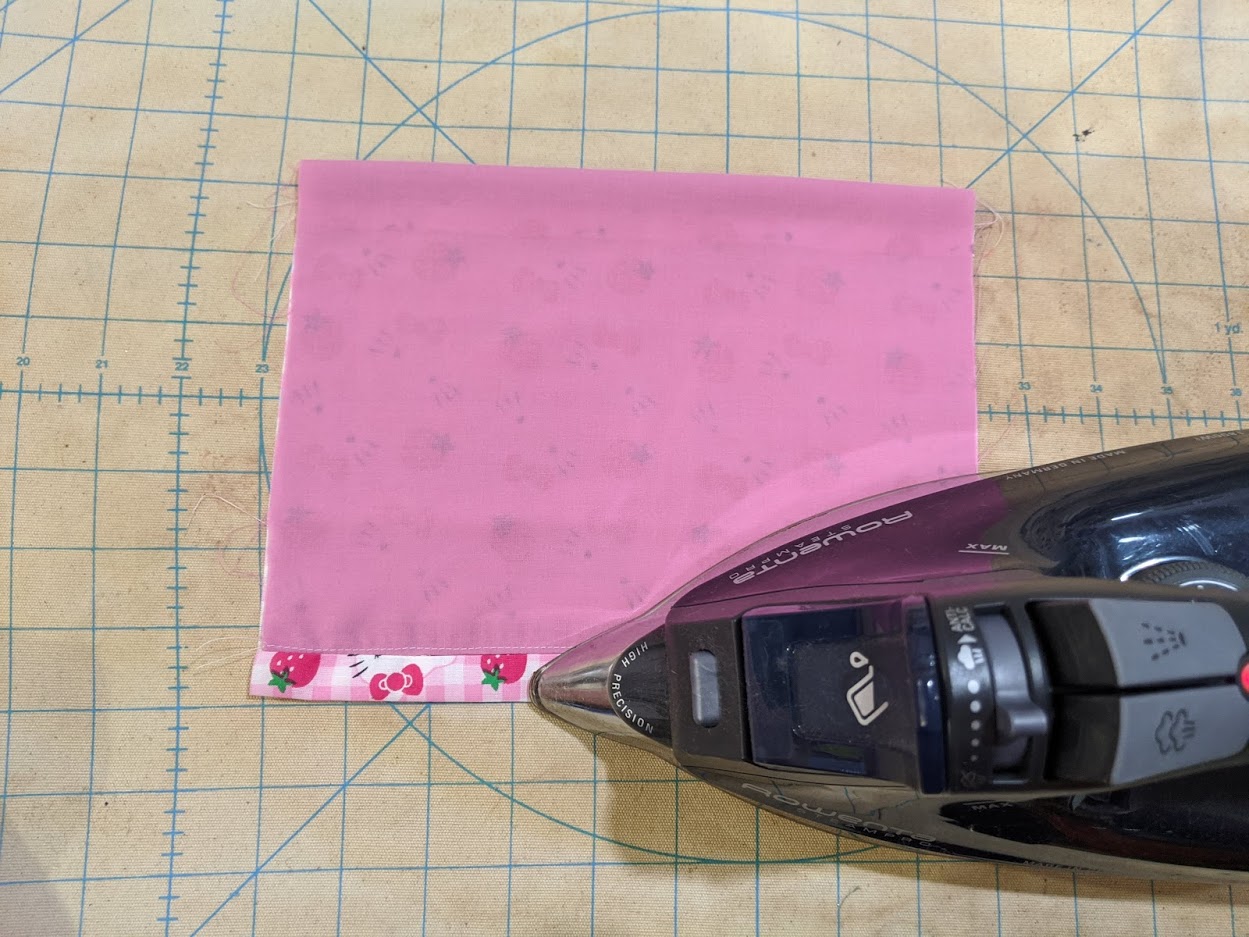
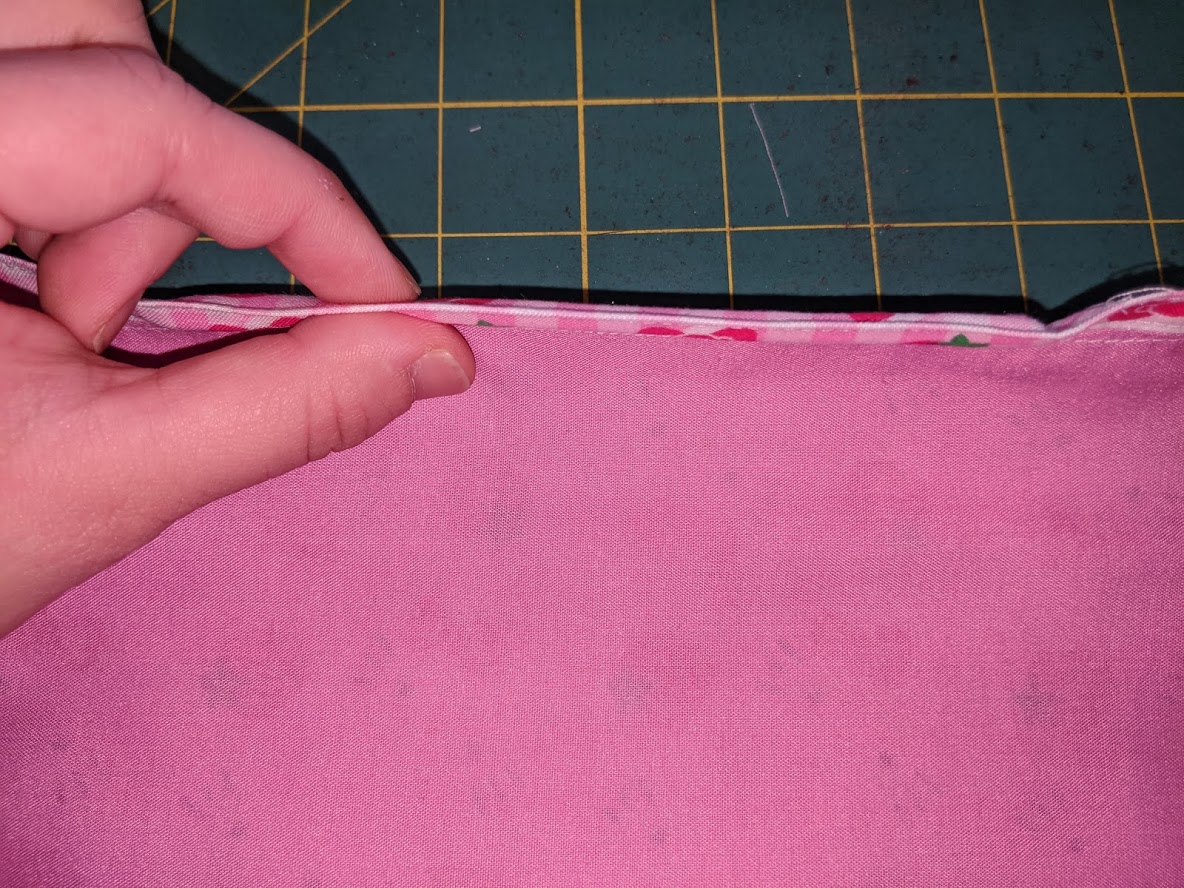
On the ironing board, finger press your fabric as seen below, with a 1cm or 1/2 inch fold showing the front fabric in relation to where the inner fabric was top stitched.
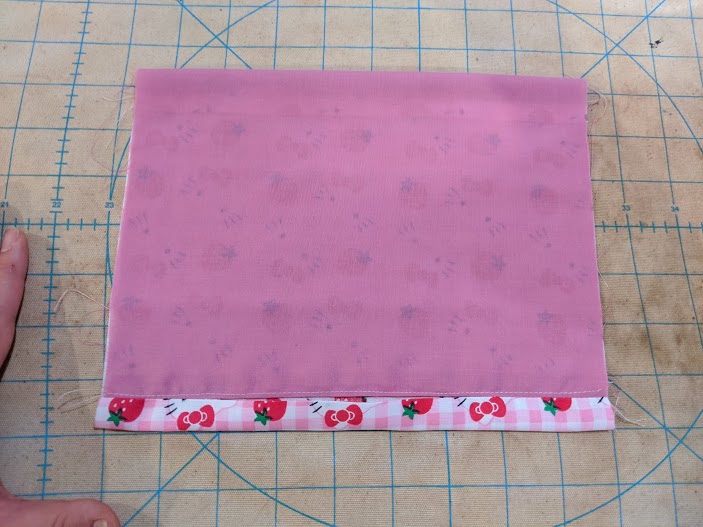
Once this is in place, press with an iron.
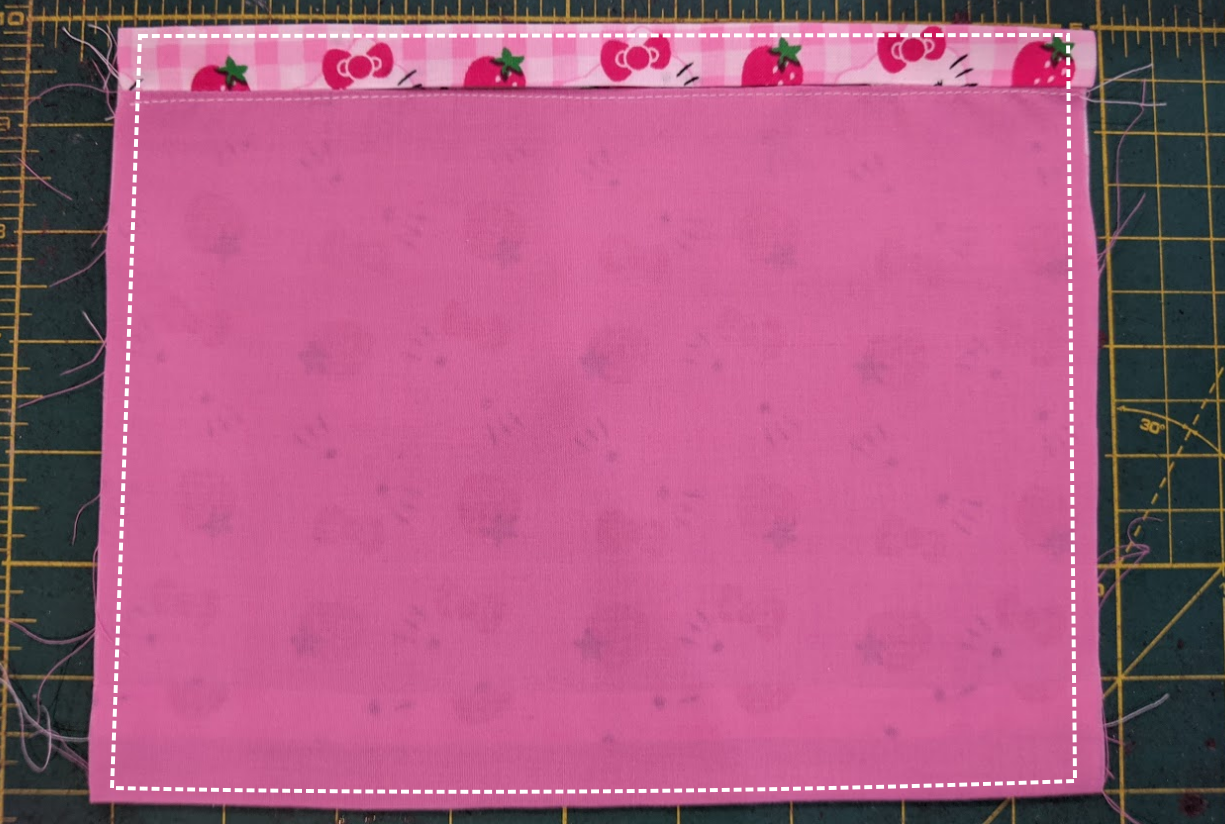
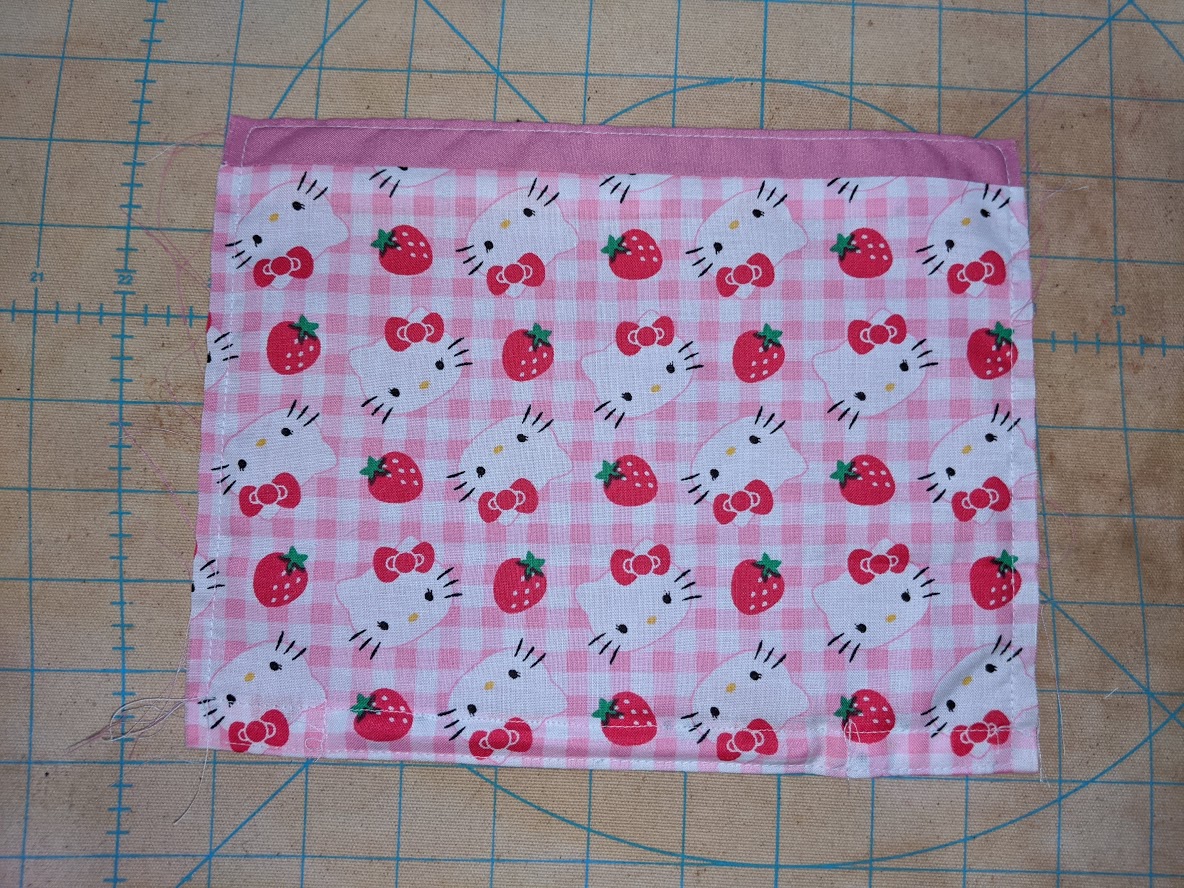
Flip the fabric over, and top stitch around the fabric piece. Leave the sides with a slightly wider seam allowance.

Cut about a 6″ wire, and bend the ends for safety.

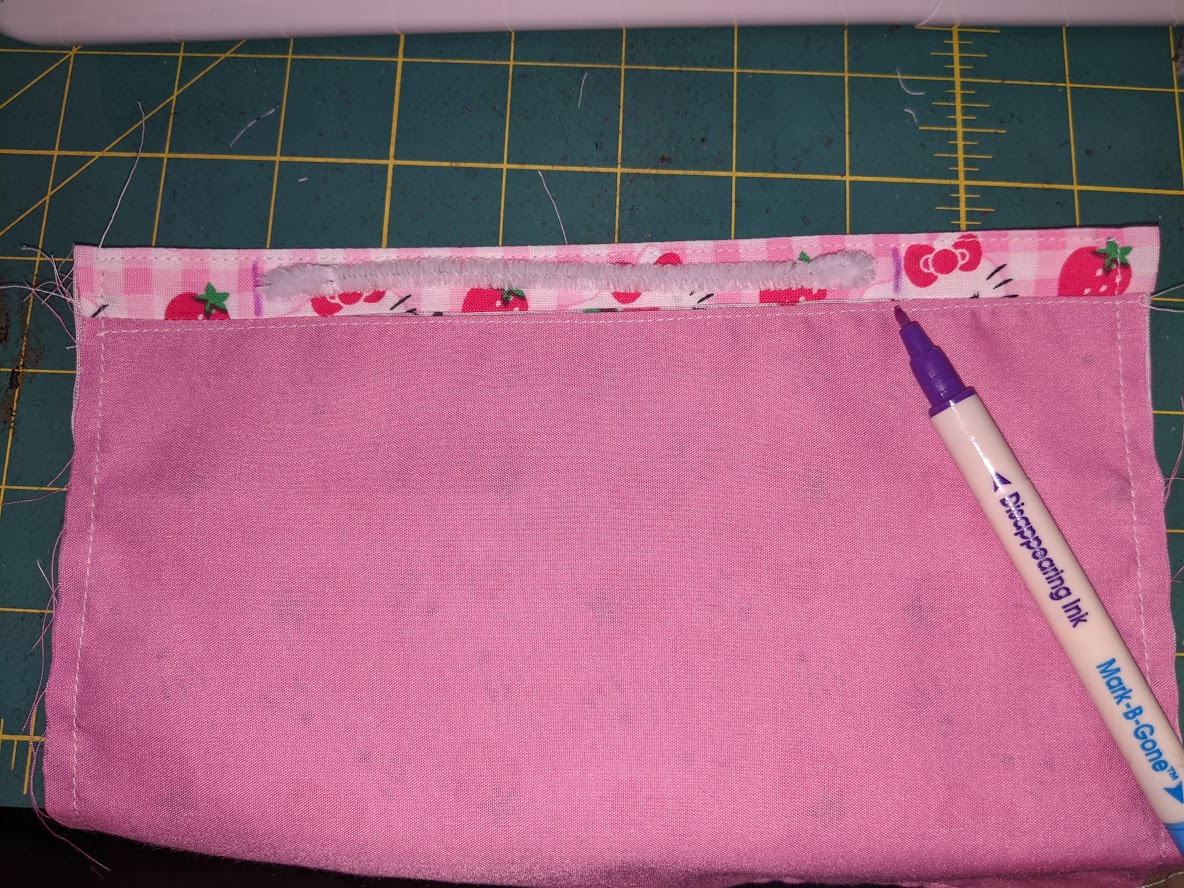
Place the wire on the top (back side) of the fabric piece, and with the air/water soluble marker – (or tailor’s chalk) mark where the ends are located . Give a little bit of “wiggle room” for the wire to fit inside. Topstitch these areas.

Cut excess threads off.
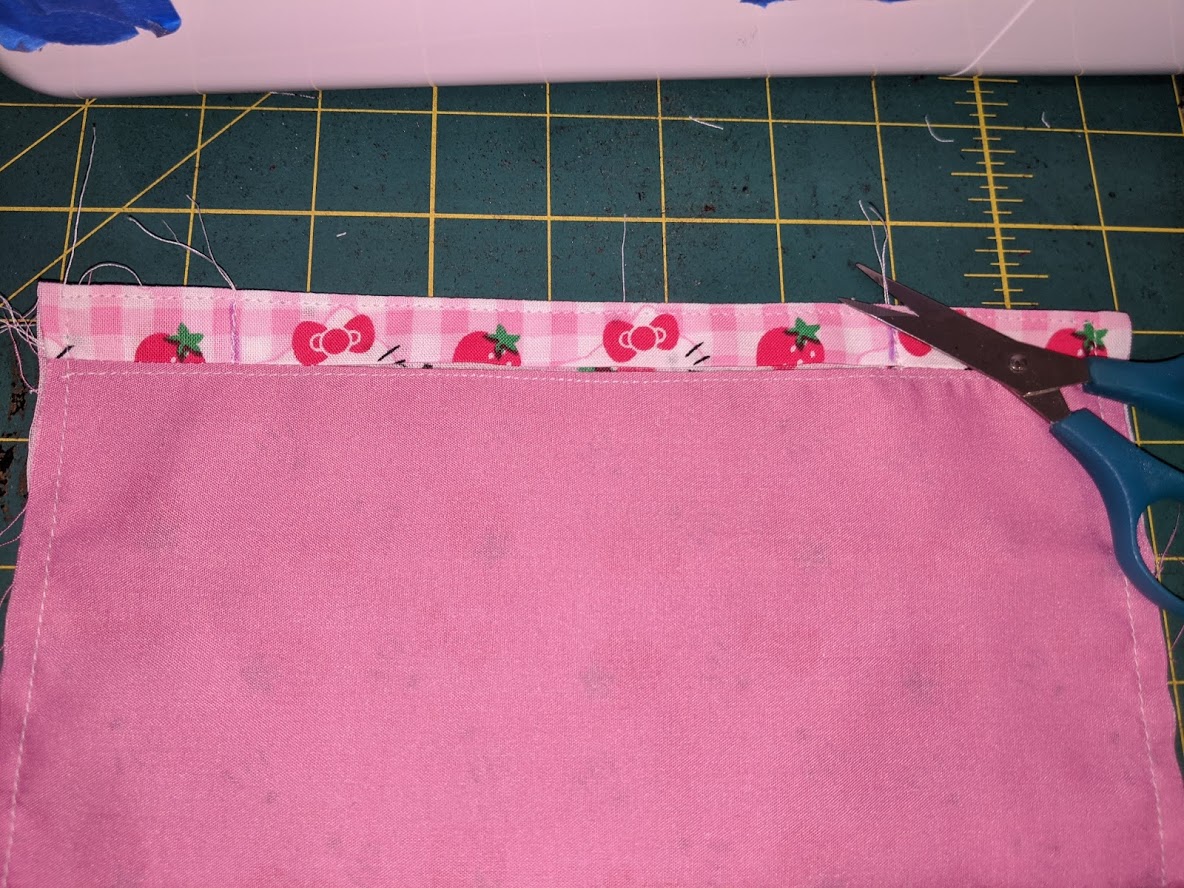
Insert the wire inside the fabric. If you see the wire poking out from the fabric, bend the wire further and re-sew the “walls” holding the wire as necessary.
Using a sewing clip, clamp down the middle of the wire inside of the fabric. The other two as pictured are optional.
Top stitch the bottom of the “pocket” that holds the wire. Hold the fabric piece taut while sewing as pictured.
Once completed with this step, the wire should be snugly inside of the fabric.
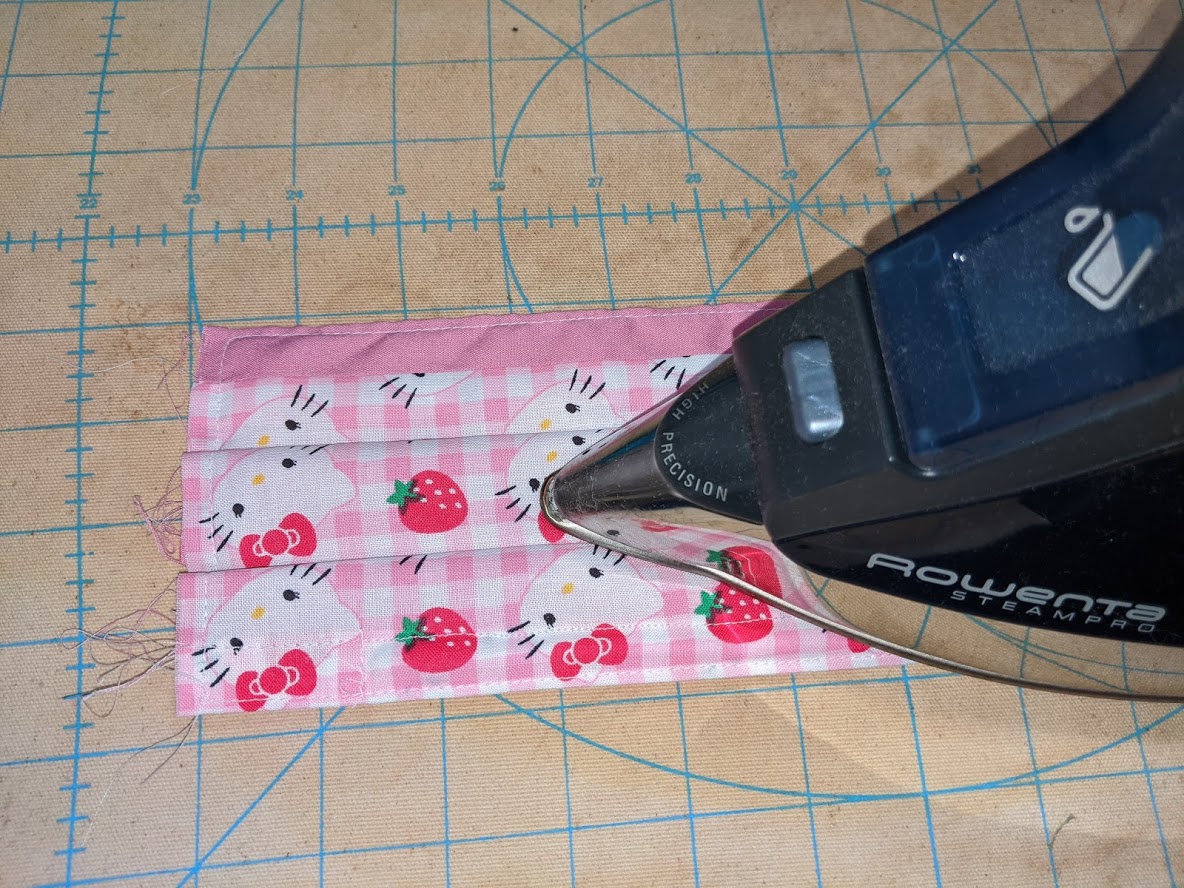
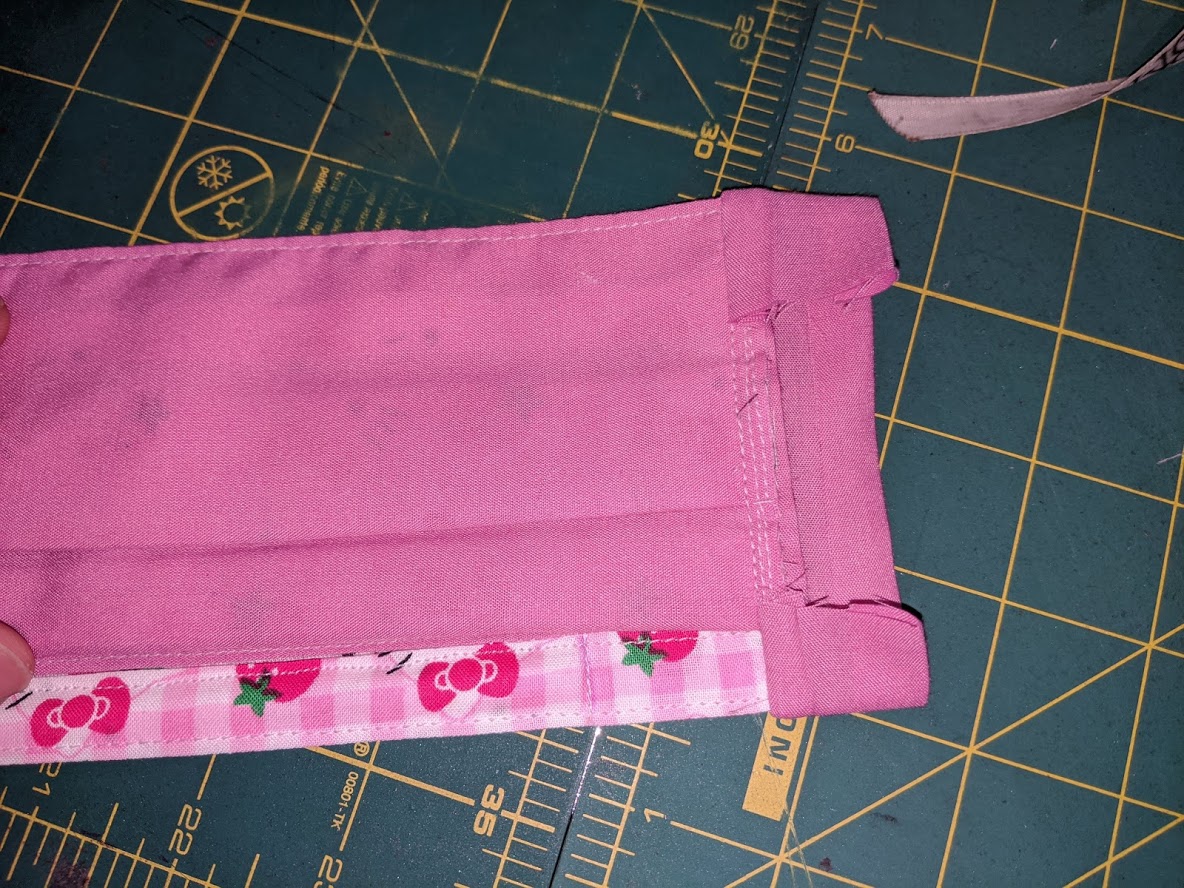
Place the fabric piece on the ironing board, front side up, with the top facing towards you.
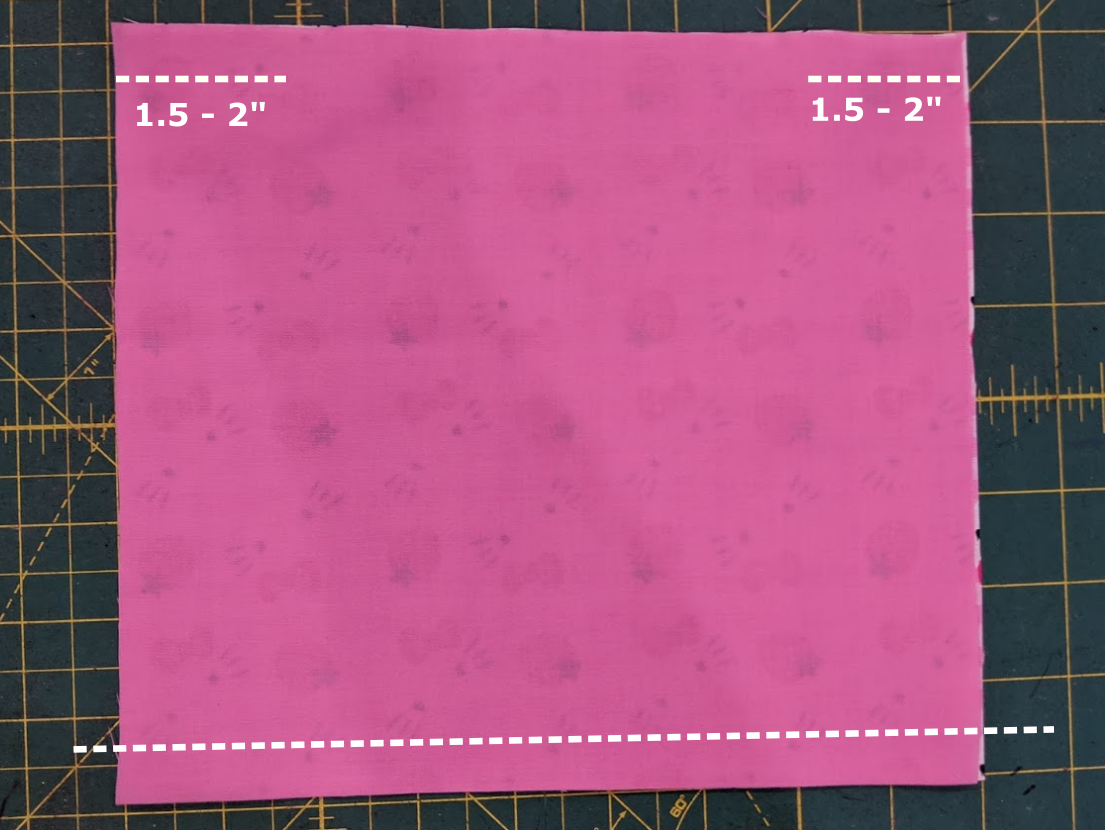
Fold the first pleat, with about 1.25″ or so as the first width.
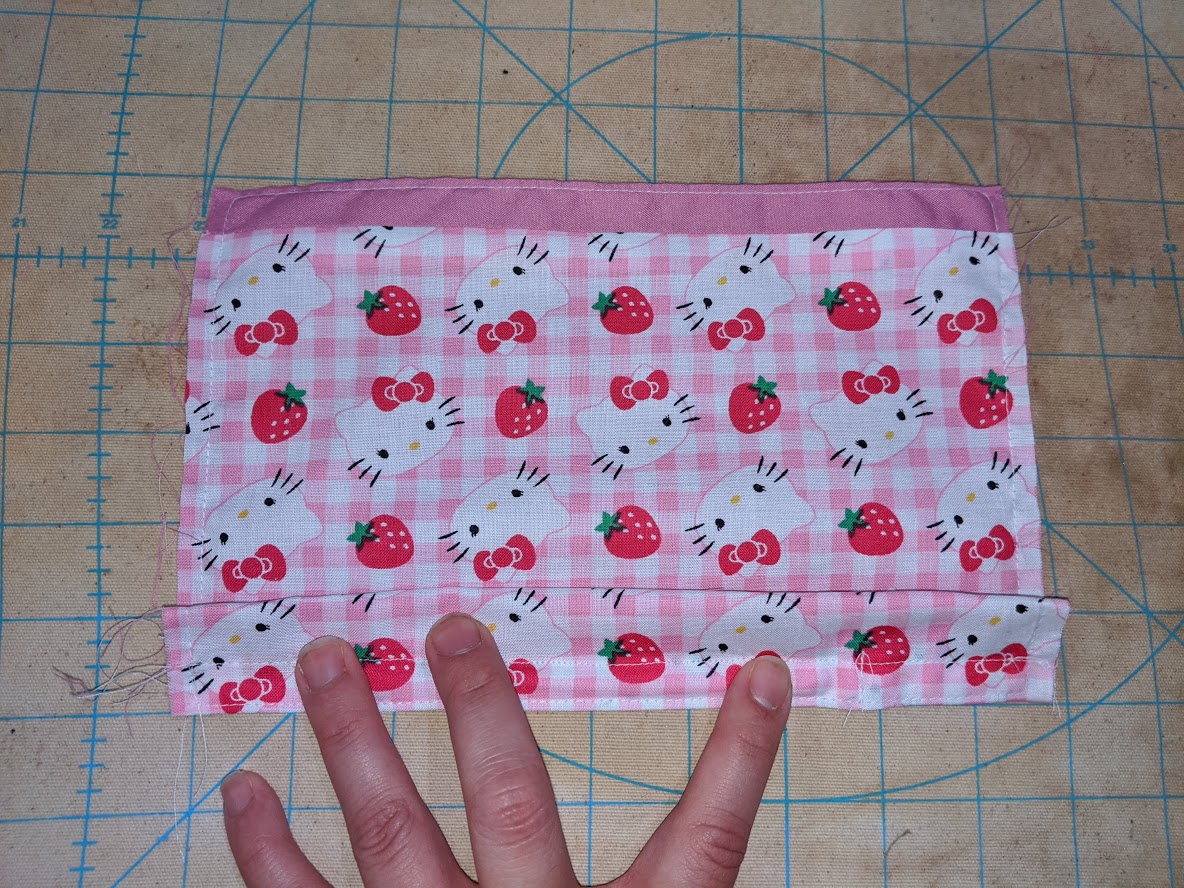
Form another similarly sized pleat, bringing the height of the mask to about 3.5 – 4″. Iron press this down.
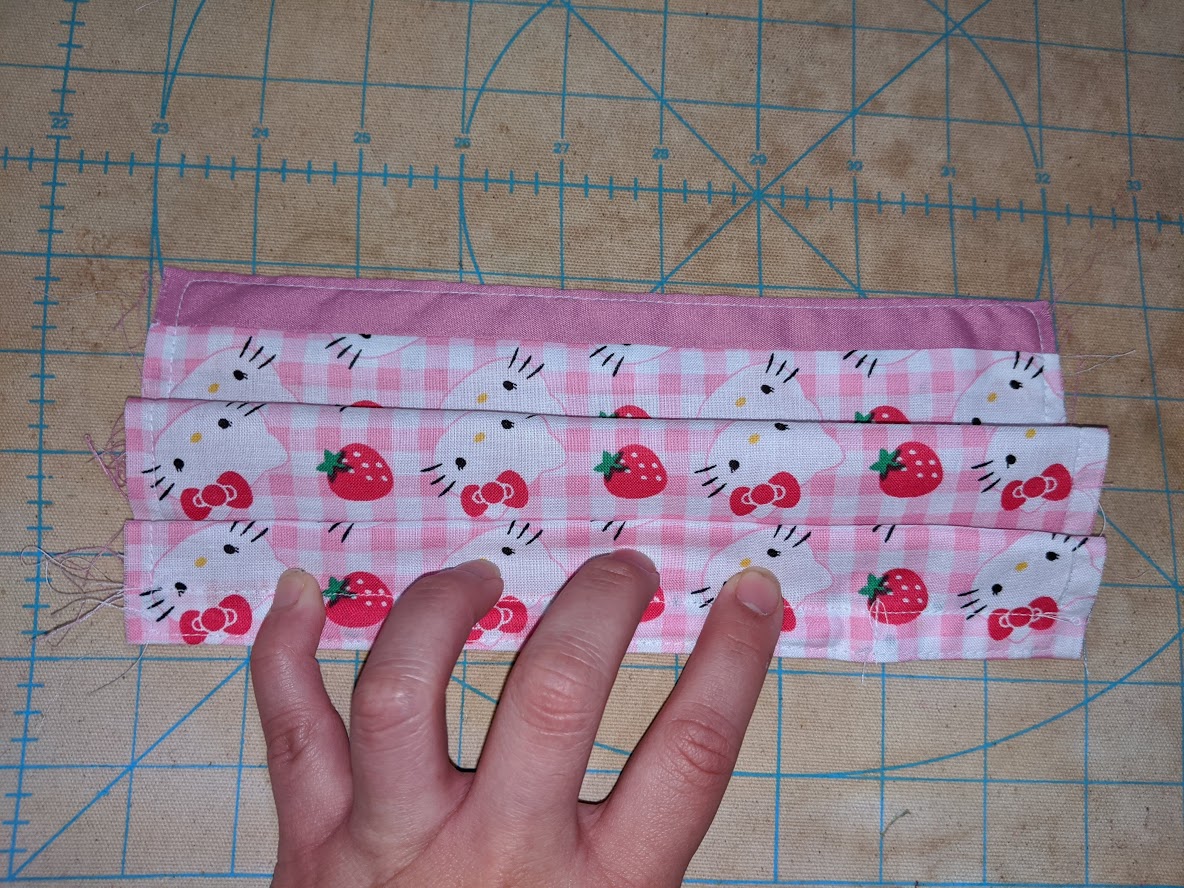
Stitch the pleats down.

With the rotary cutter, trim off the edges.
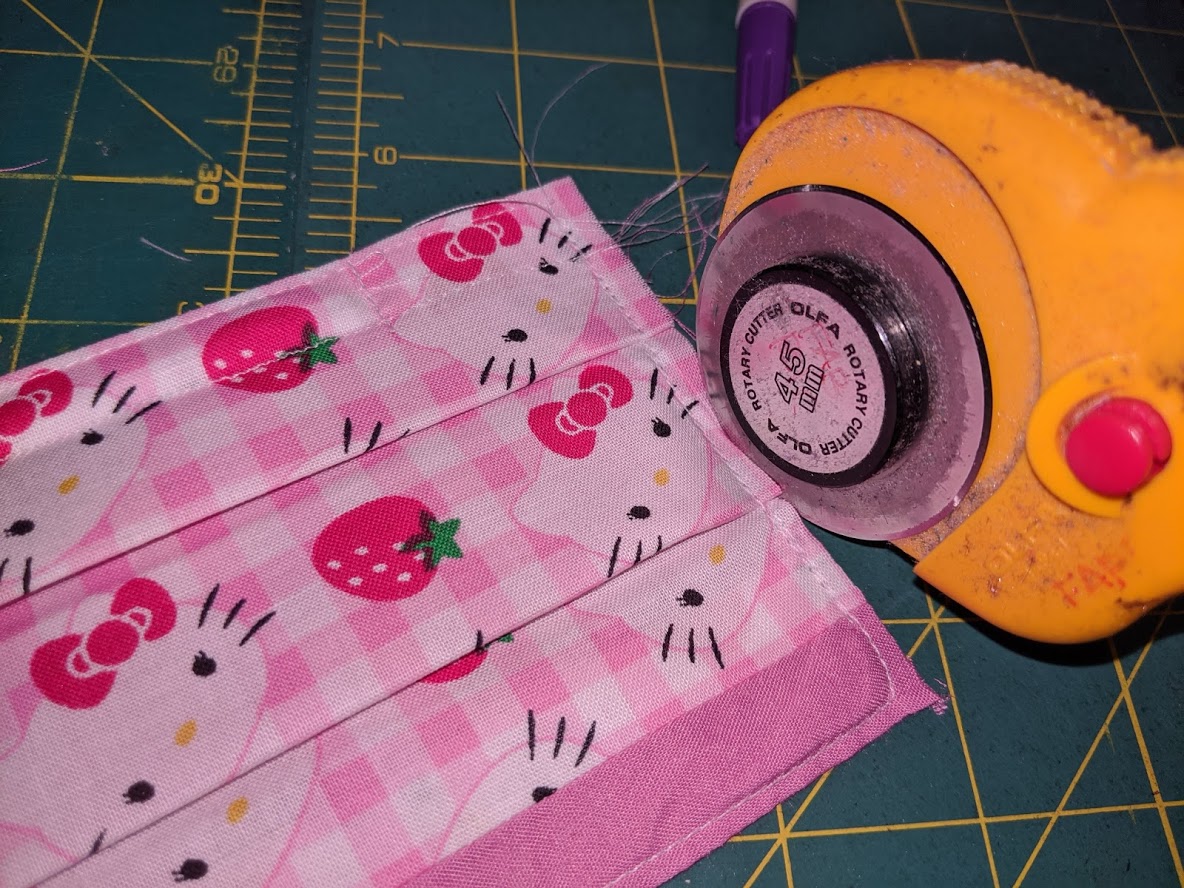
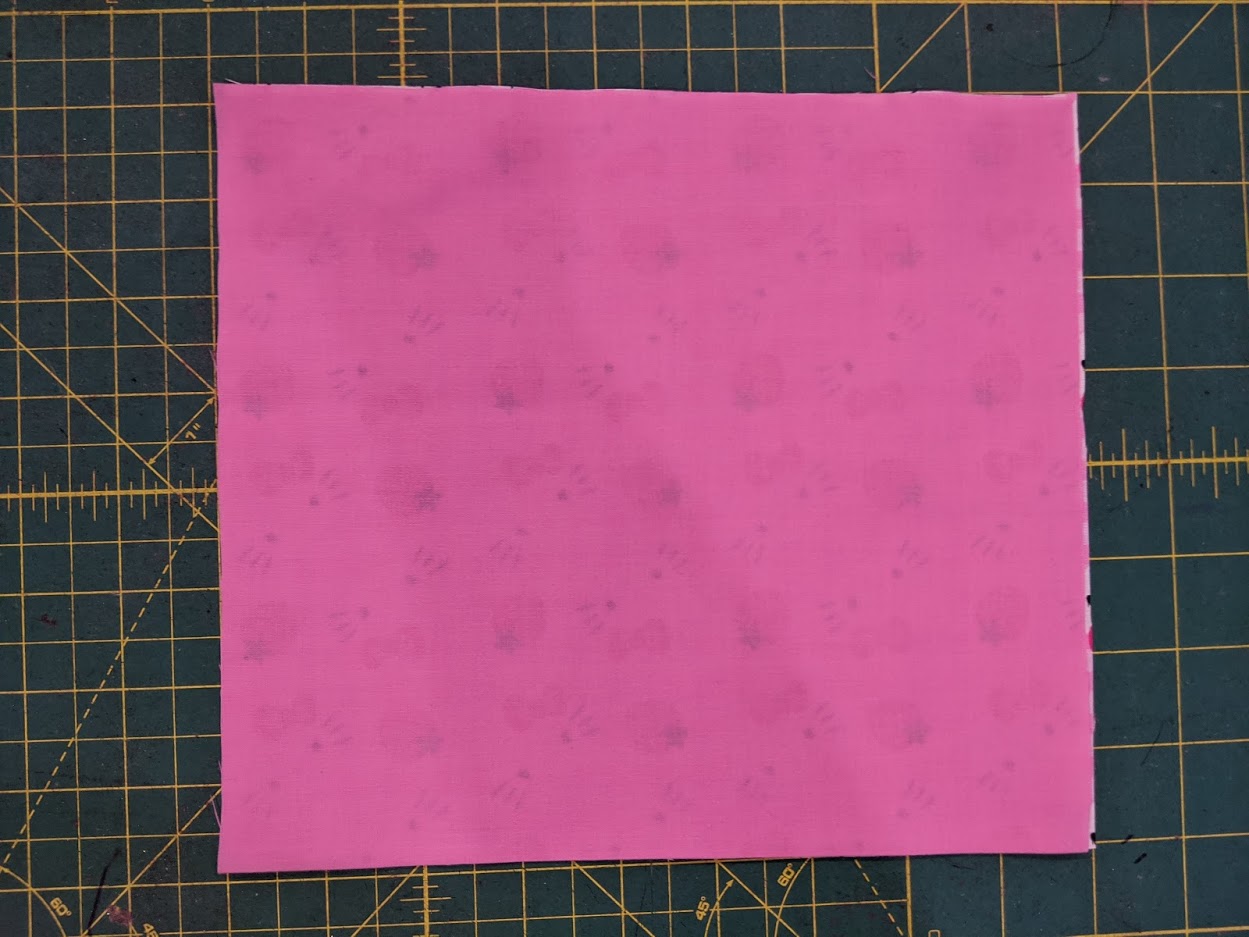
The fabric piece should look like this now.
Making the “Bias Tape” Edge:
When cutting a full yard of fabric using the template above, there will be some left over 2.5″ width fabric pieces.
Two of these will be used for the masks. If the same fabric is not used, cut two 2.5″ by 6″ inch rectangles.
For the sake of this tutorial, I know this is not the proper way to cut fabric for bias tape (it is usually done at a 45 degree angle in relation to the grain of the fabric), but to maximize fabric usage, this works.
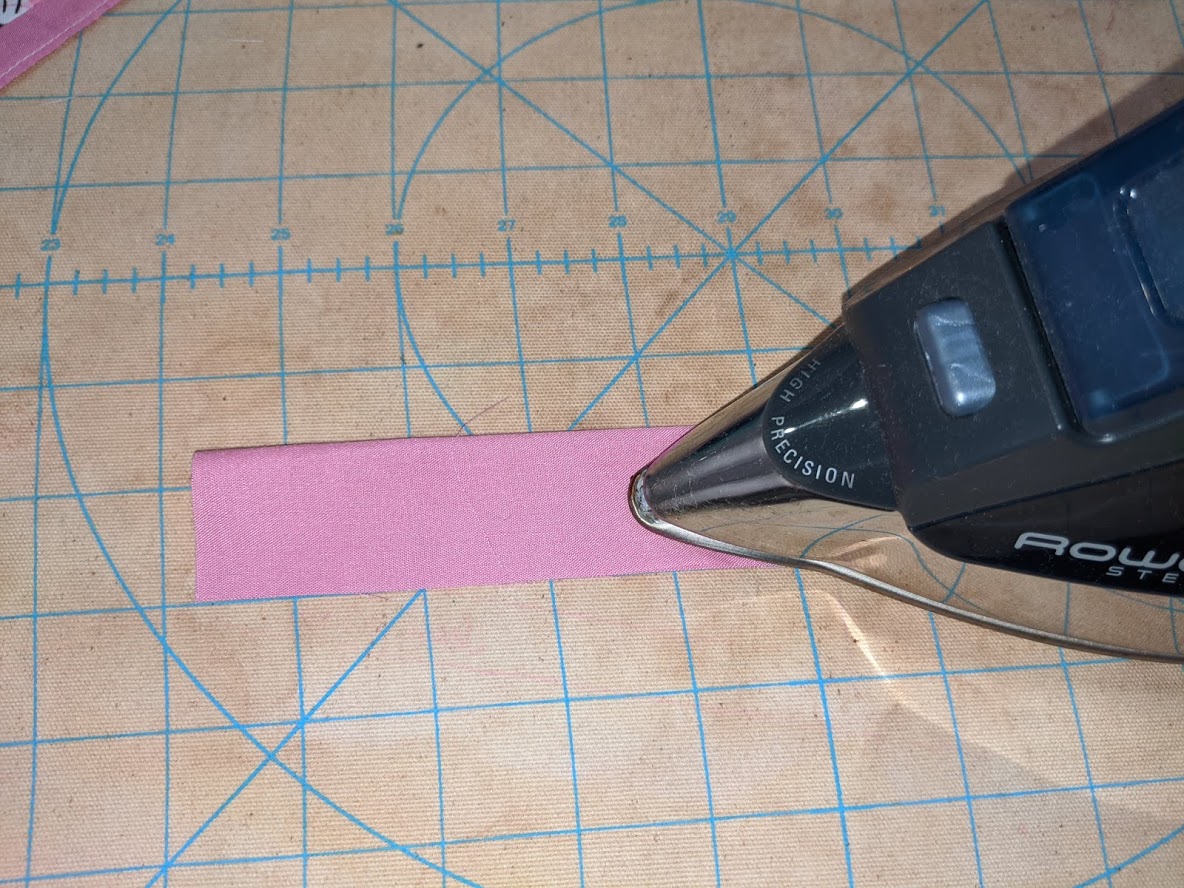
Take 1 piece and fold it in half. With an iron, press this down.
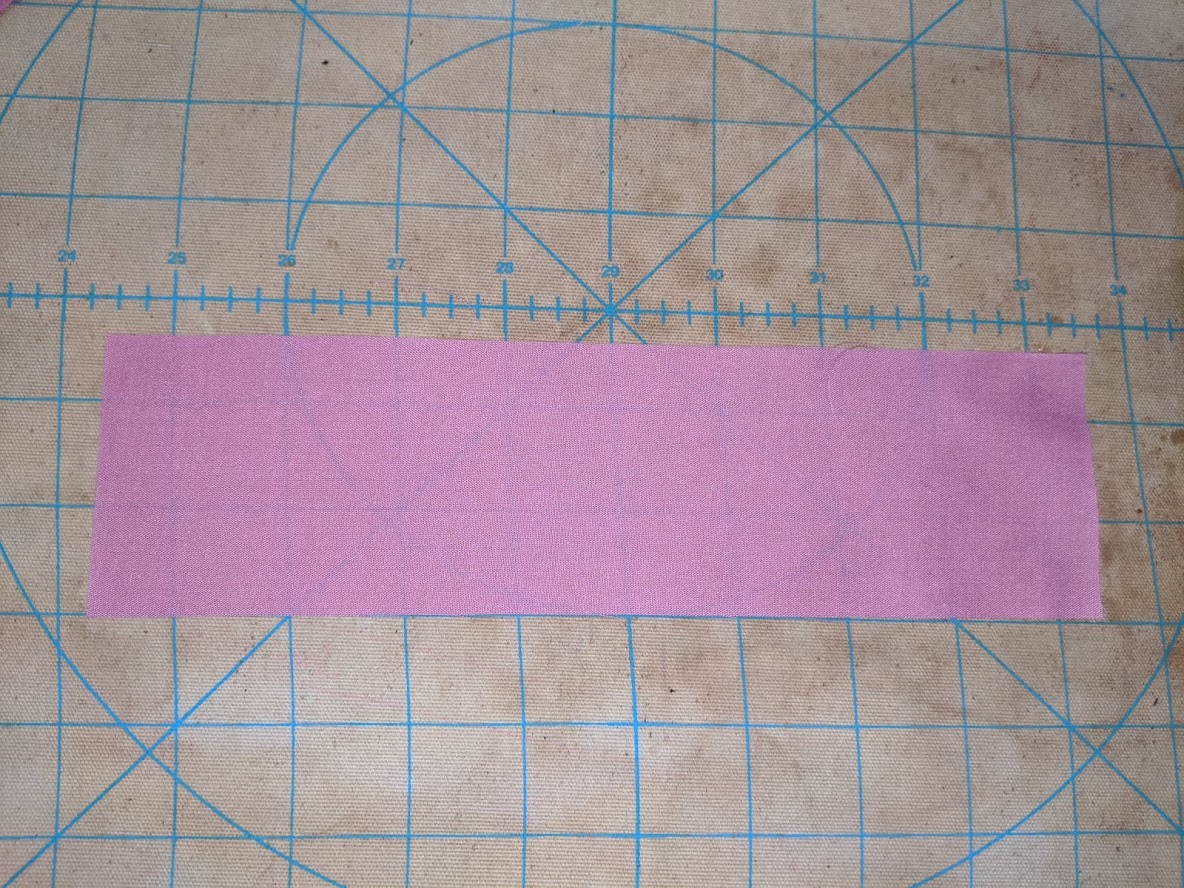
Open this folded piece back and finger press the edges as follows:
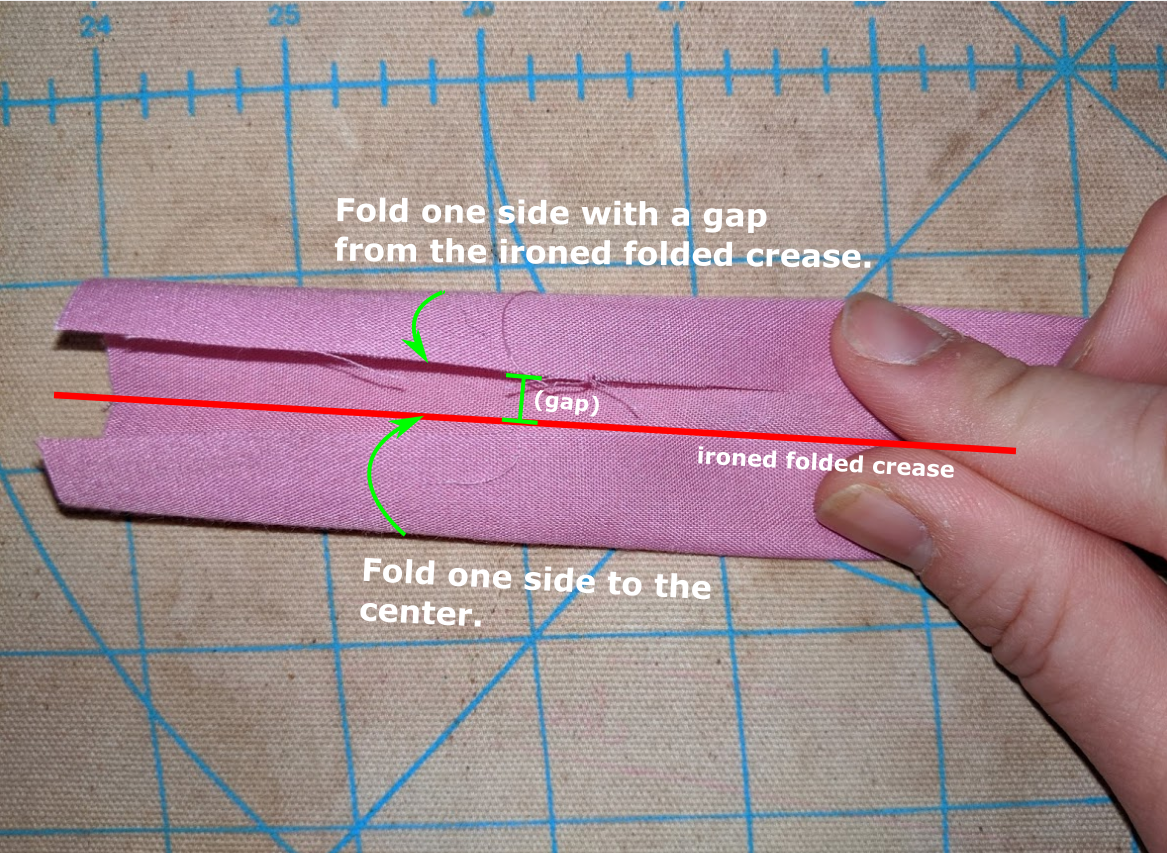
Fold the center of the “bias tape” piece and press.
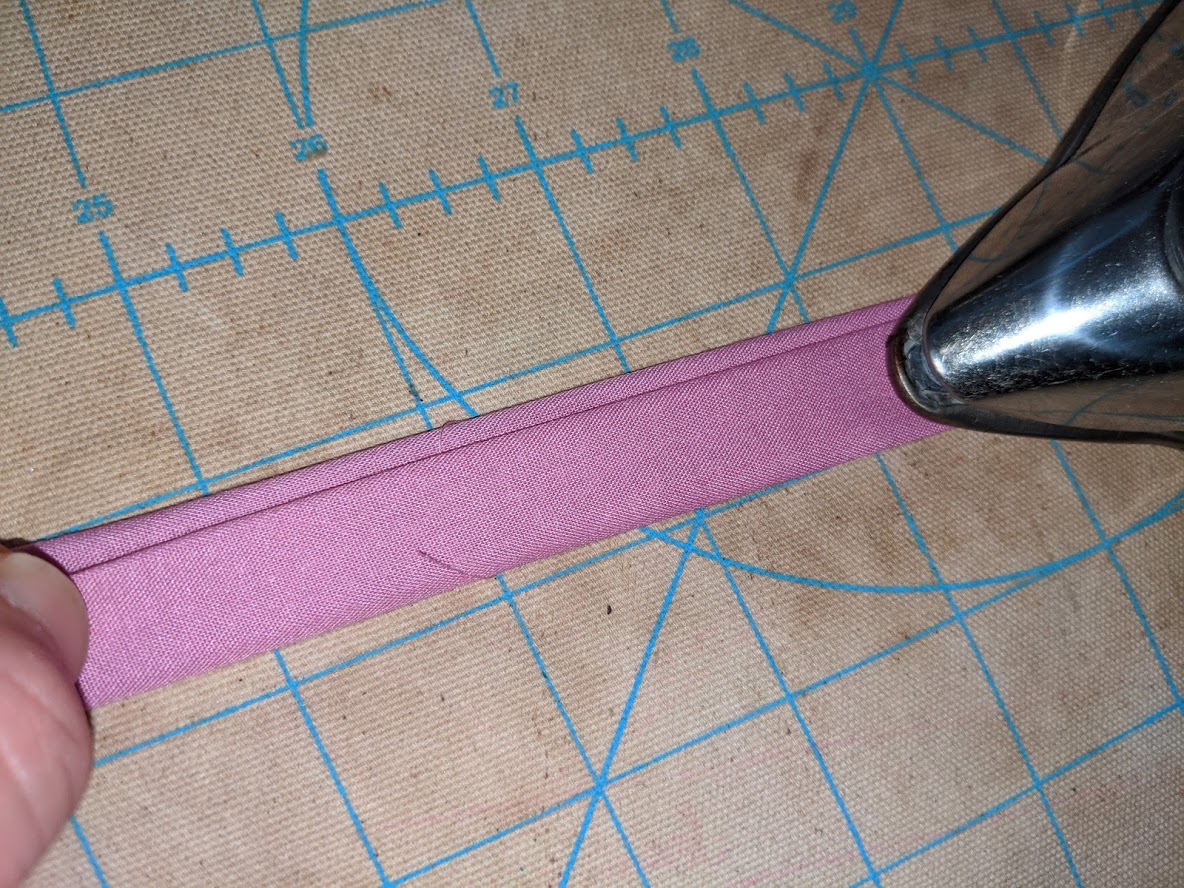
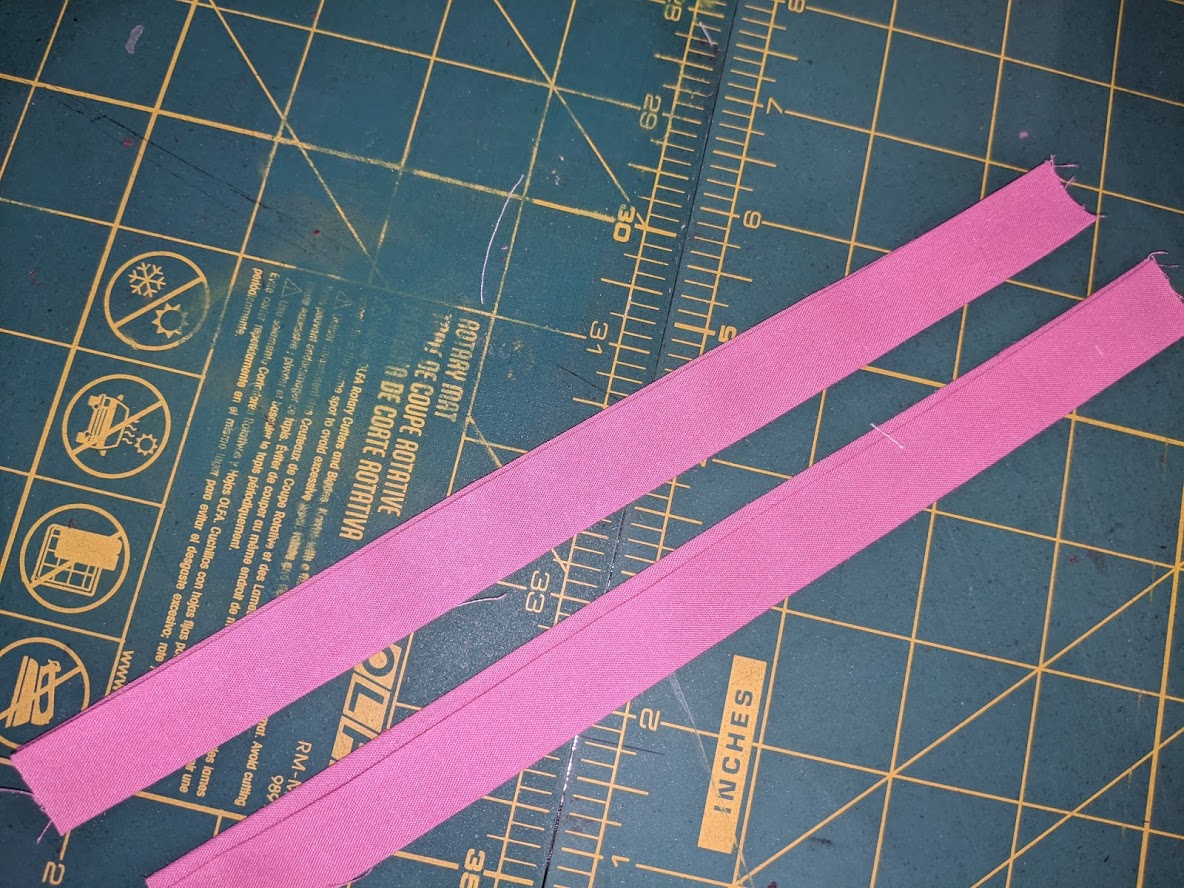
Do this for the other 2.5″ width fabric piece. You should have two of these. I recommend having a minimum 6″ length of these pieces. (2.5″ x 6″ minimum pieces)
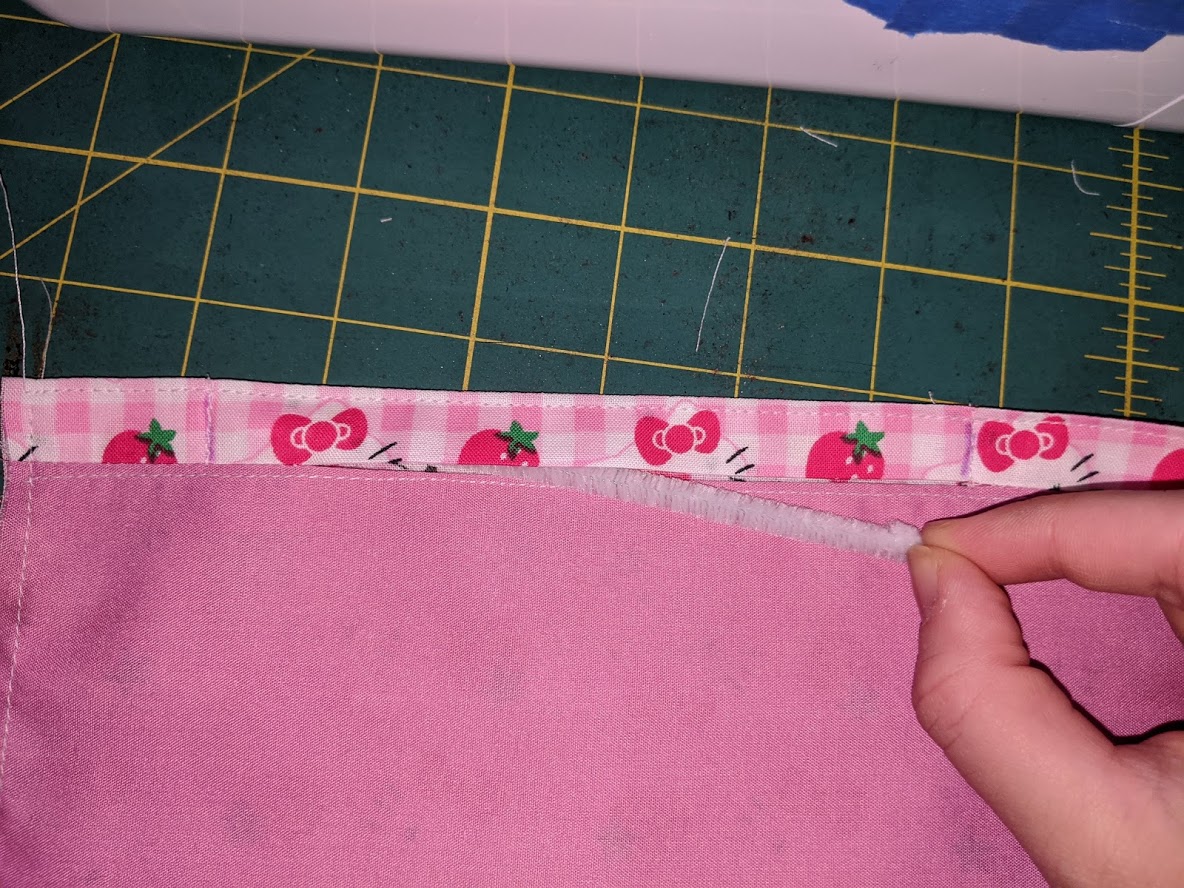
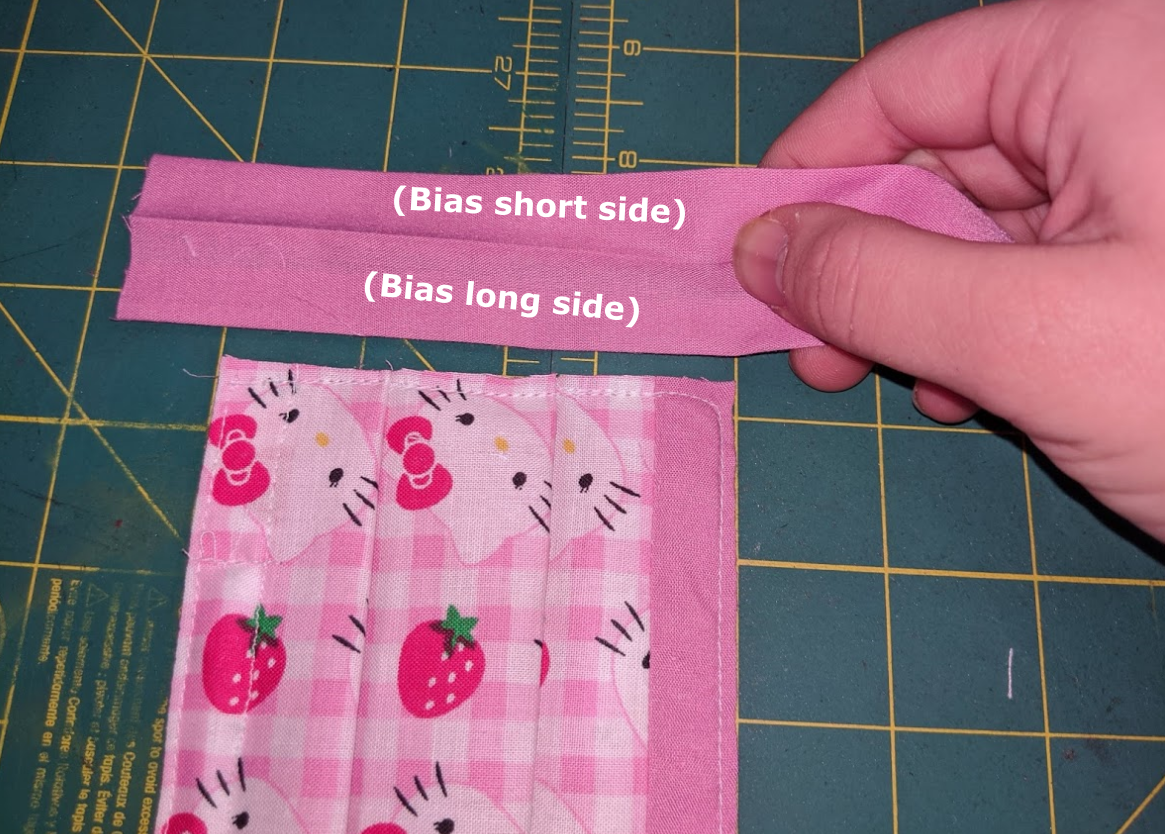
Take the strip of fabric. The “shorter” side of the bias tape should face the outer facing fabric.

Open the bias tape.
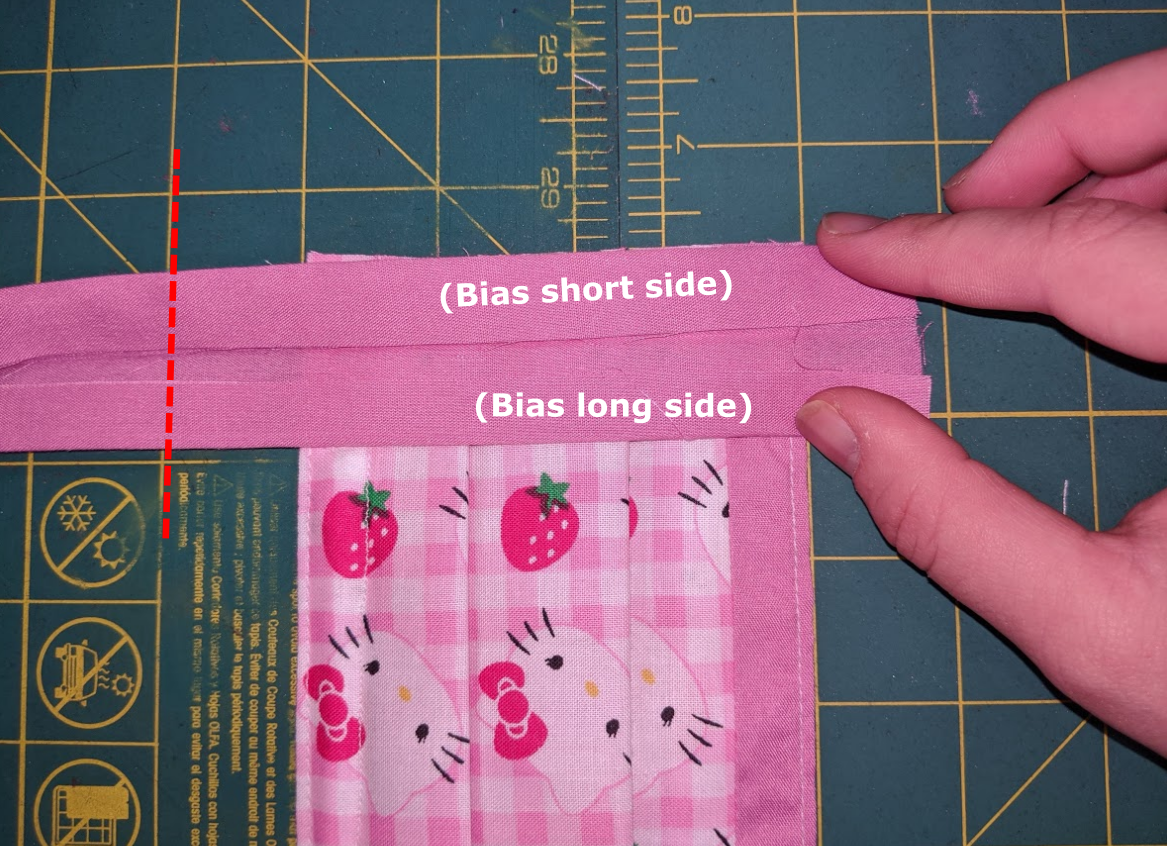
Flip the bias tape over to the other side, exposing the inner folds. Cut the edge of the bias tape to about 2cm or 1in longer than the mask fabric.

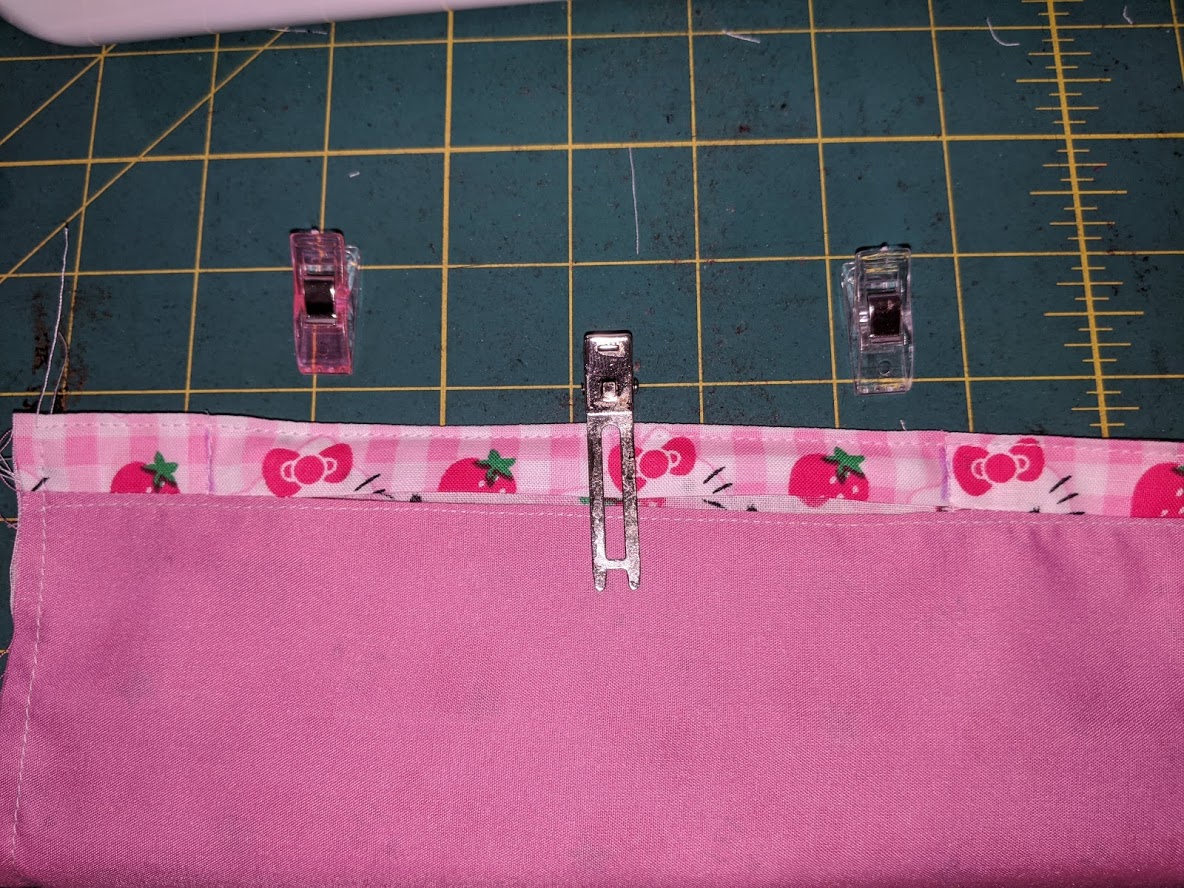
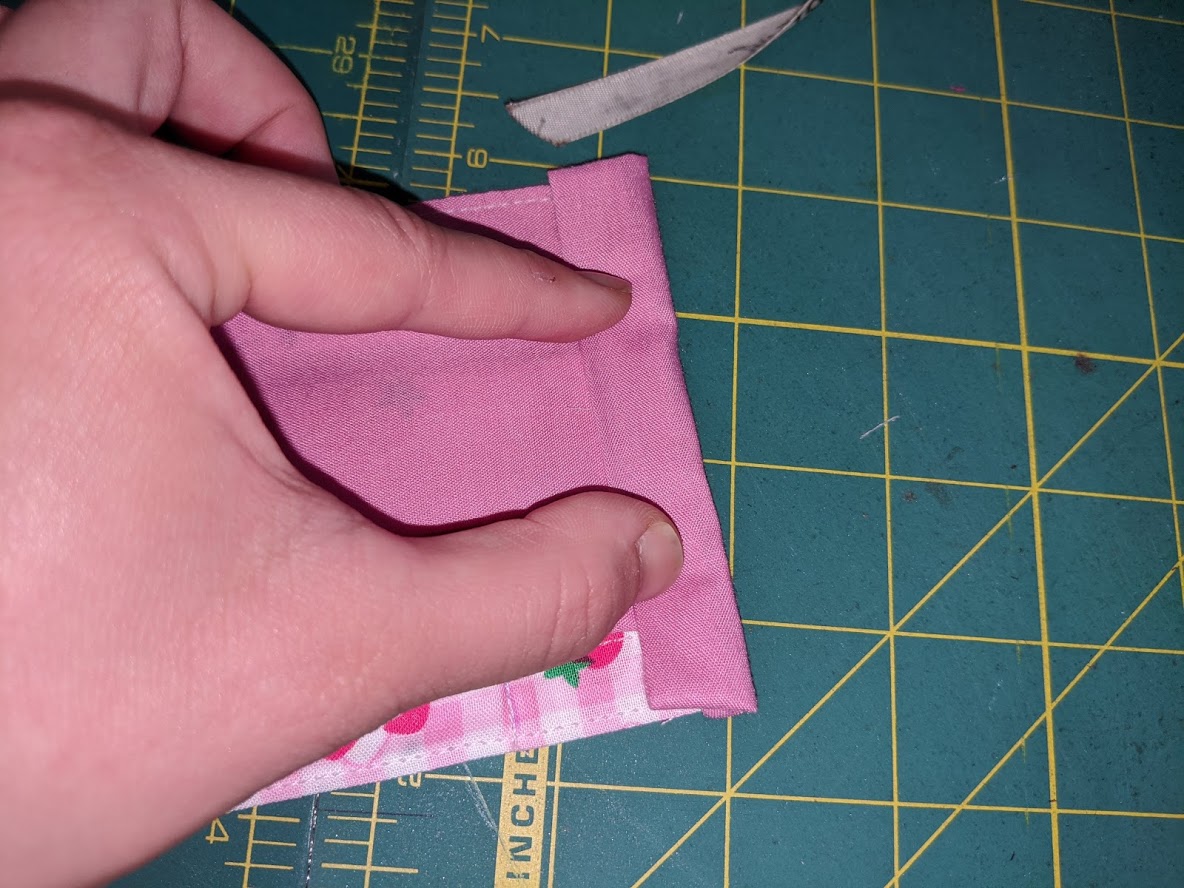
Holding the bias tape and the mask, flip this over.
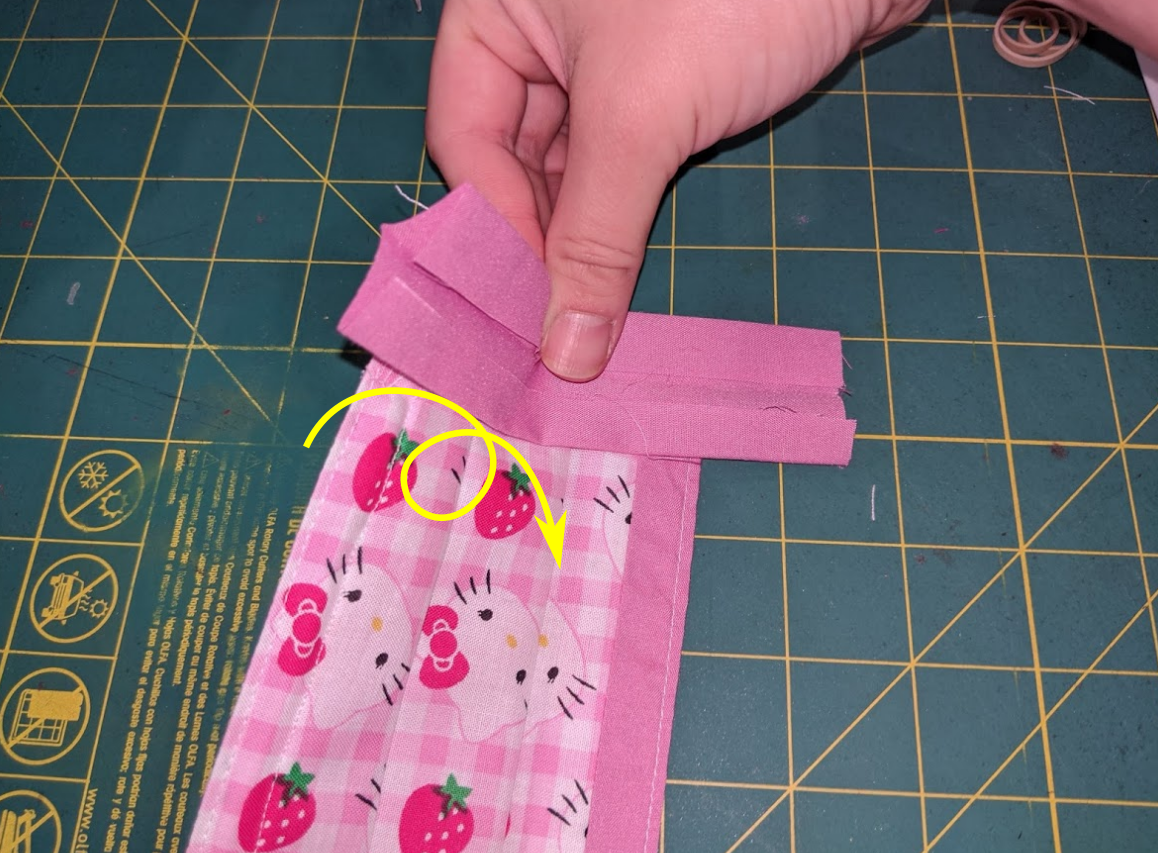
Fold the bias inside as follows. Clip or pin these down.


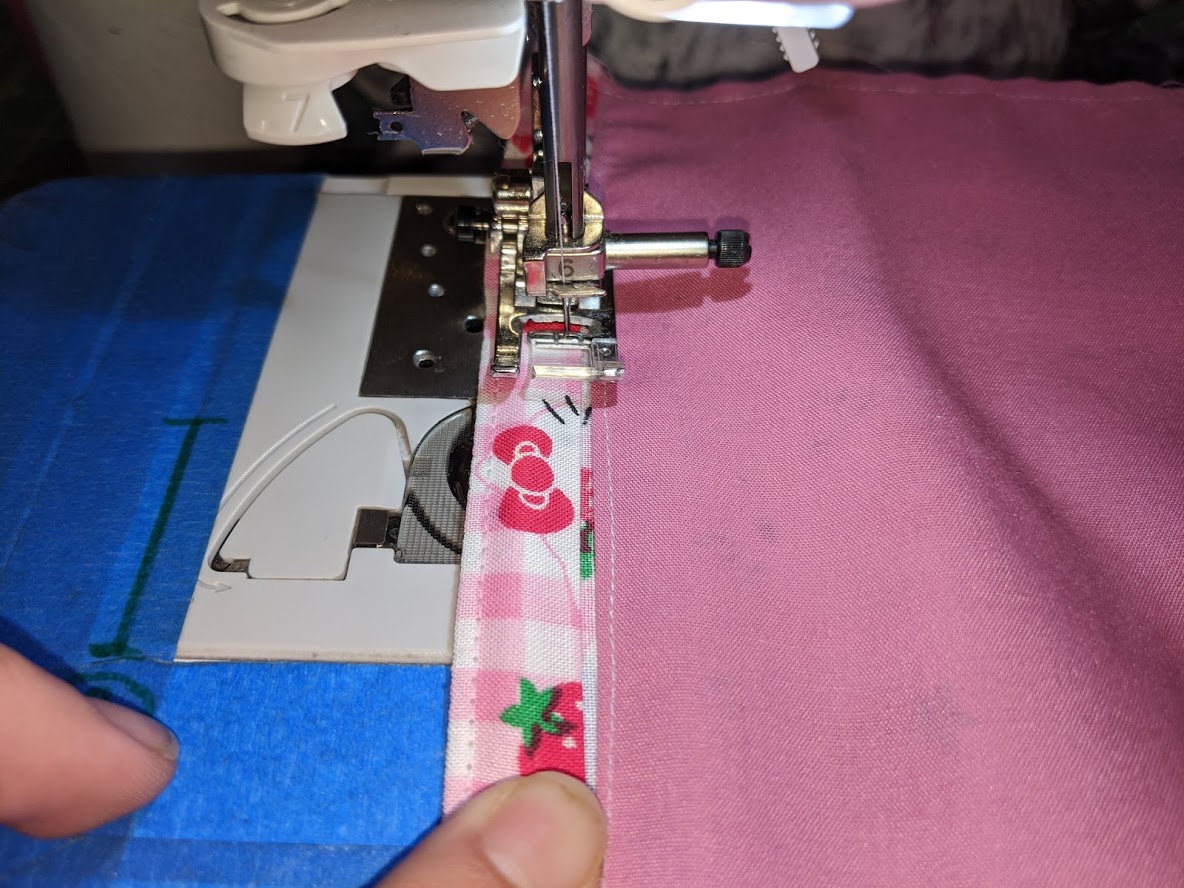
Stitch the fabric + bias down. Stitch slightly positioned left of the existing stitches.
Do the same for both sides.
From the back side, expand out the bias edging, then fold over.
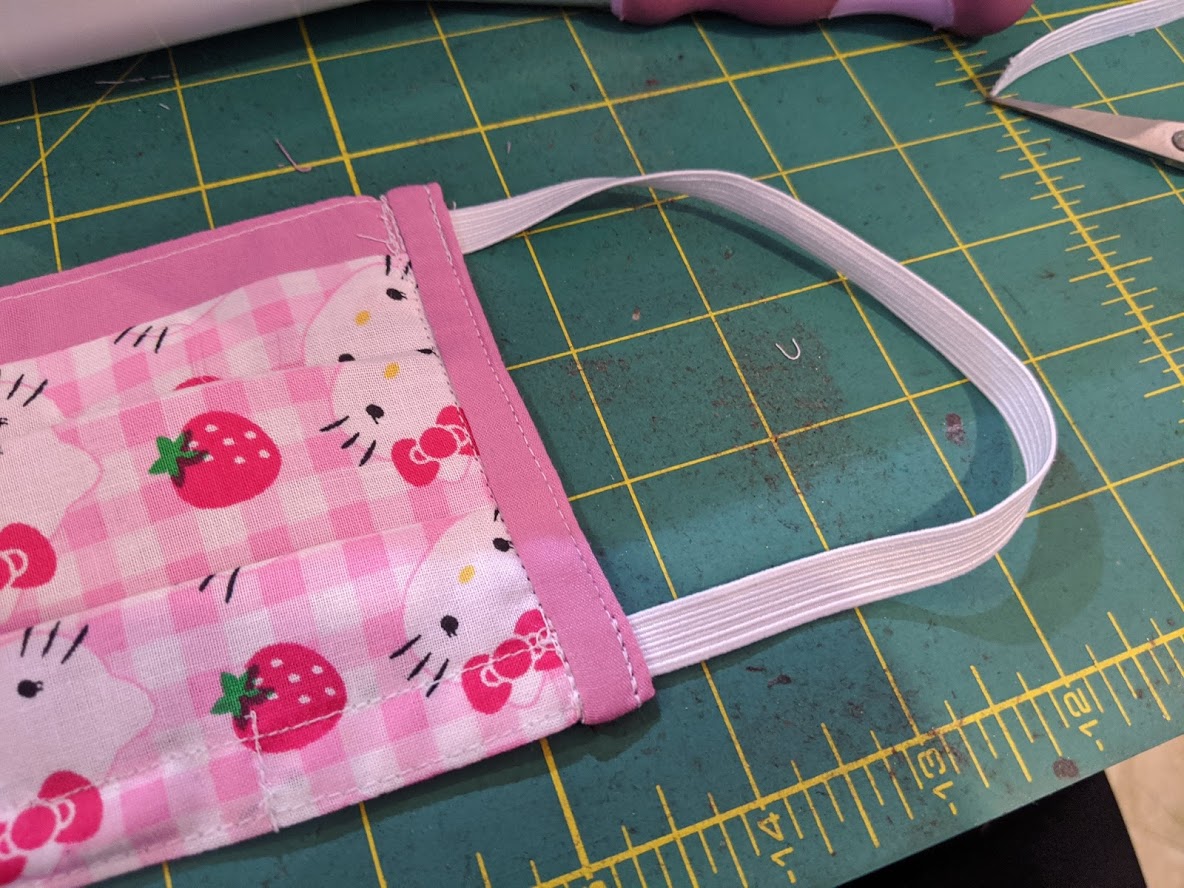
(Optional step) At this point, a cut up piece of elastic or tie may be added here. Do not knot the elastic or tie yet.

(Optional) Fold over the bias edging to wrap over the elastic or tie. Ensure that you try not to sew the actual elastic or tie itself.

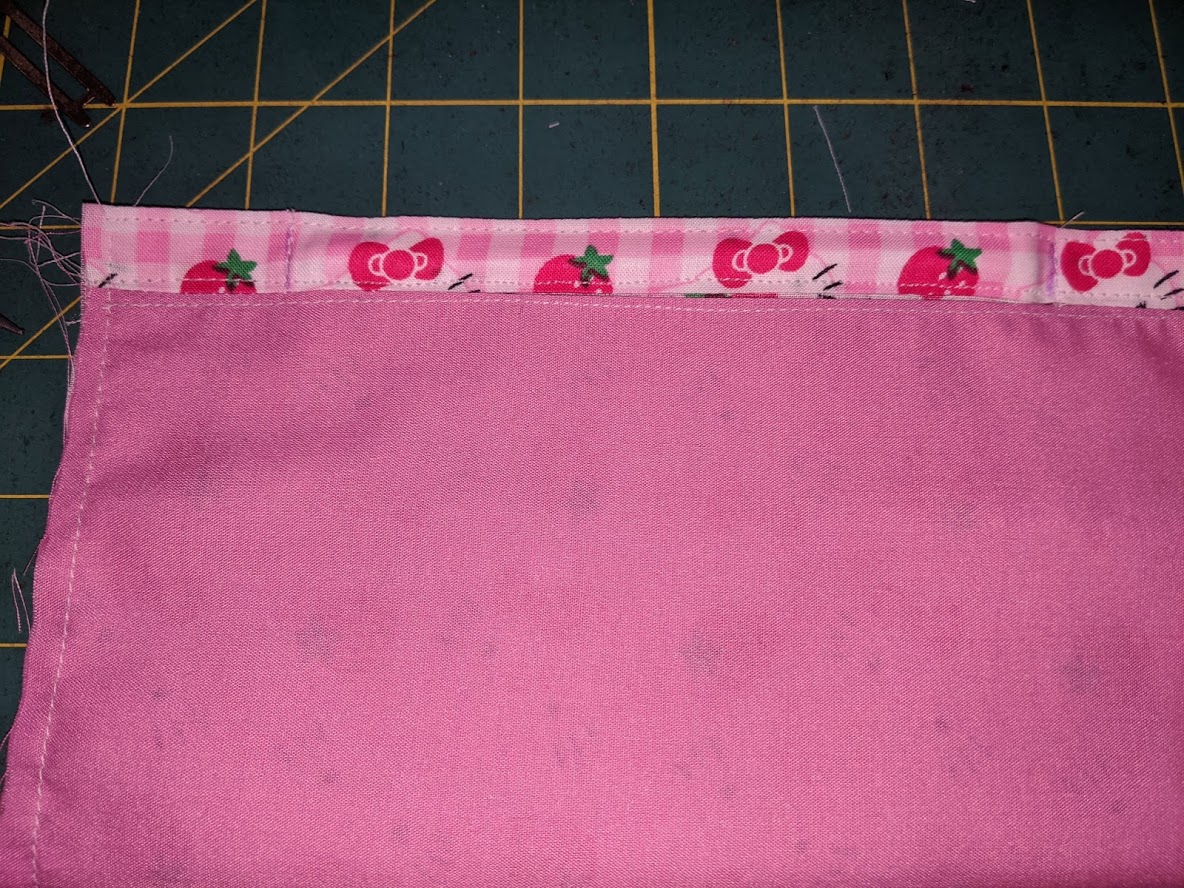
Flip the fabric mask over with the front side up. Where the fabric and the bias meet, stitch along this area. Do this for both sides. (Elastic in this step is not pictured if it was added in your case)
When complete with this step, the front and back side will look like this. (elastic not pictured)
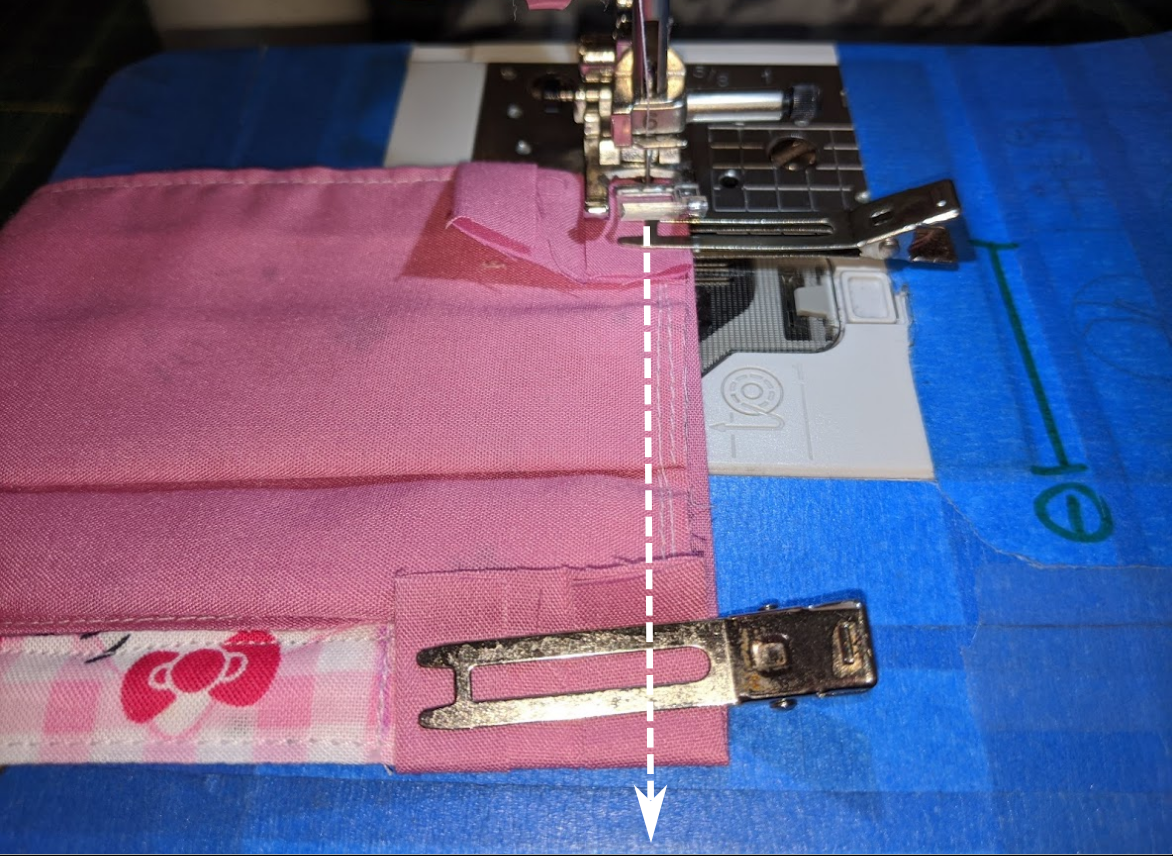
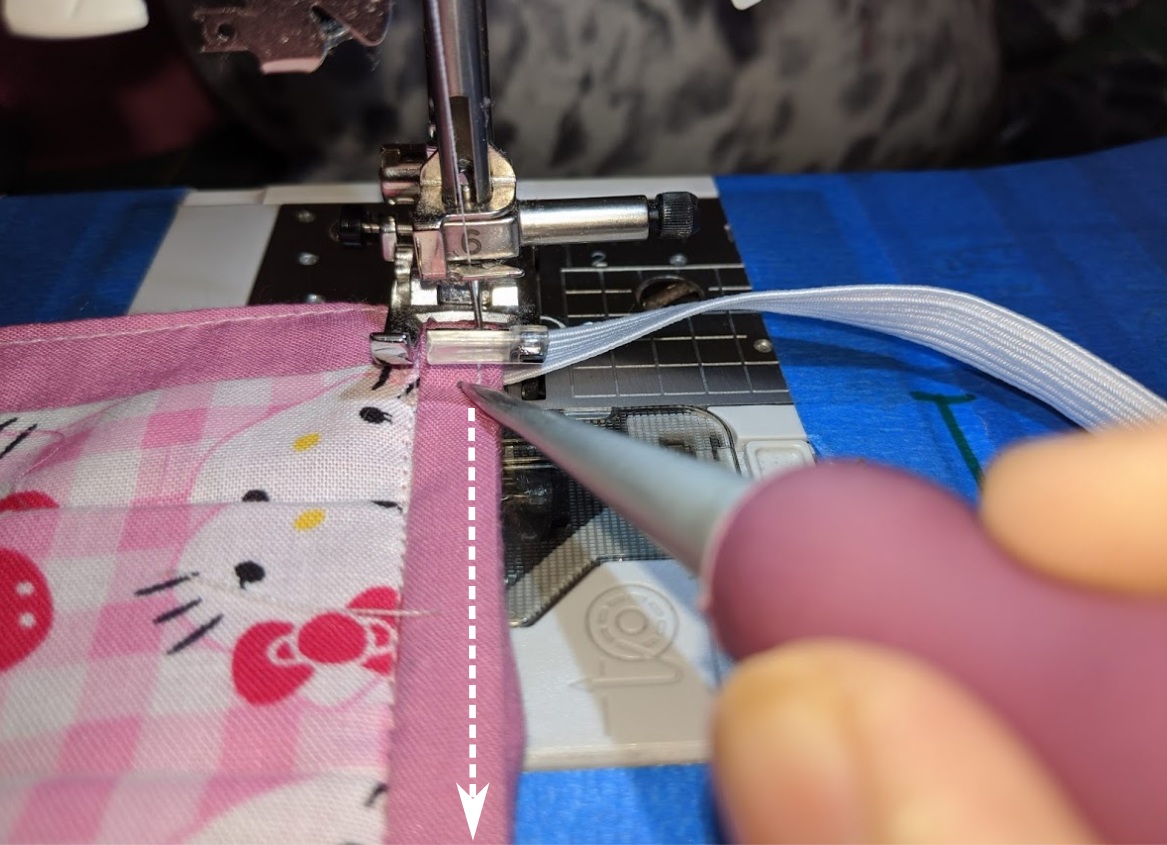
If the elastic was not sewn in the previous optional step, this is how I had sewn mine for mass production as I found it was more efficient for my workflow. This also gives more stretch to the 9″ elastic, and users have more flexibility to adjust this by tying it up based on their different head sizes.
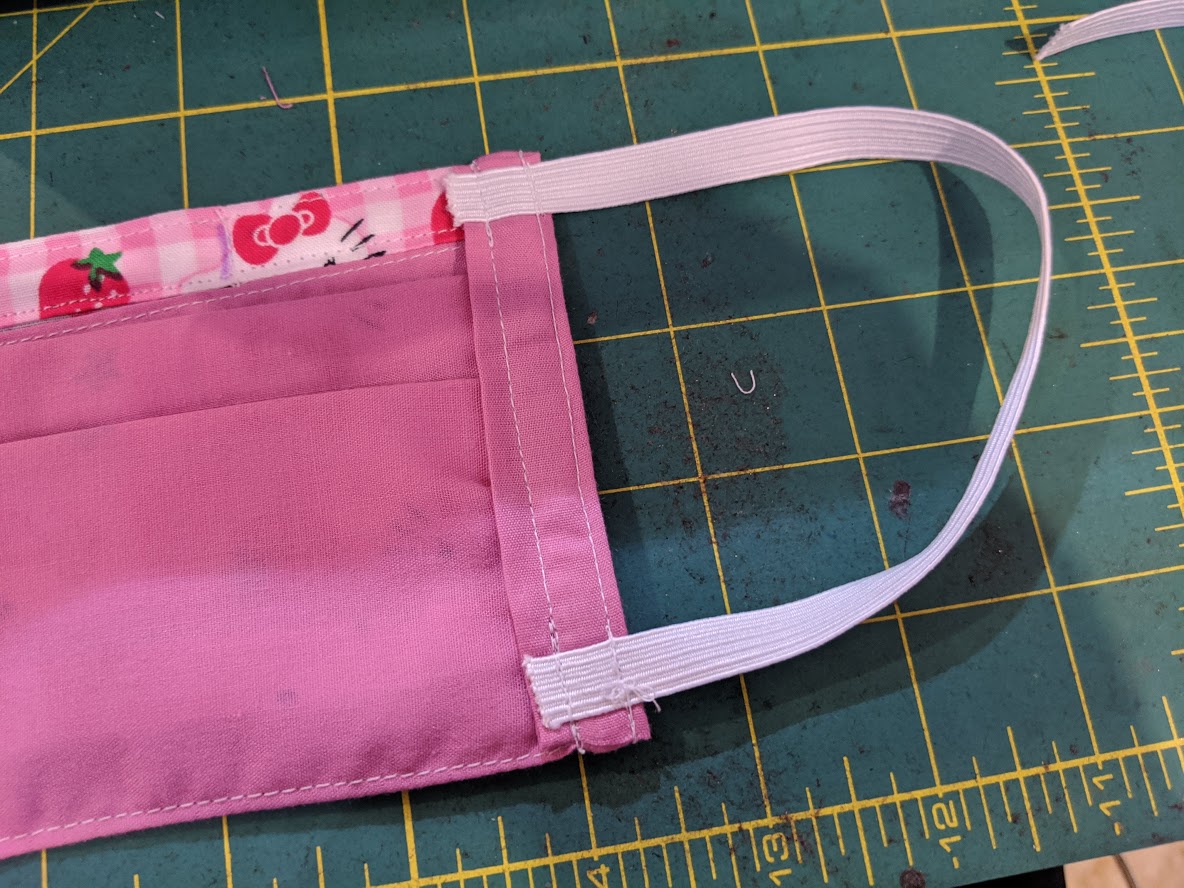
First, on each side of the mask, stitch the ends over the existing stitch line.
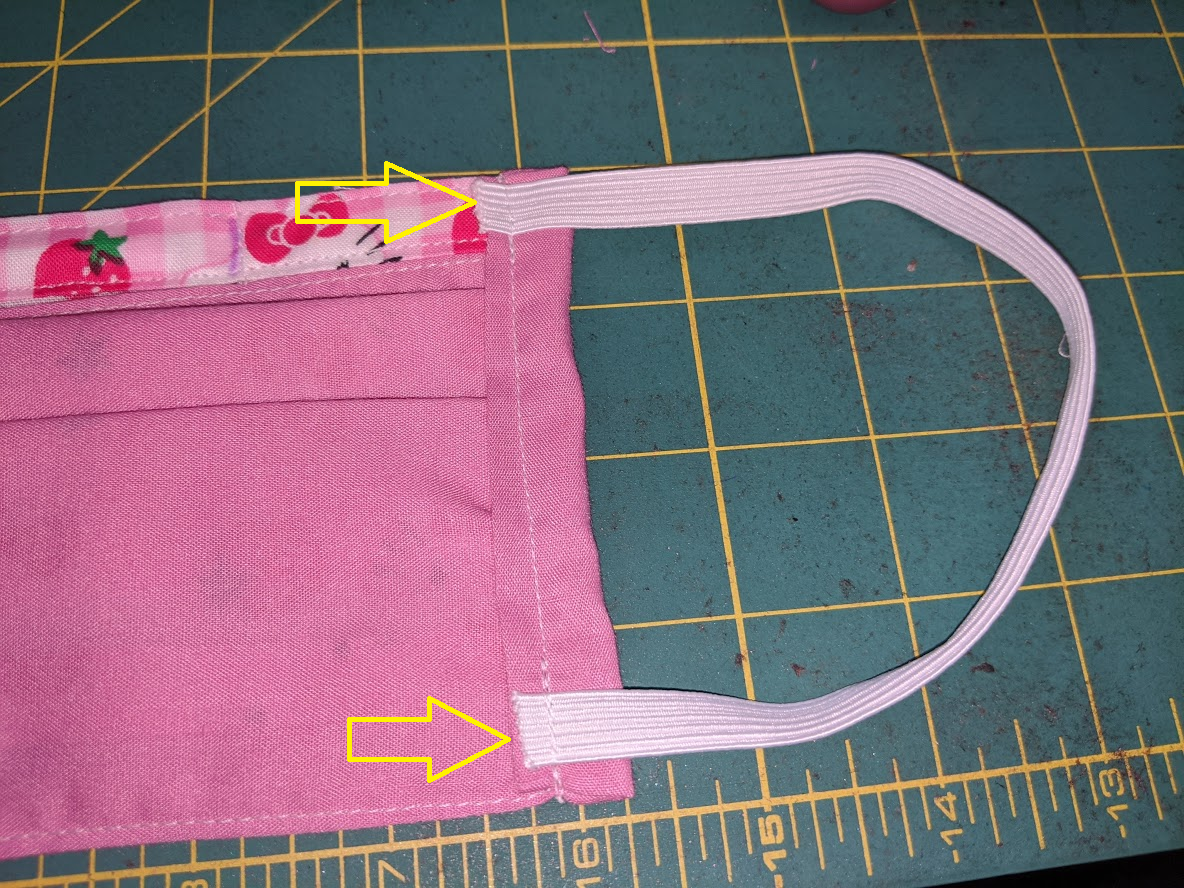
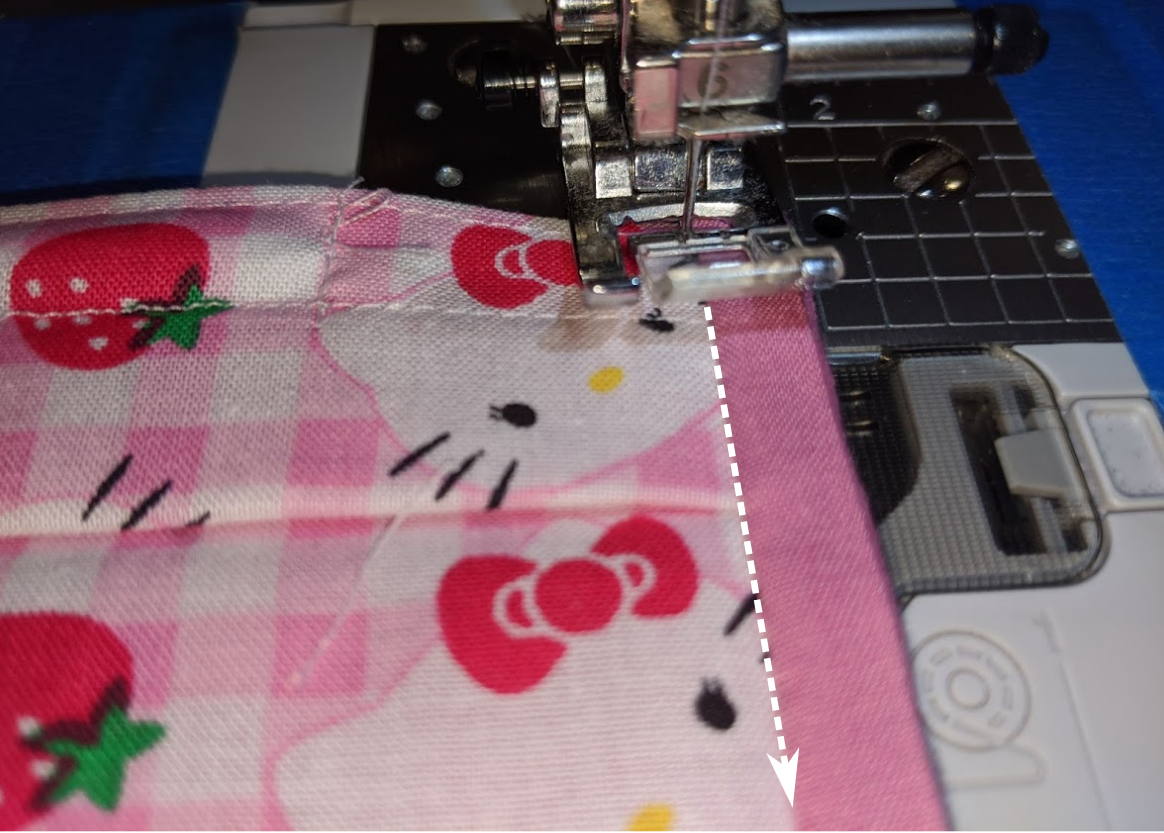
Flip the mask over to the front side.
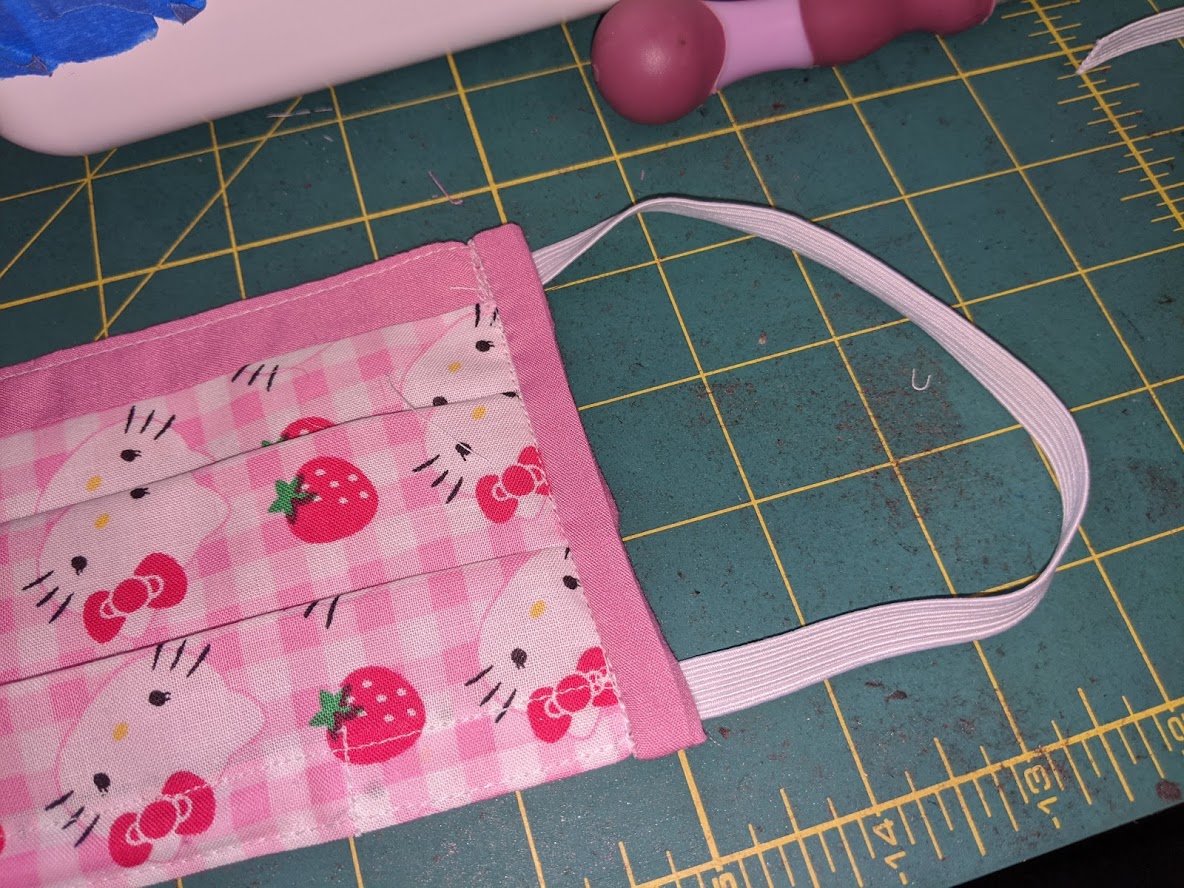
Place the mask on the sewing machine, and top stitch the outer edge of the bias. An awl is recommended to force the fabric to feed through the machine to start off with as the layers are thick.
Do this for both sides (the 2 bias tape sides) of the mask.
***Congratulations! This is the end of the DIY mask tutorial!***
Before Using:
Gently hand wash the mask using unscented detergent. I do not recommend machine washing the mask as the wire gets super bent up. You can also steam the mask before first use or after washing.
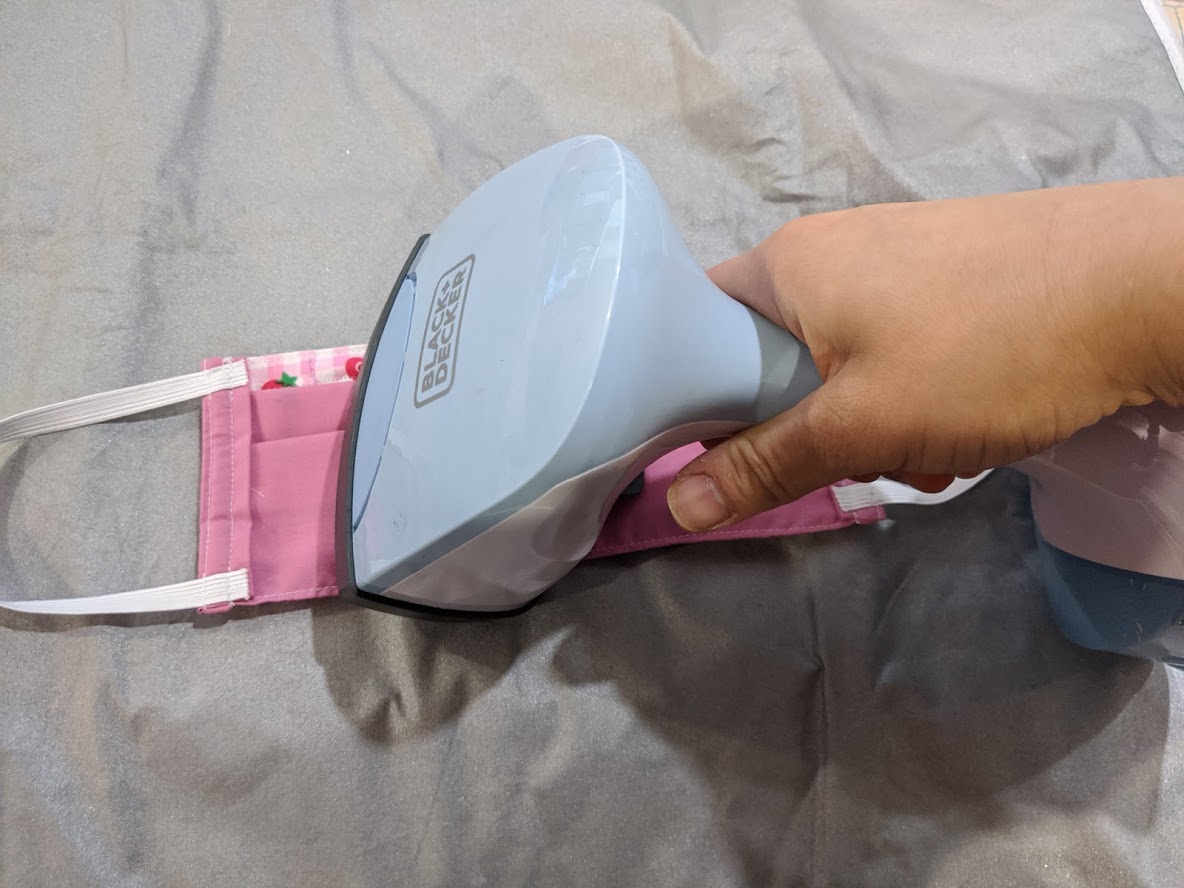
If steaming, start with the outer side first.
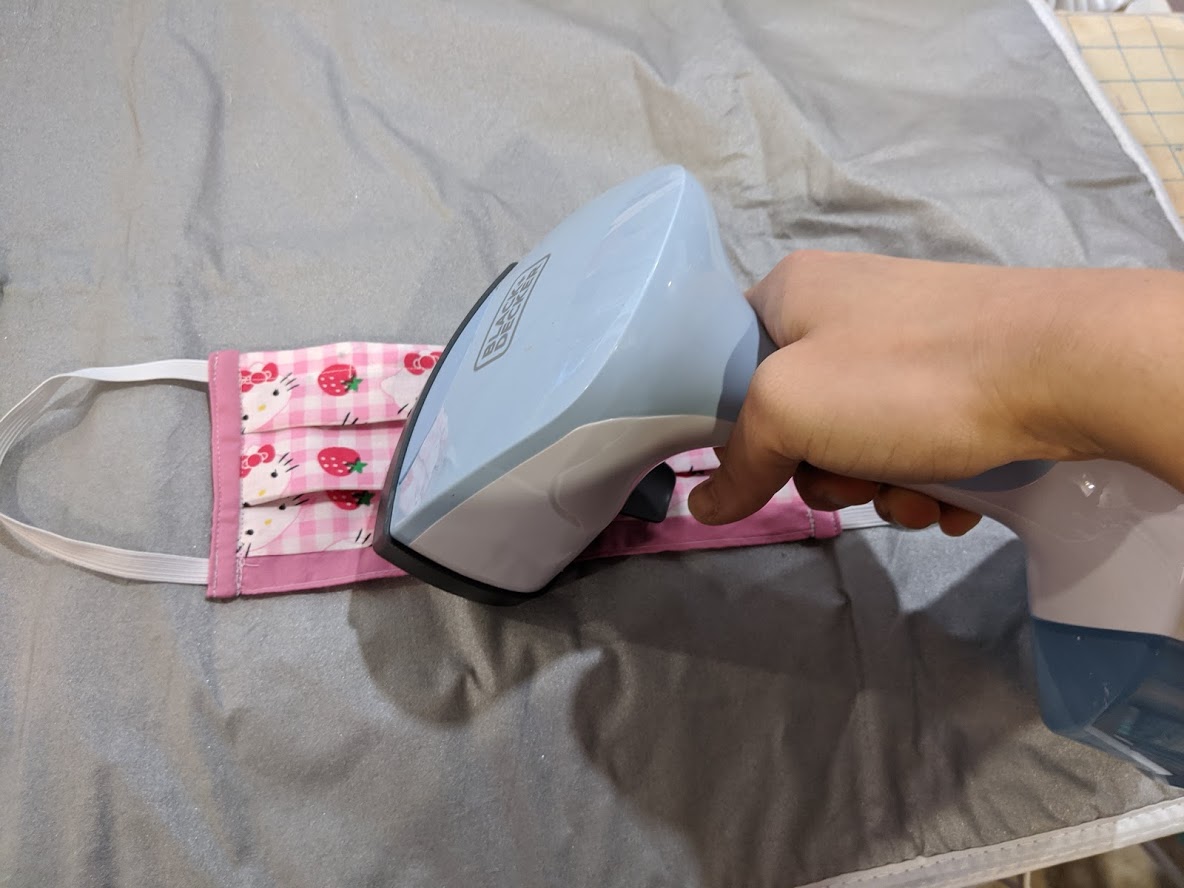
Followed by the inner side.
Hang dry when done.