Congratulations! You now have one of my patterns in your hands. This tutorial will explain in-depth how I scale patterns that are not at a 1:1 scale.
Scaling is extremely important for accuracy as you don’t want a prop either too small or too large when you take pictures with your full costume ensemble. If you purchase someone else’s 1:1 scale pattern template, this may not necessarily apply to your body size as the original author designed it for her/himself.
This tutorial is also available in video format!
If you need a cosplay pattern, you can find it here:
Free Cosplay PDF Patterns
I will discuss some methods and tools I use for properly scaling my props. In this tutorial, you will need:
Software
- ImageJ (free) – Download here (works on Mac and Windows)
- Adobe Photoshop* (or free version- here, Enable Flash 10+)
*I’ll be using Photoshop CS6 for the purpose of the tutorial. The free Pixlr version supports the similar concept.
Using ImageJ
ImageJ is a free tool I use for measuring objects in an image in relation to the character wielding said prop. I would then take these measurements, set proportions to my actual height/body or whatever else you want to use for points of reference for proper scaling. In other words, this tool helps you calculate a character’s height pixels into a known length(i.e. your height) in inches (or cm), however you choose. While Photoshop can be used to “aesthetically” calculate or estimate a prop’s scale to your own liking, ImageJ will give you EXACT measurements in cm or inches (or maybe yards or meters.. it’s completely up to you).
For the purpose of this article, I will primarily use inches as we’re in the US and we’re apparently special snowflakes by not using the metric system! I’ll try my best to convert into CM as we go.
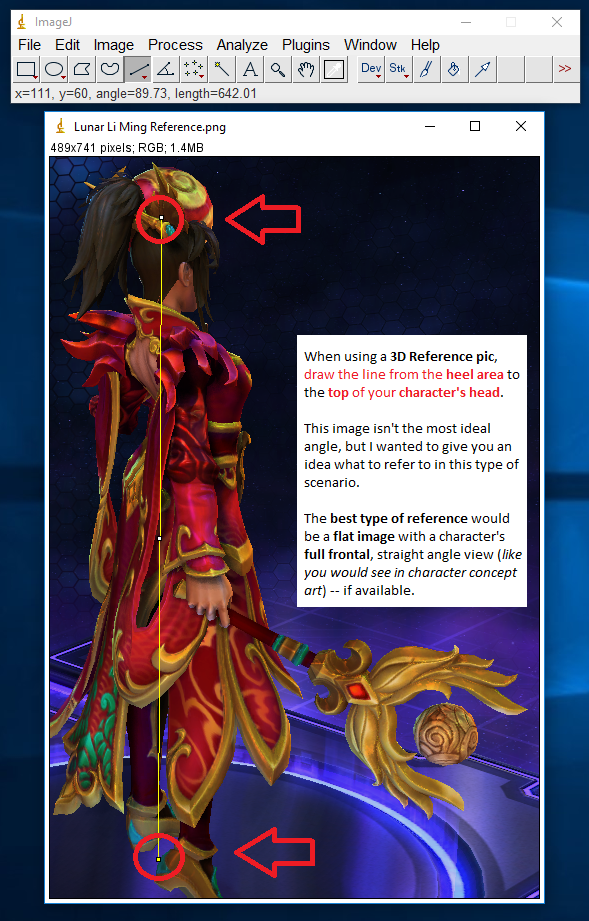
Note: This method works best with flat images, but in this tutorial I’ll be using a character’s 3D model .
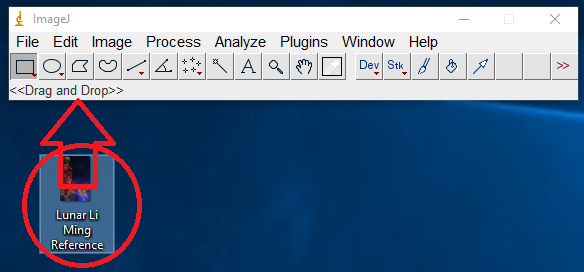
Download and extract all contents of the ImageJ *.ZIP file
Run ImageJ

Drag and drop your reference image into ImageJ (or open it through the program)
The image file should open up as a separate window.
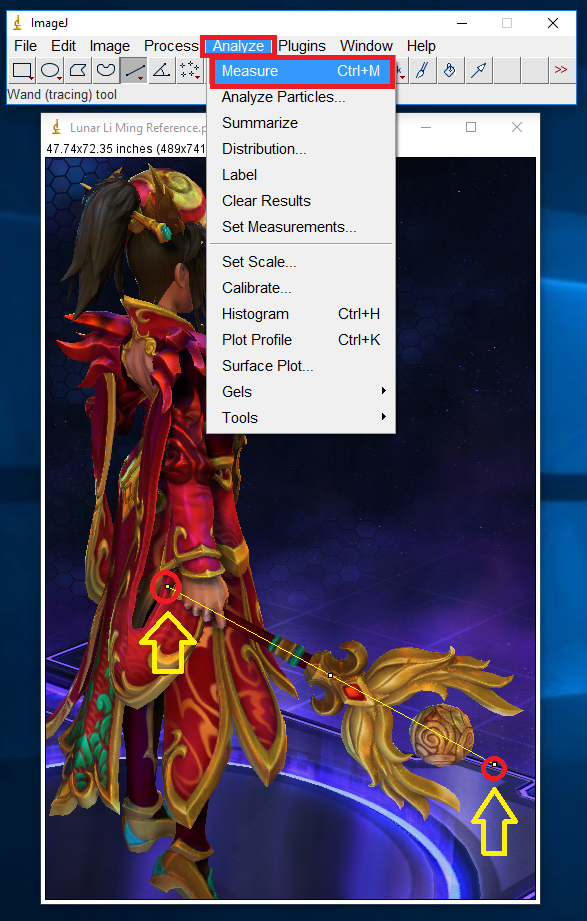
Click on the *Straight* Line button tool.
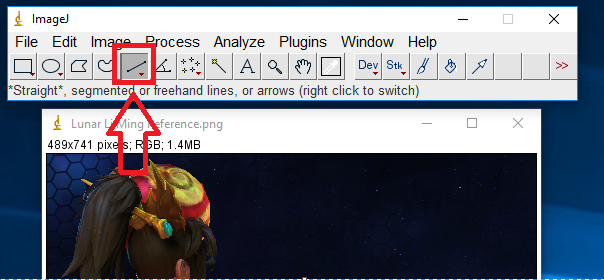
Using the Straight Line tool, set one point at the top of your character’s head, and one point at its bottom heel area.
Refer to the notes in the screenshot.
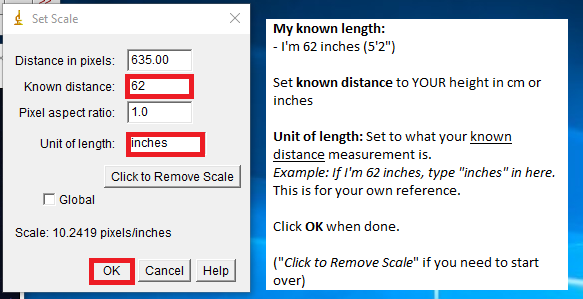
Navigate to Analyze > Set Scale…
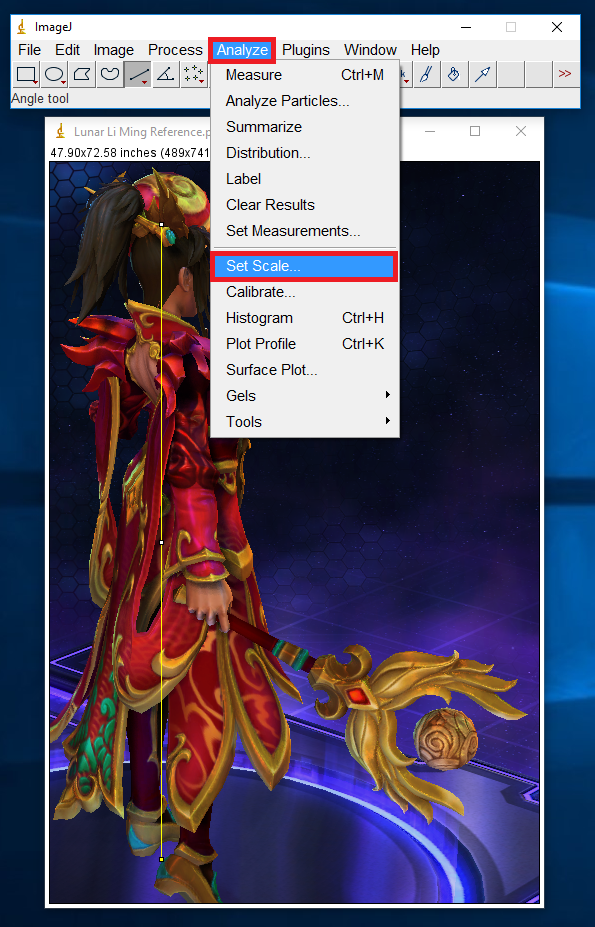
As the first point of reference – this next step will convert the line’s measurement to your own height when measuring anything in this image.
While still using the Straight Line tool, draw a line from the bottom to the top of the character’s prop.
Then go to Analyze > Measure
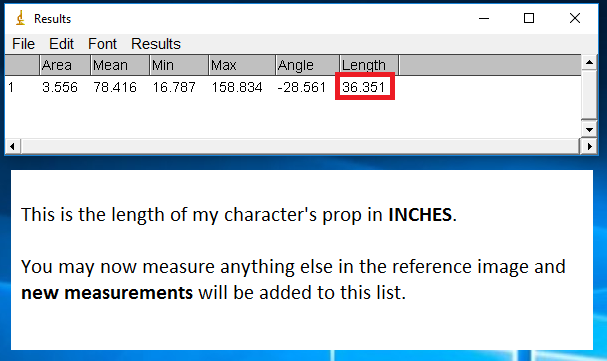
Using this info, you may now use this as a point of reference when printing and performing further visual scaling… such as the next part!
Using Adobe Photoshop
Using Adobe Photoshop, you can visually scale yourself to the reference picture.
In this screenshot below, the artist Art Doge at Blizzard posted this front and back view reference of my character.

I won’t go into too far detail with Photoshop (this is not a Photoshop tutorial) – but with this image, I arranged the reference picture in relation to myself. I also took a screenshot of my own vectored pattern PDF to get the most accurate flat representation of the prop.
When scaling any images in Photoshop, make sure to lock the proportions!


This is how I arranged the layers on Photoshop:
- Bottom – Reference, set Opacity to about 50%
- Layer 2 – Full frontal view of yourself
- Layer 3 – Prop reference, 50% Opacity optional
- Ruler guides – Align the top and bottom of the reference picture to your own body
Printing the Pattern to Your Size
Once you have determined the size of your prop as discussed with ImageJ measuring, you can now print out any pattern to the size you want!
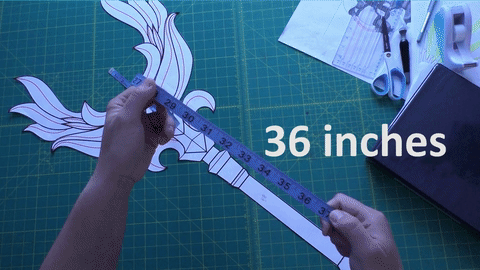
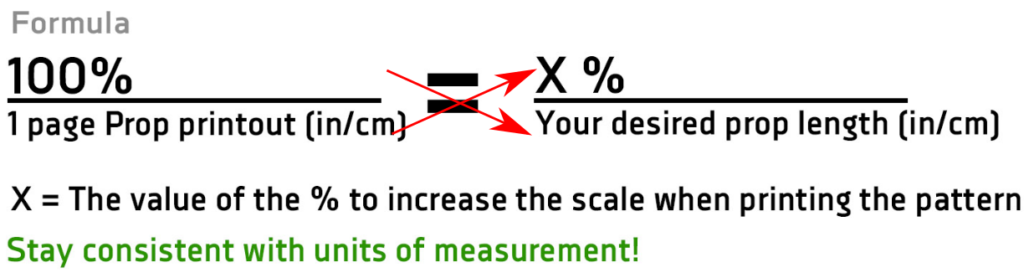
In my example above, I have determined that my prop will be about 36″. You will do a little bit of easy math to determine how much % to increase your pattern when printing it out.
The formula looks like this:
First, you will need to obtain your pattern PDF and make sure your printer supports the size you are viewing to prevent images from cutting off. The original file should show a pattern on a single page. For instance, if you are printing a US Letter pattern, the whole weapon should display on a single page for US Letter. (same applies for A4). If you need to print a US Letter pattern to A4, please refer to this page.
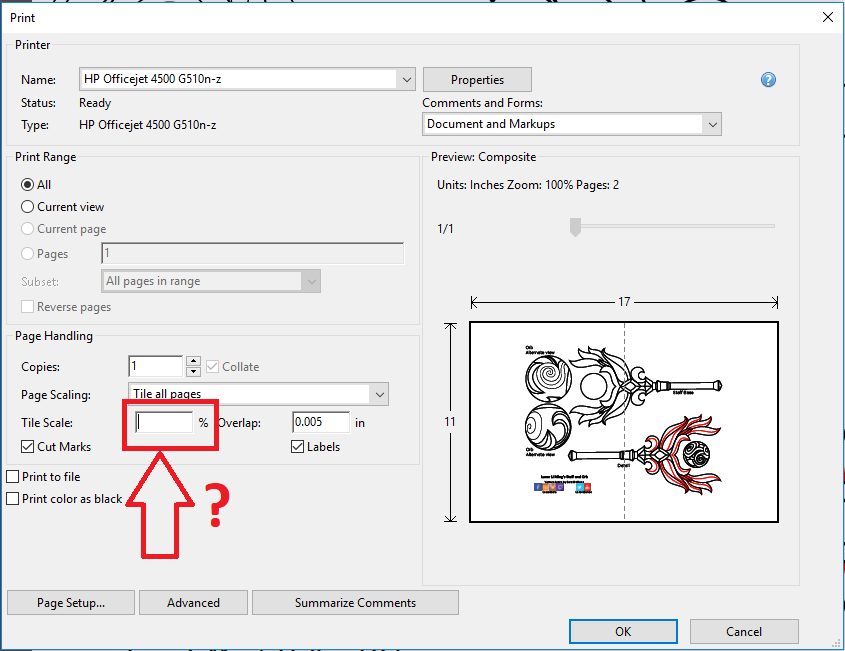
Print the pattern set to ZERO scaling, or 100%.
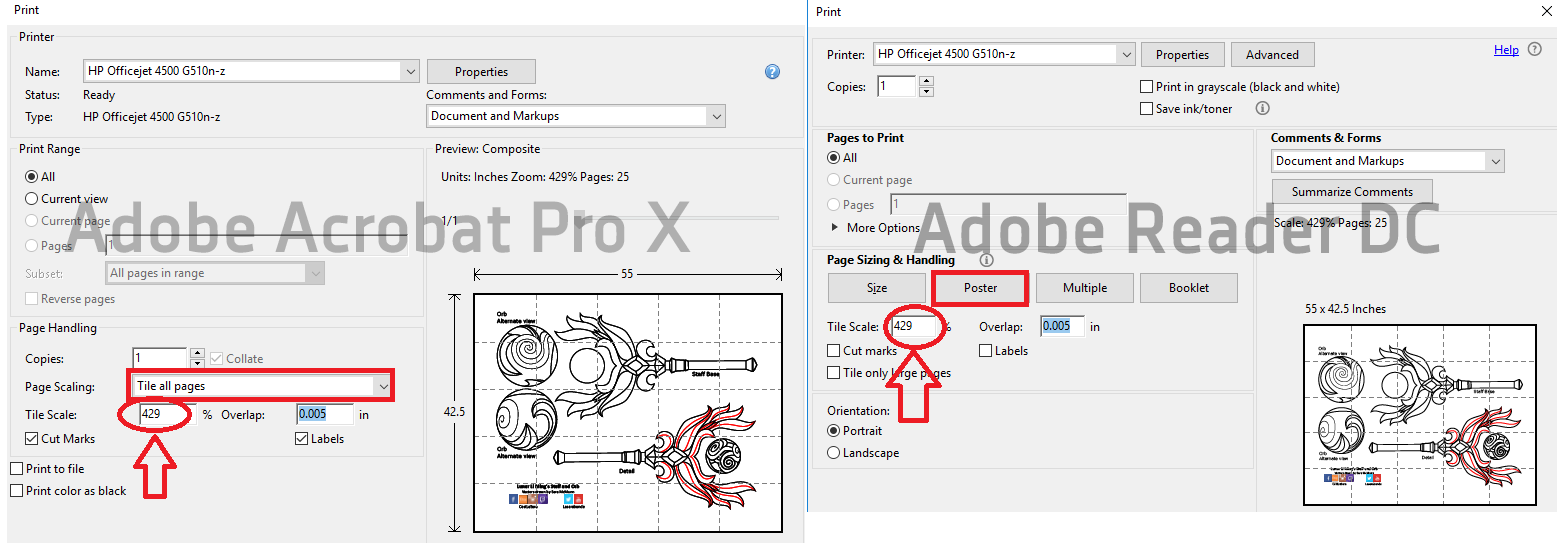
Adobe Acrobat X Pro
Page Scaling – None
Adobe Reader DC
Page Sizing & Handling – Actual Size
-Click the image below to see a larger view-

With the setting applied above, the printout looks like this from your printer.
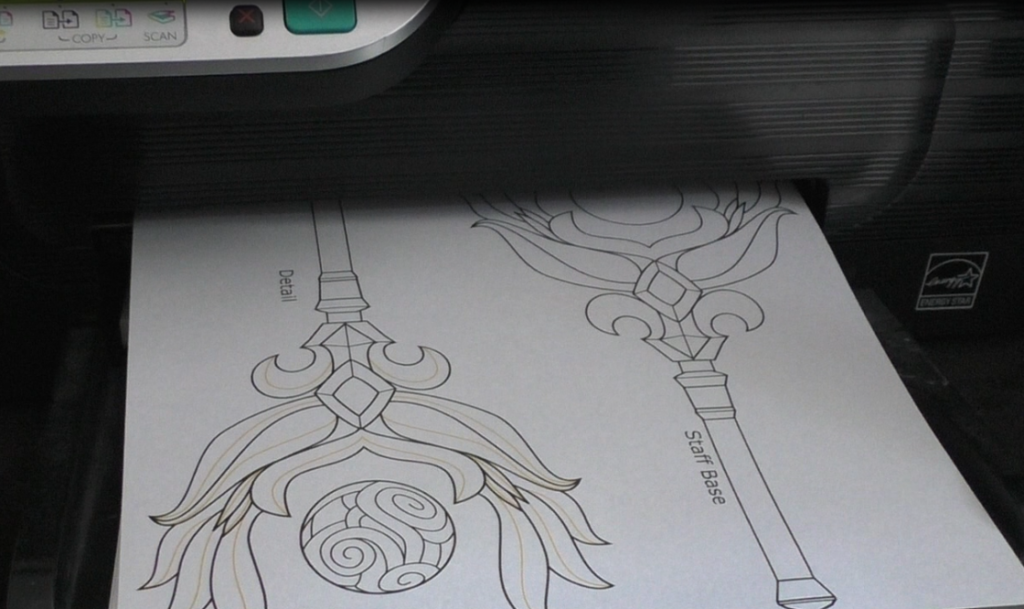
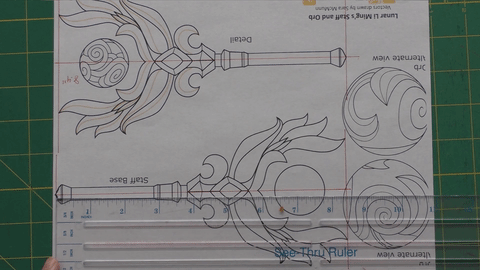
Next, you will draw a line through the center, meeting at the top and bottom of the prop.
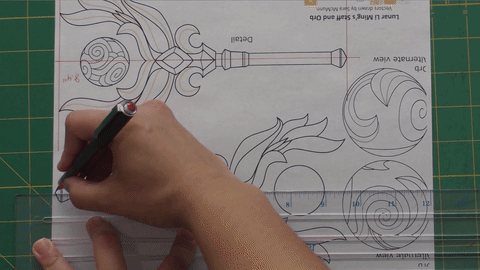
Measure this length at the line intersections. This number will be your [1 page prop printout] length. In my example, mine measured to 8.4 inches.
Now, you want to know what value to put in here for scaling. (Adobe Reader DC says “Custom Scale: _______%”)
Remember, we found the imageJ length at 36 inches. 36″ is the [Desired prop length] value.
Referring to the formula below, this is how to find out what number % to enter in for Adobe’s print window.
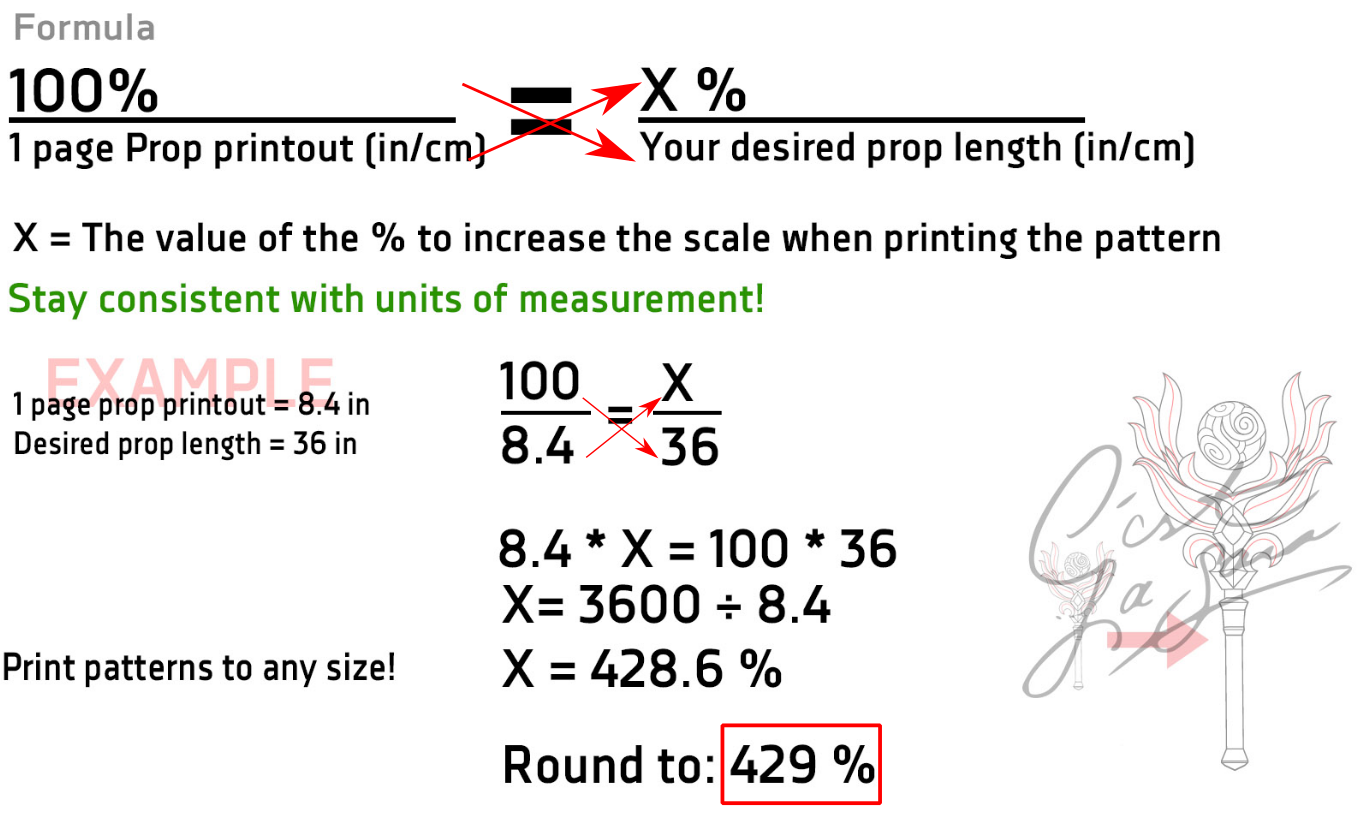
429% will be my value to enter in for the print window! Click the image below to see a larger view.
Print out the pattern, assemble this, and your actual pattern template should be the length you measured in ImageJ!